EasyManua.ls Logo

Dri-Eaz LGR 2800i User Manual

Dri-Eaz LGR 2800i
35 pages
To Next Page IconTo Next Page
Page #1 background imageLoading...
Page #1 background image
07-01674F 2011-04 Warranty 07-00420 1 Dri-Eaz Products, Inc.
Owner’s Manual
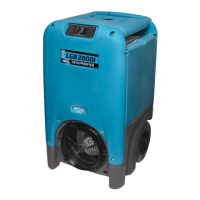
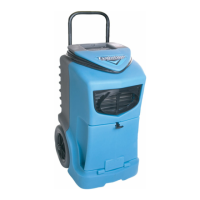
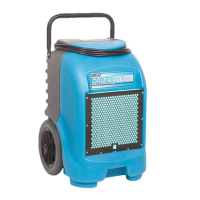
LGR 2800i Portable Dehumidifier (F410)
LGR 3500i Portable Dehumidifier (F411)
Featuring integrated sensors and remote monitoring capability
DRI-EAZ PRODUCTS, INC.
15180 Josh Wilson Road, Burlington, WA 98233
Phone: 800-932-3030 Fax: 360-757-7950 www.dri-eaz.com
The Dri-Eaz® LGR i-Series dehumidifiers reduce humidity in enclosed structural
environments by removing water vapor from the air. The i-Series product line is engineered
to be rugged, durable and highly portable, making them ideally suited for water damage
restoration, structural drying, construction, and other applications requiring temporary,
high-performance dehumidification.
Product may be covered by: U.S. Patent Pending 12/272,455; 12/558,389; 12/767,526
READ AND SAVE THESE INSTRUCTIONS
SAFETY INSTRUCTIONS
WARNING! Electric shock hazard, rotating fan, hot
surface hazards. Unplug unit before opening cover
for cleaning or servicing. Unit must be grounded.
Inspect the power cord before use. If cord is
damaged, do not use. Always grasp the plug (not
the cord) to unplug.
Insert three-prong plug on power cord into a
matching electrically grounded outlet. Do not use
adapter. Never cut off third prong. Do not use an
extension cord.
The unit must be operated on a 115V/60 Hz circuit
protected by a Ground Fault Circuit Interrupter
(GFCI) device.
Keep motor and wiring dry.
Do not attempt to repair the unit. For Authorized
Service Centers, call DriEaz at 800-932-3030.
BEFORE YOU BEGIN
Unpacking your unit
Retain all packing material and boxes for possible
equipment returns. Find and retain the AA batteries,
which must be installed before using the unit.
Installing the sensor batteries
Two AA batteries are shipped with the 2800i and 3500i
to provide power to the built-in HygroTrac® wireless
transmitter when the unit is not connected to AC power.
The battery compartment is located directly under the
power cord socket on the back of the unit (see Figure C).
Use a flat-blade screwdriver to turn the battery
compartment cover 90° counter-clockwise and remove
the cover. Insert the batteries with the negative terminal
in first. After inserting the batteries, secure the cover by
pressing it in with the screwdriver and turning it 90°
clockwise.
Warranty registration
Visit warranty.drieaz.com to register your purchase.
Registration allows us to better assist you with using,
maintaining or servicing your equipment, as well as to
contact you in case we have important safety information
concerning your Dri-Eaz product. If you determine
service is required, have your equipment model, serial
number and original proof of purchase available and call
your distributor for assistance with obtaining a return
material authorization (RMA).
WARNING
IMPORTANT
To help prevent drip tray overflow after using the dehumidifier, always purge the unit before moving.
1. Turn the unit off and allow the plugged in dehumidifier to rest for 10 minutes.
2. Press the
PURGE key and while the purge pump is operating, tip the unit back approximately 45° and hold the
unit in place until the purge cycle is complete. The manual purge cycle lasts approximately 10 seconds.
3. Return the unit to the upright position and press PURGE one more time to empty the pump.
Remove the dehumidifier promptly from the job site once these steps have been completed.

Questions and Answers:

Dri-Eaz LGR 2800i Specifications

General IconGeneral
BrandDri-Eaz
ModelLGR 2800i
CategoryDehumidifier
LanguageEnglish

Summary

Safety Instructions

General Safety Precautions

Essential safety guidelines covering electrical hazards, cord inspection, grounding, GFCI usage, and maintenance.

Preparation Before Operation

Unpacking and Sensor Batteries

Steps for unpacking the unit, retaining materials, and installing sensor batteries for the wireless transmitter.

Warranty Registration

Guide to registering the product online for enhanced support and communication of important safety information.

Condensate Purge Procedure

Essential steps to purge the unit's condensate reservoir before moving to prevent spills and damage.

Product Introduction and Technology

Dri-Eaz Dehumidifier Overview

Explanation of how Dri-Eaz dehumidifiers reduce humidity and the principles behind LGR technology for efficient drying.

HygroTrac Remote Monitoring

System Features and Benefits

Overview of HygroTrac wireless sensor technology, asset tracking, and data transmission for real-time monitoring.

Positioning the Dehumidifier

Optimizing Drying Environment

Guidelines for placing the dehumidifier in an enclosed area to ensure maximum water removal efficiency.

Parts Identification

Unit Components Overview

Visual identification and description of key parts of the dehumidifier, including front, rear, and attachment points.

Operating Your Dehumidifier

Setting the Unit Upright

Instructions on correctly positioning the dehumidifier after transport to allow oil to return to the compressor.

Setting Up the Drain Hose

Guidance on connecting and positioning the condensate drain hose for safe and effective water removal.

Electrical Connection and Power On

Connecting the Power Cord

Instructions for plugging the unit into a GFCI-protected outlet, emphasizing cord handling.

Turning the Unit On

Steps for powering on the dehumidifier and understanding the initial display sequence and compressor delay.

Control Panel Operations

Control Panel Functions

Explanation of the control panel keys (ON/OFF, DISPLAY MENU, MENU SELECTION, PURGE) and their functions.

Understanding Display Messages

How to interpret the main menu display, unit status, and the wireless transmitter connection indicator.

User Settings Menu

How to access and change user-configurable settings and view system information via the control panel.

Control Panel Operations and Settings

Status Displays and Job Hours

How to view unit status, life hours, sensor ID, inlet/outlet conditions, and reset job hours.

Operational Settings Configuration

Guide to adjusting Humidistat mode, setpoint, temperature units, language, and other operational parameters.

Error Messages and Job Completion

Understanding Error Codes

How to interpret error messages displayed by the unit and potential causes or initial troubleshooting steps.

End of Job Procedure

Detailed steps for purging the unit, turning it off, and preparing it for transport after a drying job.

Maintenance Procedures

Pre-Use Maintenance Checks

Essential checks before each use, including inspecting the power cord and cleaning the air filter.

Monthly Maintenance

Coil and Block Cleaning

Instructions for checking and cleaning coils and the heat exchange block monthly for optimal performance.

Pump Inspection and Cleaning

Steps to inspect and clean the condensate pump and its housing for proper operation.

Pump and Drain Pan Servicing

Disassembly for Cleaning

Detailed steps for disassembling the unit to access and clean the pump and drain pan assembly.

Detailed Pump and Tray Cleaning

Pump Assembly Cleaning Steps

Specific instructions for cleaning the pump assembly, pump tray, check valve, and reassembling the unit.

Annual Maintenance and Storage

Annual Pump System Inspection

Recommendation for an annual inspection of the pump system by a service department or qualified center.

Transportation and Storage Guidelines

Precautions for transporting and storing the unit, including protecting the control panel and securing the unit.

Cleaning Coils and Heat Exchange Block

Disassembly and Cleaning Procedure

Step-by-step guide for disassembling the unit to access and clean the evaporator (cold) coil and condenser coil.

Reassembly and Coil Care

Instructions for reassembling the unit, ensuring proper seal placement, and care for coil cleaning.

System Status Messages

Interpreting Status Indicators

Summary of control panel and HygroTrac website messages indicating unit operation status (e.g., Normal, Defrost, Standby).

Error Message Troubleshooting

Identifying and Resolving Errors

Explanation of system error codes (ER1-ER3), potential causes, and initial troubleshooting steps before contacting service.

Advanced Error Codes

Troubleshooting Error Codes ER4-ER9

Details on error codes related to sensor connections, invalid settings, stuck buttons, and pump/hose issues.

Troubleshooting Common Faults

Diagnosing and Solving Issues

A guide to common operational faults (e.g., dripping, not operating, poor drying) with their causes and recommended solutions.

Product Specifications

Technical Data Comparison

Detailed specifications for LGR 2800i F410 and LGR 3500i F411 models, including weight, dimensions, power, and performance metrics.

Related product manuals