1514
Assembly
Assembly must be conducted by an adult.
DO NOT ALLOW CHILDREN to conduct assembly, as there may be small parts,
sharp edges / sharp points, and packaging material that can present as hazardous.
Ensure proper disposal (and/or recycling, per local laws) of all interior packaging material,
so that they are OUT OF REACH from both children and pets.
It is recommended that you KEEP the original packaging box, in the event that the Weeler
needs to be stored away.
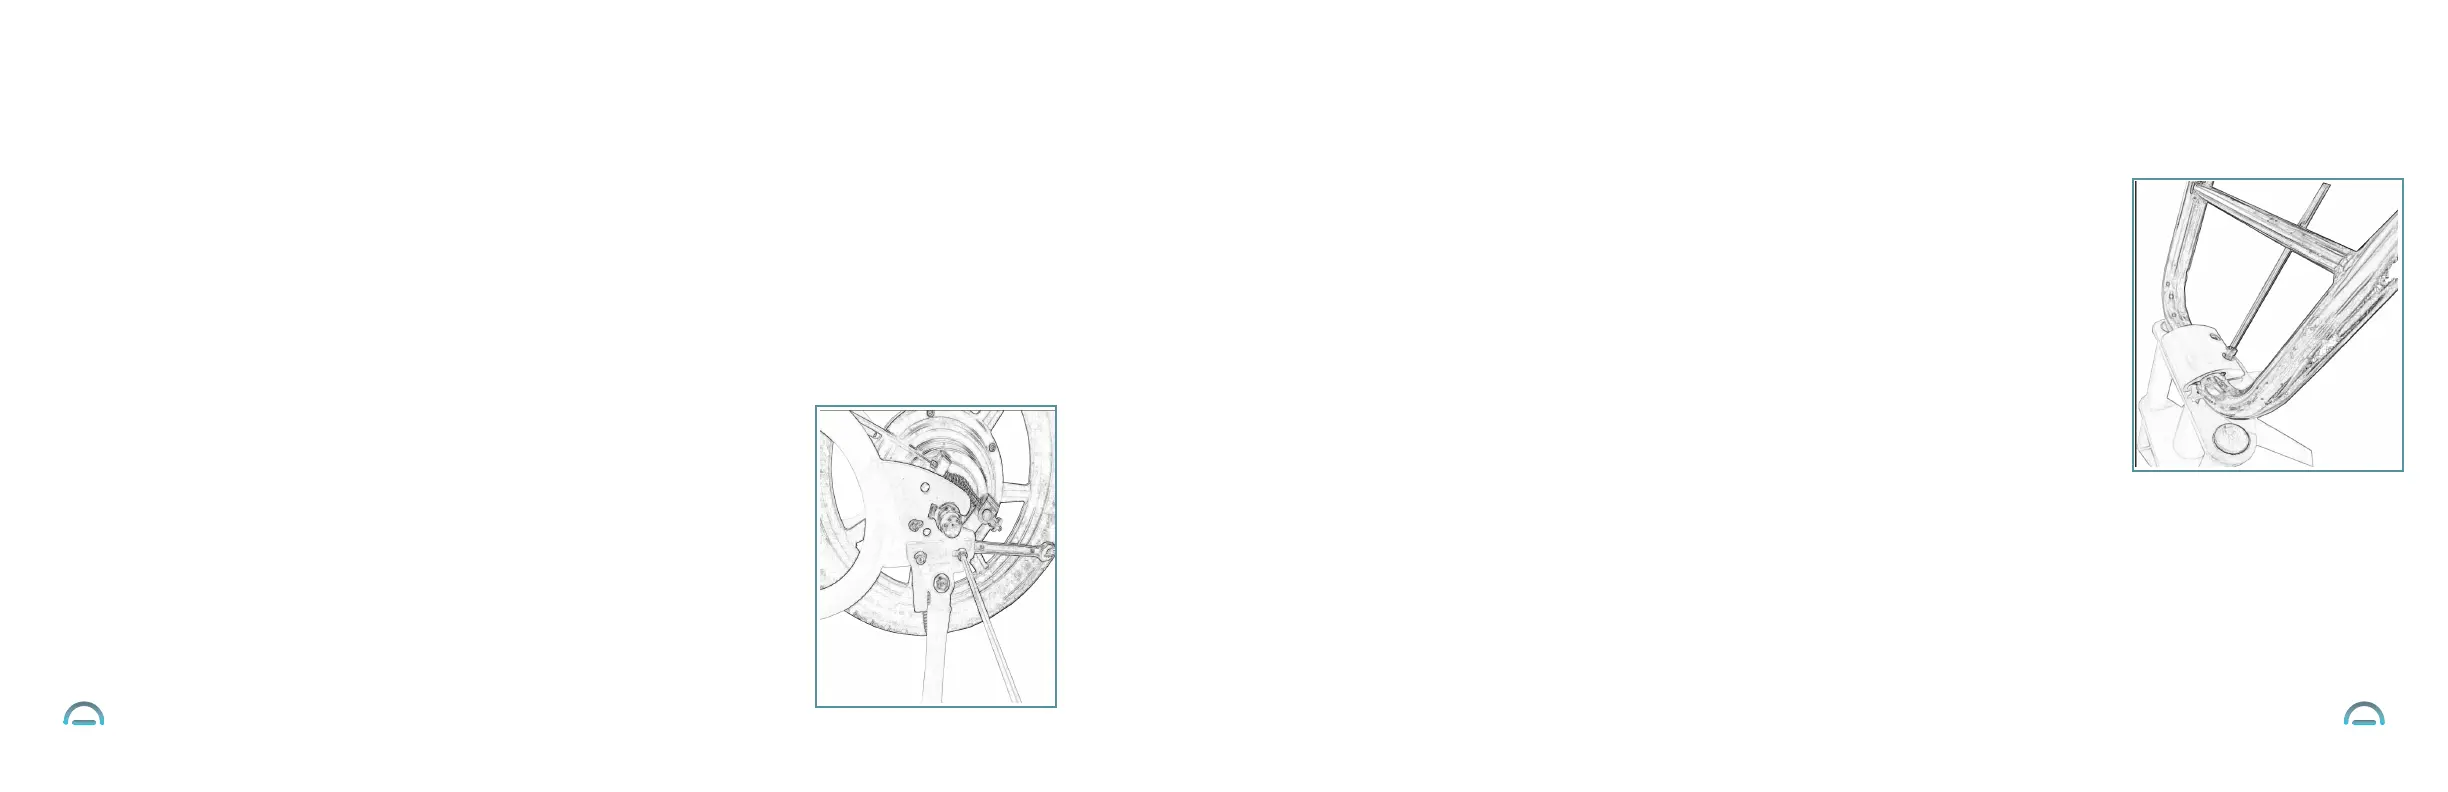
Step one: Installing the kickstand
•
Locate the kickstand, 5 mm allen wrench, and 10 mm wrench.
•
Ensure the frame is lying flat on a smooth and even surface, with the left side facing up.
•
Locate the bottom edge of the frame (where the two holes are) right next to the rear
wheel. This is the frame bracket where the kickstand will be installed.
•
Align the top of the kickstand (where the two holes are) accordingly.
•
Affix the kickstand screws by passing each screw through the aligned holes.
•
Thread each nut onto each screw from the back of the frame bracket,
While using the 10 mm wrench to brace against the nut, use the 5 mm allen wrench to fully
tighten the screws . from the front (at the top of
the kickstand).
•
Ensure that the kickstand is fully and tightly installed by pulling on it. There should
be no looseness.
•
To use the kickstand, prop the product up to an upright position with both hands,
and ensure the kickstand is pointed towards the ground. (If it’s not, use your foot to
push the kickstand lever until it’s pointed towards the ground.) You can now gradually
lean the product onto the kickstand. The kickstand should fully support the product’s
weight when the product is not in use.
• ?The frame bracket has the kickstand screws (x 2) and nuts (x 2) pre-installed.
Remove both screws and nuts.
•
Ensure that the kickstand is in the correct position (foot of the kickstand pointing outward).
Install the handlebar clamp bottom half onto the frame, as follows:
Step two: Installing the handlebar
• Locate the handlebar and handlebar clamp.
•
• Manually disassemble the handlebar clamp into the following parts:
Ensure power remains OFF at all times during assembly.
Ensure that assembly is conducted in a space where neither children nor pets have access, as assembly contains small
and/or sharp parts that may present choking or otherwise dangerous hazards.
Do NOT leave the product partially assembled and unsupervised, as assembly contains small and/or sharp parts that
may present choking or otherwise dangerous hazards to children and pets.
Do NOT attempt to charge the product until it is fully assembled.
If any parts are damaged or missing, do NOT proceed with assembly, and contact customer support for assistance.
• Bottom half (x 1), bottom half screws (x 2), bottom half washers (x 2) and bottom half nuts (x 2)
• Top half (x 1) and top half screws (x 2)
• Position the handlebar clamp bottom half onto the frame.
• Ensure the bottom clamp is centered and the holes are aligned with the holes on the frame.
• Pass each bottom half screw through each aligned hole from the top.
• Place each bottom half washer onto each screw from beneath the frame.
• Thread each bottom half nut onto each screw from beneath the frame.
• Locate the 4 mm allen wrench and 10 mm wrench.
• Simultaneously use the 10 mm wrench to brace against each nut, and use the 4 mm allen wrench
to tighten each screw. Continuously rotate the allen wrench clockwise until each screw is fully tightened.
Next, install the handlebar as follows:•
• Locate the handlebar, handlebar clamp top half, and 5 mm allen wrench.
• Position the handlebar so that the accelerator lever is on the right and brake lever is on the left.
• Place the handlebar directly on top of the handlebar clamp bottom half.
• Center the handlebar and position it at the desired angle. (Ensure it is not angled too far back, to ensure stability.)
• Place the handlebar clamp top half directly over the handlebar, so that the holes are aligned with those of the bottom half.
• Locate the top half screws (x 2).
• Pass each screw through each aligned hole from the top.
• Use the 5 mm allen wrench to tighten each screw from the top. Continuously rotate the allen wrench clockwise until each screw
is fully tightened.
• Ensure the handlebar is fully and tightly installed by pulling on it. There should be no looseness.
 Loading...