Connecting to the gas supply
The gas control block has a 3/8" internal thread for the
gas connection.
Use an approved connecting tap with coupling in the
supply pipe (for Belgium this must be B.G.V. approved).
In addition:
• Expel the air from the supply pipes before connecting the
appliance.
• Avoid pressure on the gas control block and the pipes.
• Check all connections for gas tightness.
Positioning the logs
Special vermiculite and chips have been developed for the
Concerto Vision to create a decorative black appearance.
You have the option of using either the vermiculite, chips
and embers from the log set, or the black accessory set
with black vermiculite and chips especially designed for the
Concerto Vision.
NB: Do not use both!
Position the logs as follows:
• Lay the large log against the back wall, on the log
supports.
• When you use the vermiculite, chips and embers from the
log set:
• Fill the burner with vermiculite.
• Spread it evenly over the burner tray and the surrounding
tray.
• Sprinkle the brown embers, to create a glowing effect on
the burner bed, and the chips (black and yellow) on the
top of the vermiculiet on the burner.
When you use the black accessory set:
• Fill the burner with vermiculite.
• Spread it evenly over the burner tray and the surrounding
tray.
• Sprinkle the black chips on the top of the vermiculiet on
the burner. • It is important to first sprinkle the
vermiculite on the burner tray and then the chips, as this
will give the best flame effect.
• Make sure that no vermiculite gets on or into the pilot
light burner, as this could prevent it from working
properly.
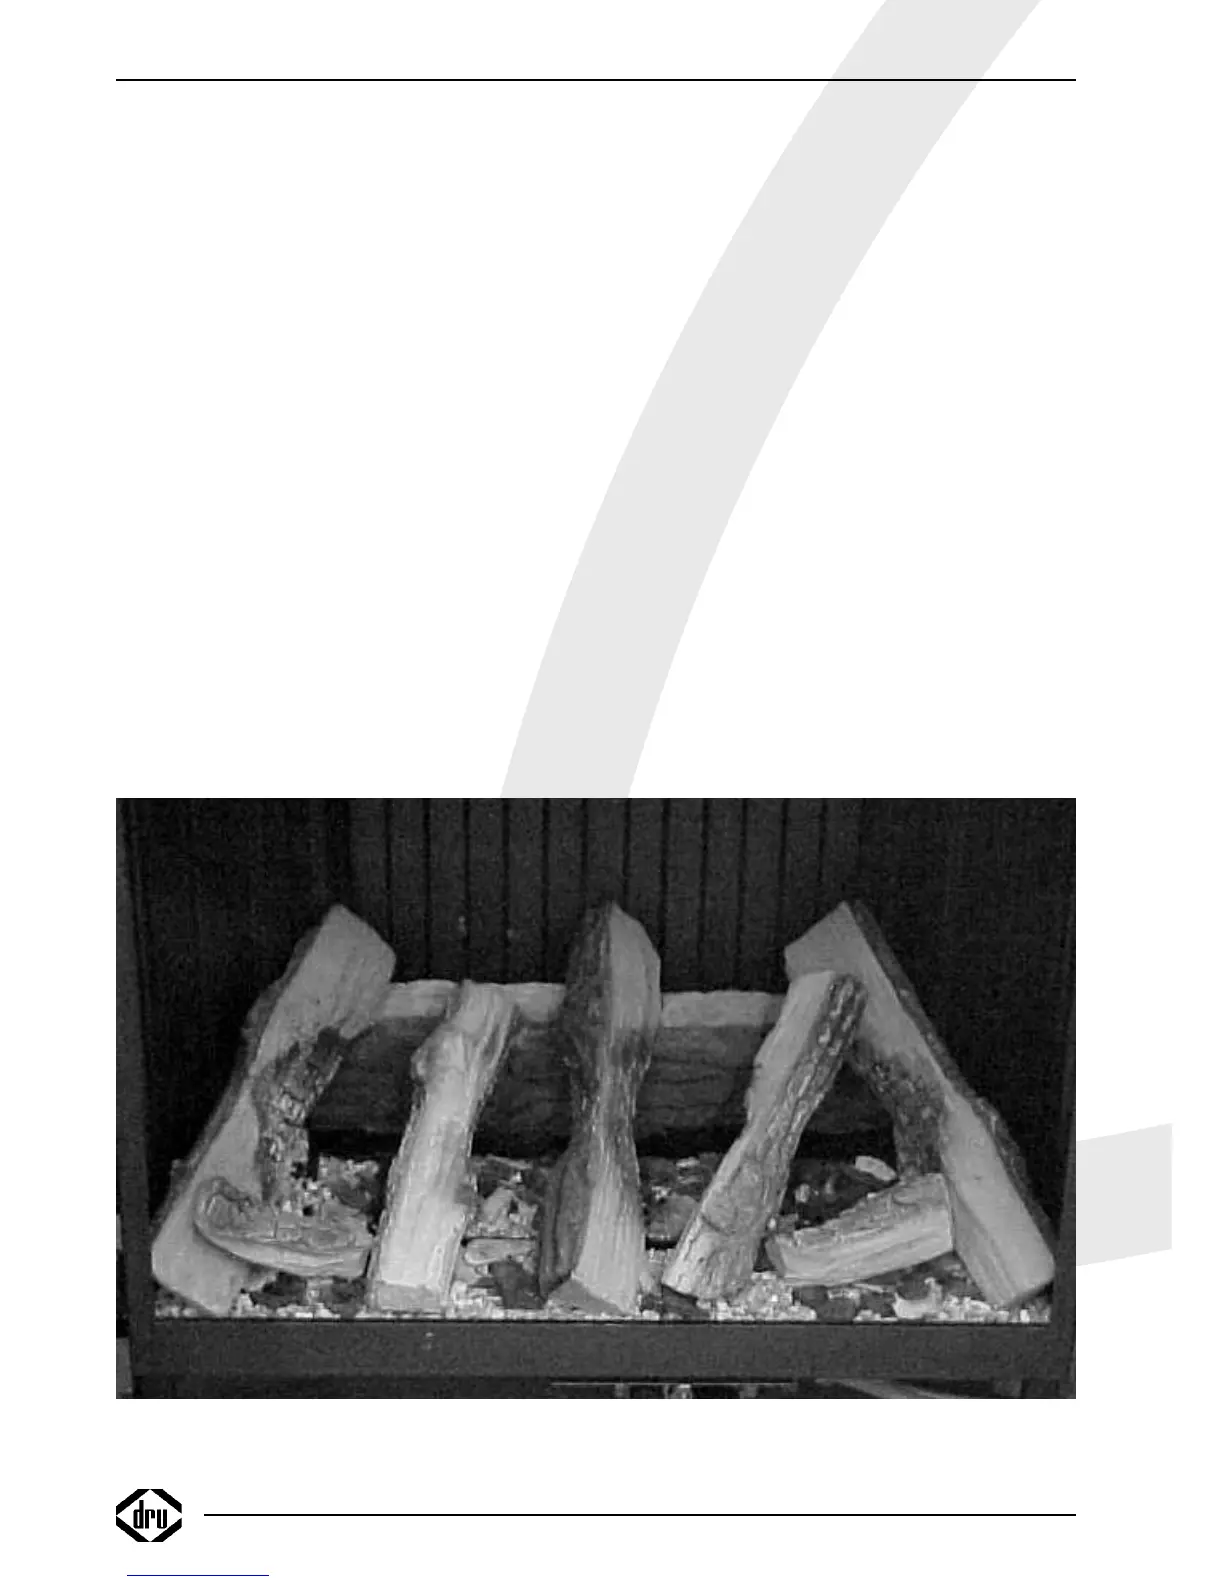
• Now lay the rest of the logs in place as illustrated in fig. 5.
The logs should not be laid in any other way as this could
cause the formation of soot. Neither should the logs touch
pilot light burner.
You can "play" with the flames by moving the vermiculite,
embers and chips about on the burner bed until you have
created the desired flame effect.
Do not use any materials other than those supplied.The
supplied materials are incombustible and have been
manufactured specifically for this appliance.
12
INSTRUCTIONS FOR INSTALLATION
fig. 5