INSTRUCTIONS FOR INSTALLATION OPERATING INSTRUCTIONS
14
Replacing the batteries in the receiver
• Open the door at the front.
• Take the receiver and open the cover.
The batteries are under that cover.
• Remove the old batteries and insert the new ones, making
sure that the + and – signs on the batteries correspond
with those in the holder.
Inserting or replacing the batteries in the
remote control
• Remove the cover on the back of the remote control.
• Connect a square battery (type 6LR61) to the clip.
• Fit the battery in the holder.
• Replace the cover.
NB: Do not throw old batteries in the dustbin.
They should be treated as Chemical Waste.
Oxypilot
This appliance has been fitted with an oxypilot safety
device.The oxypilot is activated in the event of flue gasses
flowing back through the baffle. The pilot light goes out
and the gas supply to the burner is shut off.The oxypilot
will also switch the fire off if the oxygen concentration in
the room in which it is installed drops too low.
Possible causes of the safety device being activated include:
• There is little or no supply of fresh air into the home
(all draughts have been excluded and ventilation openings
sealed off).
• The outlet into the flue duct is partially or completely
blocked.
• The chimney mouth was not constructed correctly, can
cause "fall winds" in the chimney duct being a possible
result.
The appliance needs a good supply of air for optimum
combustion. If there is not enough air, because all draughts
have been excluded or all means of ventilation have been
closed or shut off, for example, and/or because a
mechanical extraction system such as a cooker hood
extracts too much air, a permanent means of ventilation
must be fitted in the room in which the heater is to be
installed. If the home has a mechanical extraction system,
the flue system to which the gas fire is connected must
have a flue fan.
Please refer to the gas installation regulations and any
relevant legislation enforced locally.
The appliance can be re-ignited once the air supply and / or
flue discharge has been restored.
OPERATING INSTRUCTIONS
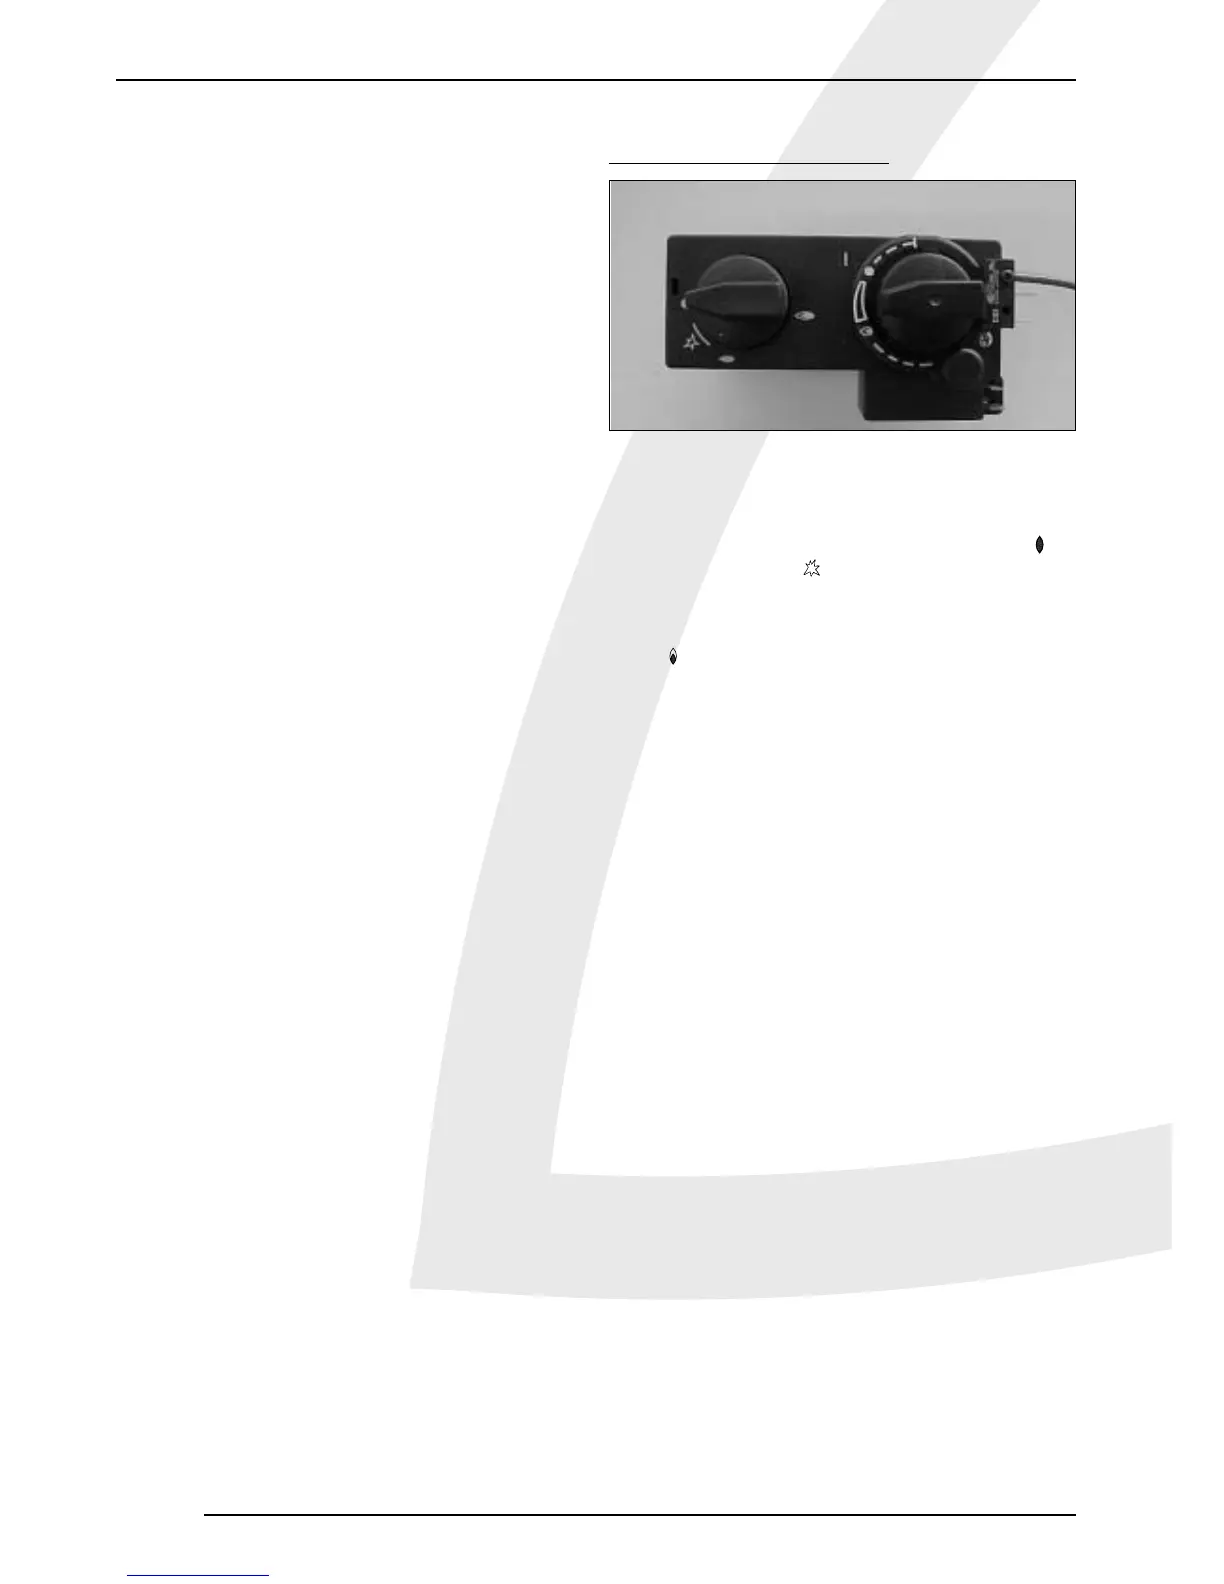
Lighting
Press button A and turn to the left to the small flame .
The flame will ignite at . Check that the pilot is alight. If
that is the case, hold button A firmly pressed for another 5
seconds.Then release button A and check that the pilot
light is still burning. Now turn button A to the large
flame , which will open the main valve of the control
block. Depending on the setting of the control button B,
high or low flames will be visible.
Remote Control
The height of the flames can be regulated by remote
control, which will turn button B (fig. 17b) on the gas
control block. Press the bottom button on the remote
control for a smaller flame; press the upper button for a
higher flame. Manually adjusting button B will have the
same effect.
A certain force is required when rotating button B,
a clicking sound is quite normal.
Pilot light setting
If the heater is not in use but you would like the pilot light
to remain alight, set button A to the small flame.The gas
supply to the main burner will then be switched off.
Switching off
Turn button A to the "0" setting.The gas supply to the
burners will then be switched off.
Important
A built-in safety lock is activated when the appliance is
switched to "OFF" (closed down setting).Therefore, wait 5
minutes before relighting the heater.Within this period, do
not try to push the lighting button, as this has been
blocked by the safety lock. Do not force the button, as this
may result in damage to the mechanism.
fig. 17b
AB