Keypad Commands: 3.4 [*] Commands
9
Activate Stay/Away Zones
If the system is armed in stay mode, the [*][1] command can
be used to activate the stay/away zones.
Night Zone
This zone type is identical to the Interior, Stay-Away zone [05]
except that it will not be activated when Stay-Away zones are
reactivated ([*][1]).
When the system is armed in Stay mode, (Stay function key,
[*][9], At Home arming, Delay zone is NOT tripped during the
exit delay time), the Night Zone will be bypassed.
When the system is armed in Away mode (Away function key,
Delay zone is tripped during the exit delay time), the Night
zone will function like an Interior zone [04].
This zone is type 31.
[*][2] Trouble Display
The panel constantly monitors itself for several different trou-
ble conditions. If a trouble condition is present, the Trouble (or
System) light will be on and the keypad will beep twice every
10 seconds. When the system is disarmed, users can silence
the trouble beep for faults and tampers by entering an access
code. For other troubles, users can silence the trouble beep
by pressing any key at any system keypad.
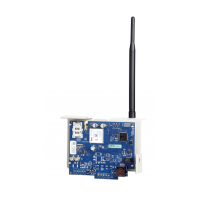
The PC5132-NB receiver detects jamming signals that can
prevent the receiver from properly receiving transmissions
from enrolled devices. If the system detects jamming signals
for longer than 30 seconds, the Trouble (or System) light will
turn on. The keypad will not sound trouble beeps for an RF
Jam trouble unless the Audible RF Trouble (Keypad Beeps)
option is turned on. If the system detects jamming signals for
longer than 5 minutes, the panel will send a General System
Trouble reporting code.
Audible RF Trouble (Keypad Beeps). . . . . .Section [018]: [6]
To view trouble conditions from an LED keypad:
1. Press [*][2].
2. The keypad will flash the Trouble (or System) light. The
zone indicator lights corresponding to the present trouble
conditions will be ON.
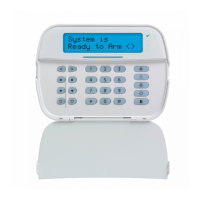
When using an LCD keypad, the trouble conditions will be
listed on the display. Use the arrow (< >) keys to scroll through
the list of present trouble conditions.
NOTE: Troubles can be viewed while armed using the LCD
keypad, provided the keypad is version 2.0 or later. Older key-
pads will incorrectly display “Fire Trouble”. If using older LCD
keypads, programming section [013], option [3] as OFF will
ensure troubles are displayed correctly.
The various troubles are described below:
Light Trouble
1
Service Required: Press [1] to determine the specific trouble. Lights 1 - 5 will light up to indicate the trouble:
• Light [1] Low Battery: Main panel backup battery charge is low (below 11.5 volts under load).Trouble is restored
when the battery charges over 12.5 volts.
• Light [2] Bell Circuit Trouble: The bell circuit is open (see section 5.14 ‘Bell’ on page 23).
• Light [3] General System Trouble: The printer connected to the PC5400 Printer module has a fault and is off-line.
• Light [4] General System Tamper: Tamper has been detected in a module.
• Light [5] General System Supervisory: The panel has lost communication with a module connected to the Keybus
(see section 2.6 ‘Supervision’ on page 5). The event buffer will log the event.
NOTE: All tamper conditions must be physically restored before the trouble condition will clear.
NOTE: Lights [6-8] – Not used
2
AC Failure: AC power is no longer being supplied to the control panel. The Trouble (or System) light will flash if an AC
Failure is present, if the Trouble Light Flashes if AC Fails option is programmed (section [016], option [2]). This trouble
will not be displayed if the AC Trouble Displayed option is disabled (section [016], option [1]). See section
5.9 ‘Communicator – Reporting Codes’ on page 18 for information on AC trouble reporting.
3
Telephone Line Monitoring Trouble (TLM): There is a problem with the telephone line (See section
5.13 ‘Telephone Line Monitor (TLM)’ on page 23.)
4
Failure to Communicate (FTC): The communicator failed to communicate with any of the programmed telephone
numbers (see section 5.6 ‘Communicator – Dialing’ on page 17).
5
Zone Fault (including Fire Zone): A zone on the system is experiencing trouble, meaning that a zone could not
provide an alarm to the panel if required to do so (e.g. a fire zone is open, or there is a short on a DEOL zone, or a super-
visory fault on a wireless zone). When a zone fault trouble condition occurs, the keypad(s) on the system will start to
beep. Press [5] while in Trouble mode to view the affected zones.
NOTE: A Fire zone trouble will be generated and displayed in the armed state.
6
Zone Tamper: A zone configured for Double End Of Line resistor supervision has a tamper condition, or the tamper
switch is open on a wireless device. When a tamper condition occurs, the keypad(s) will start to beep. Press [6] while in the
Trouble mode to view the affected zones. If a zone is tampered or faulted, it must be fully restored to clear the trouble.
NOTE: By enabling Tampers/Faults Do Not Show as Open in section [013], option [4], Faults and Tampers will not show
as open on the keypad, and will be hidden from the end user. If the option is disabled, Faults and Tampers will be dis-
played on the keypad
NOTE:Once a zone is tampered or faulted, it must be completely restored before the trouble condition will clear.
7
Device Low Battery: A wireless device has a low battery condition. Press [7] one, two, or three times to view which
devices are experiencing battery failure. An LED keypad will indicate battery failure using zone lights 1 to 8. The follow-
ing will occur:
Keypad beeps: Keypad displays:
Press [7] 1 Zones with low batteries (LED keypad - zone lights 1 to 32)
Press [7] again 2 Handheld keypads with low batteries (LED keypad - zone lights 1 to 4)
Press [7] again 3 Wireless keys with low batteries (LED keypad - zone lights 1 to 8)
To view the battery conditions of wireless keys 9 through 16, you must use an LCD keypad.
8
Loss of System Time: When the panel is powered up, the internal clock needs to be set to the correct time. This
trouble is cleared when an attempt is made to reset the clock.

 Loading...