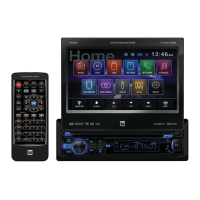
This document is an installation and owner's manual for the Dual DXDM280BT AM/FM/CD Receiver, which also features MP3, USB, AUX, and Bluetooth® connectivity.
Function Description
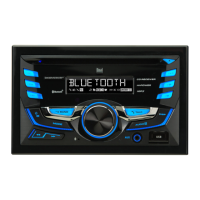
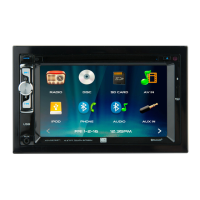
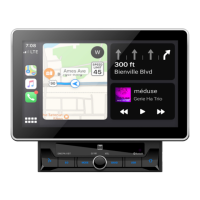
The DXDM280BT is a versatile car audio receiver designed to provide a wide range of entertainment options. It functions as an AM/FM tuner, a CD player, and supports playback of MP3 files from CDs, USB devices, and auxiliary input sources. A key feature is its integrated Bluetooth® technology, allowing for wireless audio streaming and hands-free calling from compatible mobile devices. The unit is equipped with a display that shows various information depending on the selected mode, such as clock, ID3 tag information for MP3 files, track numbers, and file/folder names.
Usage Features
General Operation:
- Power On/Off: The unit can be turned on by pressing the power button or any other button (except EJECT) and turned off by pressing the power button.
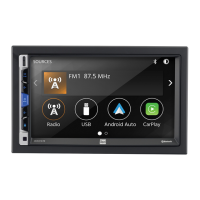
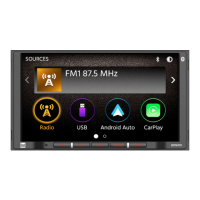
- Mode Selection: The MODE button allows users to switch between AM/FM radio, CD player, Bluetooth, auxiliary input, and USB modes. CD and USB modes only appear when a CD is inserted or a USB device is connected, respectively.
- Auxiliary Input: A 3.5mm auxiliary input port is located on the front panel for connecting external audio devices like MP3 players.
- Volume Control: Volume is adjusted using the dedicated volume knob, with a range from 00 to 46.
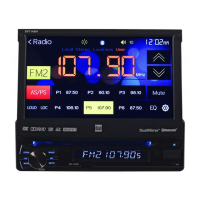
- Display Information: The DISP button cycles through various display options, including the clock. During MP3 playback, it rotates through ID3 tag information, elapsed time, track number, and file/folder names.
- Reset: A RESET button is provided for initial installation or to resolve abnormal operation.
- Clock Setting: The clock can be set by pressing and holding DISP until it flashes, then using the tune buttons to adjust hours and minutes.
- 12/24-hour Clock: The clock displays 12-hour AM/PM time in USA frequency spacing mode and 24-hour time in European frequency spacing mode.
- Setup Menu: Pressing and holding the AUDIO button for more than 3 seconds accesses the setup menu, where various functions can be adjusted using the AUDIO button and volume knob.
Audio Settings:
- Audio Menu: Pressing AUDIO momentarily cycles through Bass, Treble, Balance, and Fader settings.
- Bass/Treble: These settings can be adjusted from -6 to +6 using the volume knob when selected in the audio menu.
- Balance/Fader: Balance (BAL 12L - BAL 12R) and Fader (FAD 12R - FAD 12F) can be adjusted, with "BAL EVEN" and "FAD EVEN" indicating equal settings.
- Equalization (EQ): The EQ button cycles through predefined equalization curves: FLAT, POP, JAZZ, CLASSIC, BEAT, ROCK, and USER. Manual adjustments to Bass or Treble are automatically saved as USER.
- Loudness: The LOUD ON/OFF setting can be toggled via the AUDIO/MENU button and volume knob.
- Source Volume Level: This feature allows for gain adjustment for each audio source (AM, FM, CD, AUX, USB) from -3 to +3. To set, press AUDIO/MENU until "SRC LEVEL" appears, then adjust with the volume knob. This adjustment is mode-specific.
AM/FM Tuner Operation:
- Seek Tuning: The TUNE buttons momentarily seek the next strong station.
- Manual Tuning: Pressing and holding the TUNE buttons until "MANUAL" appears allows for single-step frequency changes. Holding them down advances quickly.
- Band Selection: The BAND button cycles through FM1, FM2, FM3, AM1, and AM2 bands.
- Storing and Recalling Presets: Up to 18 FM and 12 AM stations can be stored by selecting a station and holding a preset button (1-6) for over 2 seconds. Presets can be recalled by pressing the corresponding button.
- Auto Store Stations: Holding AUDIO/MENU for more than 3 seconds to find "AUTO STORE" allows the unit to automatically store the 6 strongest stations in the current band.
CD Player Operation:
- Insert/Eject CD: CDs are inserted label-side up. The EJECT button removes the CD; if not removed within 10 seconds, it reloads.
- Track Select: The TRACK buttons skip to the next or previous track. Holding them fast forwards or reverses.
- Pause/Resume: The play/pause button temporarily stops and resumes CD playback.
- Intro: The INT button accesses the Intro menu, offering "OFF" (cancels INT) and "ALL" (plays first 10 seconds of each track).
- Repeat: The RPT button accesses the Repeat menu, offering "ALL" (plays all tracks) and "TRACK" (repeats selected track).
- Random: The RDM button accesses the Random menu, offering "OFF" (cancels RDM) and "ALL" (plays all tracks in random order).
- MP3 Files: The unit supports MP3 playback from CDs, displaying ID3 tag information (title, artist, folder, file name). It supports ISO9660 levels 1 and 2, Yellow Book modes, and multi-session discs.
USB Operation:
- Connecting USB: USB mass storage devices can be connected to the unit's USB port for MP3 playback.
- Playing Music: Upon connection, "USB READ" appears, and playback begins.
- Track Select: Similar to CD operation, TRACK buttons skip tracks, and holding them fast forwards/reverses.
- Pause/Resume: The play/pause button controls USB playback.
- File Search: The SELECT button enters file/folder search mode, displaying a list of folders. The volume knob navigates folders and files, and SELECT confirms selection. "ROOT" refers to files in the root directory.
- Folder Access: The folder buttons navigate to previous or next folders.
- Repeat/Random/Intro: These functions operate similarly to CD mode, with options for "ALL," "TRACK," and "FOLDER" (for repeat and intro) or "ALL" and "FOLDER" (for random).
Bluetooth® Operation:
- Pairing a New Device: The unit constantly broadcasts a pairing signal when no devices are connected. The device name is "DUAL BT" with passcode "1234." Pairing can be done from any mode.
- Pairing Additional Devices: If a device is connected, press and hold the talk button to disconnect it before pairing a new device.
- Connecting a Paired Device: Most Bluetooth devices auto-connect. If not, the talk button can be used to reconnect. The volume knob cycles through paired device names and recent calls (up to ten).
- Disconnecting a Device: Press and hold the talk button for 3 seconds to disconnect.
- Recent Calls List: In Bluetooth mode, SELECT views recent calls (dialed, received, missed). The volume knob navigates the list, and SELECT or the talk button dials.
- Redialing Last Number: Press the talk button from Bluetooth mode to redial the last number.
- Receiving a Phone Call: Incoming calls display on the unit with a ring tone. The talk button receives, and pressing and holding it refuses the call. Auto Answer can be enabled in the setup menu.
- Ending a Phone Call: The talk button ends an active call.
- Streaming Audio (A2DP/AVRCP): The unit supports wireless audio streaming from Bluetooth mobile devices. The track skip buttons navigate audio tracks, and the play/pause button toggles playback.
Maintenance Features
Installation:
- Preparation: Before installation, disconnect the negative battery terminal. Avoid installing the unit in areas with high temperatures, direct sunlight, dust, dirt, or excessive vibration.
- Getting Started: Remove the trim ring and two transit screws from the top of the unit. Connect the wiring harness and antenna. Test for correct operation before snapping the trim ring into place.
- Wiring Diagram: The manual provides a detailed wiring diagram for connecting power (yellow for memory, red for accessory, black for ground), remote turn-on (blue), and speaker outputs (right front, right rear, left front, left rear).
- Fuse: The unit uses a 10 amp AGC fuse located beside the wiring connector. When replacing, ensure the new fuse has the correct type and amperage to prevent damage.
Troubleshooting:
The manual includes a troubleshooting guide for common issues:
- Unit will not turn on: Check yellow, red, and black wire connections, and replace the fuse if blown.
- Unit has power but no sound: Check speaker wire connections and ensure no bare wires are touching each other or chassis ground.
- Unit blows fuses: Check for pinched yellow/red wires or speaker wires, and ensure the correct fuse rating is used.
- Excessive skipping: Check if the unit is mounted correctly and if the backstrap is secure. Inspect media for physical defects.
- "ERR FILE" on display: Indicates a disc read error or focus error, or if the disc is upside down. Press EJECT or RESET.
- "NO FILE" on display: No playable MP3 files found on the device. Check for valid MP3 files.
- Unit will not accept a disc: CD mechanism position may be out of alignment (press EJECT to reset) or transit screws are still in place (remove them).
- "NO SUPPORT" on display: An invalid ID3 tag version is present. The unit supports ID3 tags Version 1.0 to 2.0.
Warranty:
Dual Electronics Corp. provides a limited one-year warranty covering defects in material and workmanship from the date of purchase. The warranty covers repair or replacement and is extended to the original retail purchaser in the U.S.A. It excludes software, installation costs, damage from misuse, improper installation, unauthorized repair, and certain other conditions. For service, customers are advised to check the troubleshooting guide first, then pack the product with proof of purchase and a description of the problem, and contact Dual Electronics Corp. via toll-free number or email. The warranty explicitly excludes indirect, incidental, or consequential damages.