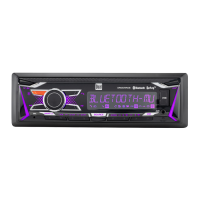
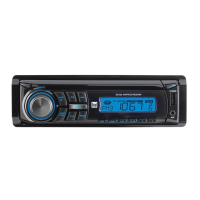
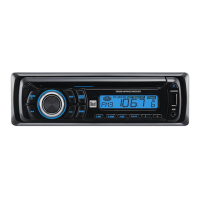
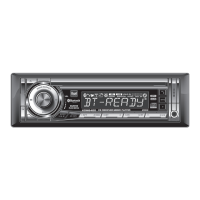
The Dual XRM69RGB is an AM/FM receiver designed for in-car audio entertainment, featuring Bluetooth connectivity and RGB color control. This device allows users to listen to radio broadcasts, play MP3 and FLAC files from USB devices, and stream audio wirelessly from Bluetooth-enabled smartphones. Its RGB color control offers personalization of the unit's illumination, enhancing the aesthetic appeal of the car's interior.
Installation and Setup
Before installation, it is crucial to disconnect the negative battery terminal of the vehicle to prevent electrical issues. The unit should be installed in a location free from high temperatures, direct sunlight, dust, dirt, or excessive vibration to ensure optimal performance and longevity. The installation process typically involves a DIN mounting method.
First, the mounting sleeve is inserted into the installation kit or dashboard. Multiple mounting tabs around the sleeve are then bent to secure it firmly in place. Next, all wiring harnesses are connected according to the provided wiring diagram. The head unit is then slid into the mounting sleeve until it clicks into place, indicating a secure fit. For removal, specialized removal keys are used to disengage the unit from the sleeve.
The wiring diagram details connections for power, ground, accessory, memory, remote turn-on, and speaker outputs. The blue wire is for remote turn-on, connecting to an amplifier or power antenna. The black wire is for ground, connecting to the vehicle chassis. The red wire is for accessory power, connecting to an existing ignition circuit or switched 12-volt source. The yellow wire is for memory, connecting to the battery or a constant 12-volt source. Speaker connections are clearly labeled for right front (gray/black and gray), right rear (violet/black and violet), left front (white/black and white), and left rear (green/black and green). The unit uses a 10-amp ATM fuse, located beside the heat sink, which should be replaced with the correct type and amperage to prevent damage.
General Operation
The device is powered on or off by pressing the dedicated power/mute button. To change audio sources, the SOURCE button is pressed, cycling through Radio, USB, Auxiliary Input, and Bluetooth modes. The volume is adjusted using the volume knob, with a range from 00 to 40. Pressing the volume knob momentarily allows selection between audio functions, while pressing and holding it for more than two seconds enters the menu functions. Rotating the volume knob left or right adjusts or activates the desired function.
The mute function is activated by pressing the power/mute button, silencing the audio, and can be resumed by pressing it again. For auxiliary input, a 3.5mm cable is inserted into the front AUX port. The RESET button, located on the front panel, restores the unit to factory settings in case of abnormal operation.
Setting the clock involves pressing the DISP button to display the clock time, then pressing and holding DISP until the hours flash. The volume knob is rotated to adjust the time, and DISP is pressed and held again to finalize the setting. The DISP button also toggles between various displayed information.
AM/FM Tuner Operation
The AM/FM tuner offers several functions for radio listening. Seek tuning is performed by pressing the TUNE or TUNE buttons to find the previous or next strong station. For manual tuning, the TUNE or TUNE buttons are pressed and held to enter manual tuning mode, then pressed momentarily to change the radio frequency up or down one step at a time. Pressing and holding TUNE or TUNE again advances quickly through frequencies.
The BAND button selects between FM1, FM2, FM3, AM1, and AM2 bands. The unit can store up to six presets for each band, totaling 18 FM stations and 12 AM stations. To store a station, the desired band and station are selected, and the desired preset button (1-6) is pressed and held for more than two seconds. The preset number will then appear on the display. Stored presets can be recalled at any time by pressing the corresponding preset button.
The automatically store feature is activated by pressing and holding MENU for more than two seconds, then pressing DISP to automatically store 18 FM stations and 12 AM stations. Preset Scan (available with the Dual Smart Remote App) allows users to recall each preset station stored in memory for each band.
USB Operation
The XRM69RGB supports playing MP3 and FLAC files from a USB device. To skip to the beginning of the next track, the TUNE button is pressed. To skip to the beginning of the previous track, the TUNE button is pressed. Fast forward and reverse functions are activated by pressing and holding TUNE or TUNE, respectively.
Playback can be temporarily paused by pressing the /II button and resumed by pressing it again. Folder access is managed by pressing Folder Up or Folder Down buttons. After about one second of displaying the folder name, the first file under the selected folder will begin playback.
The repeat function (RPT) toggles between three options: RPT ALL (plays all tracks on the USB device), RPT ONE (continuously repeats the selected track), and RPT FOLDER (repeats all tracks in the selected folder). The random function (RDM) plays tracks in random order and can be canceled by pressing RDM again. The intro function (INT) plays the first 10 seconds of each track and can be canceled by pressing INT again.
RGB Color Operation
The RGB color control allows for personalization of the unit's illumination. The DIM button adjusts the dimmer level for the buttons and LCD, with options for HIGH (default), MID, and LOW, selected by turning the volume knob.
To select a quick preset color, the volume knob is pressed while the dimmer level is displayed, choosing one of seven preset colors. For more advanced color settings, the volume knob is pressed and held for more than two seconds to enter the color setting menu. The volume knob is then turned left or right to select Color Auto (default), Preset, Custom, or Flash mode. Pressing and holding the volume knob again for more than two seconds enters the selected color mode.
In Auto Color mode, the unit automatically rotates through all illumination colors. Preset Color mode allows selection of one of seven colors: Blue, Green, Red, Yellow, Violet, Cyan, or White. Custom Color mode enables adjustment of individual red, green, and blue levels within a range of 0-32, offering over 32,000 color combinations. Note that setting all red, green, and blue levels to 0 will turn off all lights on the LCD and buttons; to restore lights, press DIM and change the color again in the color setting. Flash Color mode allows selection of one of six different colors with a flash effect or to turn it off. Flash lights are demonstrated for about 30 seconds before returning to setting mode. The adjusted color will also flash when there is an incoming Bluetooth call.
Bluetooth Operation
Before using Bluetooth, the device must be paired and connected, ensuring Bluetooth is activated on the user's device. The head unit constantly broadcasts the pairing signal when no devices are connected. The pairing sequence is completed from the Bluetooth device, with the device name "Dual Media Player" and a passcode of "1234". Pairing can be performed regardless of the head unit's current mode of operation.
The head unit supports A2DP wireless streaming audio from a Bluetooth mobile device. The following functions control music playback: pressing to skip to the next available audio track, pressing to skip to the previous audio track, and pressing /II to toggle between play and pause.
Dual iPlug P2 Smart App Remote Control
The Dual iPlug P2 Smart App Remote Control, available for Apple and Android smartphones, allows control of the receiver via Bluetooth. This app enables users to change modes, stations, songs, volume, and settings directly from their smartphone, even without a direct line-of-sight to the receiver. The app can be downloaded from the Apple App Store or Google Play Store.
Voice Activation
With Bluetooth paired between the smartphone and receiver, pressing the voice activation button switches the receiver into Bluetooth mode, activating Siri® or Google Assistant™ on the smartphone. Users must manually switch back to the previous or desired mode after the voice activation operation is terminated.
An optional audio source can be connected to the 3.5mm front panel input. Selecting Auxiliary input from the Main Menu allows listening to audio from this source. The volume on the external audio source should be adjusted as needed, especially if connected to the headphone output of the device.
Troubleshooting
The manual provides a troubleshooting guide for common issues. If the unit does not turn on (no power), check connections for proper voltage (11-16VDC) for the yellow and red wires, and ensure the black wire is connected to ground. A blown fuse requires replacement. If the unit has power but no sound, check speaker connections, insulate bare speaker wires from each other and chassis ground, and check for pinched wires. If the unit blows fuses, check for pinched yellow or red wires touching chassis ground, speaker wires touching chassis ground, and ensure the correct fuse rating is used. If "NO FILE" appears on the display, check the device for valid MP3 files. If "NO SUPPORT" appears, ensure that ID3 tag versions 1.0 to 2.0 are used.
Maintenance
Regular maintenance involves ensuring proper wiring connections and fuse replacement. The unit is designed to be robust, but avoiding exposure to extreme temperatures, direct sunlight, dust, dirt, and excessive vibration will prolong its lifespan. In case of issues, the troubleshooting guide should be consulted before seeking service. For service during the warranty period, the product should be carefully packed in its original package and shipped with proof of purchase to an authorized service center.
FCC Compliance
The device complies with Part 15 of the FCC Rules, meaning it will not cause harmful interference and must accept any interference received. Users are warned that changes or modifications not expressly approved by the responsible party could void their authority to operate the equipment. If the equipment causes harmful interference to radio or television reception, users are advised to reorient or relocate the receiving antenna, increase separation between the equipment and receiver, connect the equipment to a different circuit, or consult a dealer or experienced radio/TV technician.