Page | 20
INSTALLATION OF FENCE HANDLE
Refer to the mechanical drawings in order to facilitate the installation of the handle on the safety fencing.
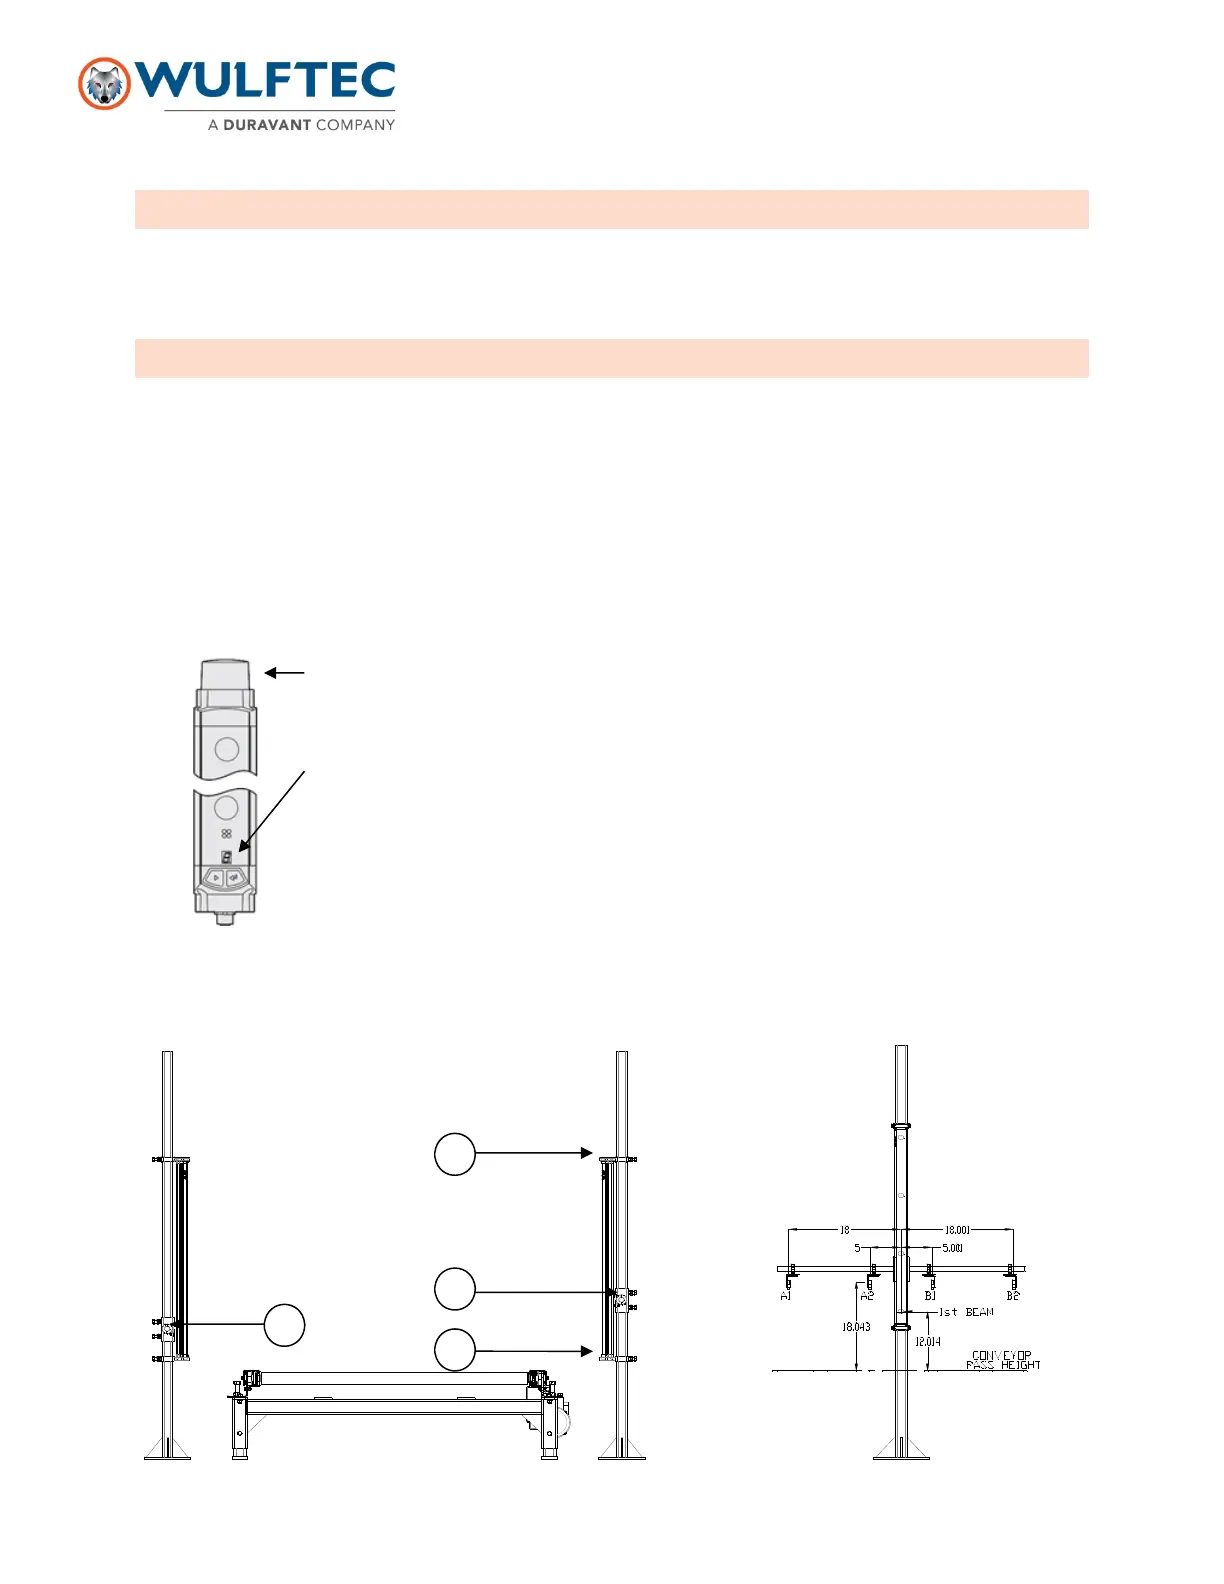
INSTALLATION OF LIGHT CURTAIN
1. The light curtains must be installed at the end of a conveyor, away from the wrap zone and be positioned as
close to the conveyor side as possible (refer to overview drawing). Make sure the posts are leveled (both sides,
vertically) before anchoring.
2. Anchor the posts.
3. Make sure both light curtains are at the same level/height.
4. Connect the light curtain, if not connected already.
5. Final alignment is performed by mechanically adjusting the light curtains components, using the top light beams
as guide.
6. The alignment mode is automatically activated when the light curtain is switched on if the light beams are not yet
aligned or the light path is interrupted.
Top light beams (A)
Red light beam – light curtain is misaligned or an obstacle is blocking the path
Green light beam – system clear
Yellow light beam – muting in action
Bottom light beams (B)
Red light beam – light curtain is misaligned or an obstacle is blocking the path
Orange light beam – cleaning or alignment required
Yellow light beam – reset required
Green light beam – system clear
7. Align the muting photoeyes (C). Make sure they are a minimum of six (6) inches higher than the mirrors (D). The
smallest load must be able to hide the four (4) photoeyes at the same time for a proper transfer.
8. Test a load in manual mode.
 Loading...