Page | 49
ANALOG SENSOR ADJUSTMENT
The following steps accomplish replacement or adjustment of analog sensor and cam:
1. Activate the emergency stop.
2. Remove the film roll.
3. Remove the carriage cover.
4. Make sure that the dancer bar is completely retracted and at home position.
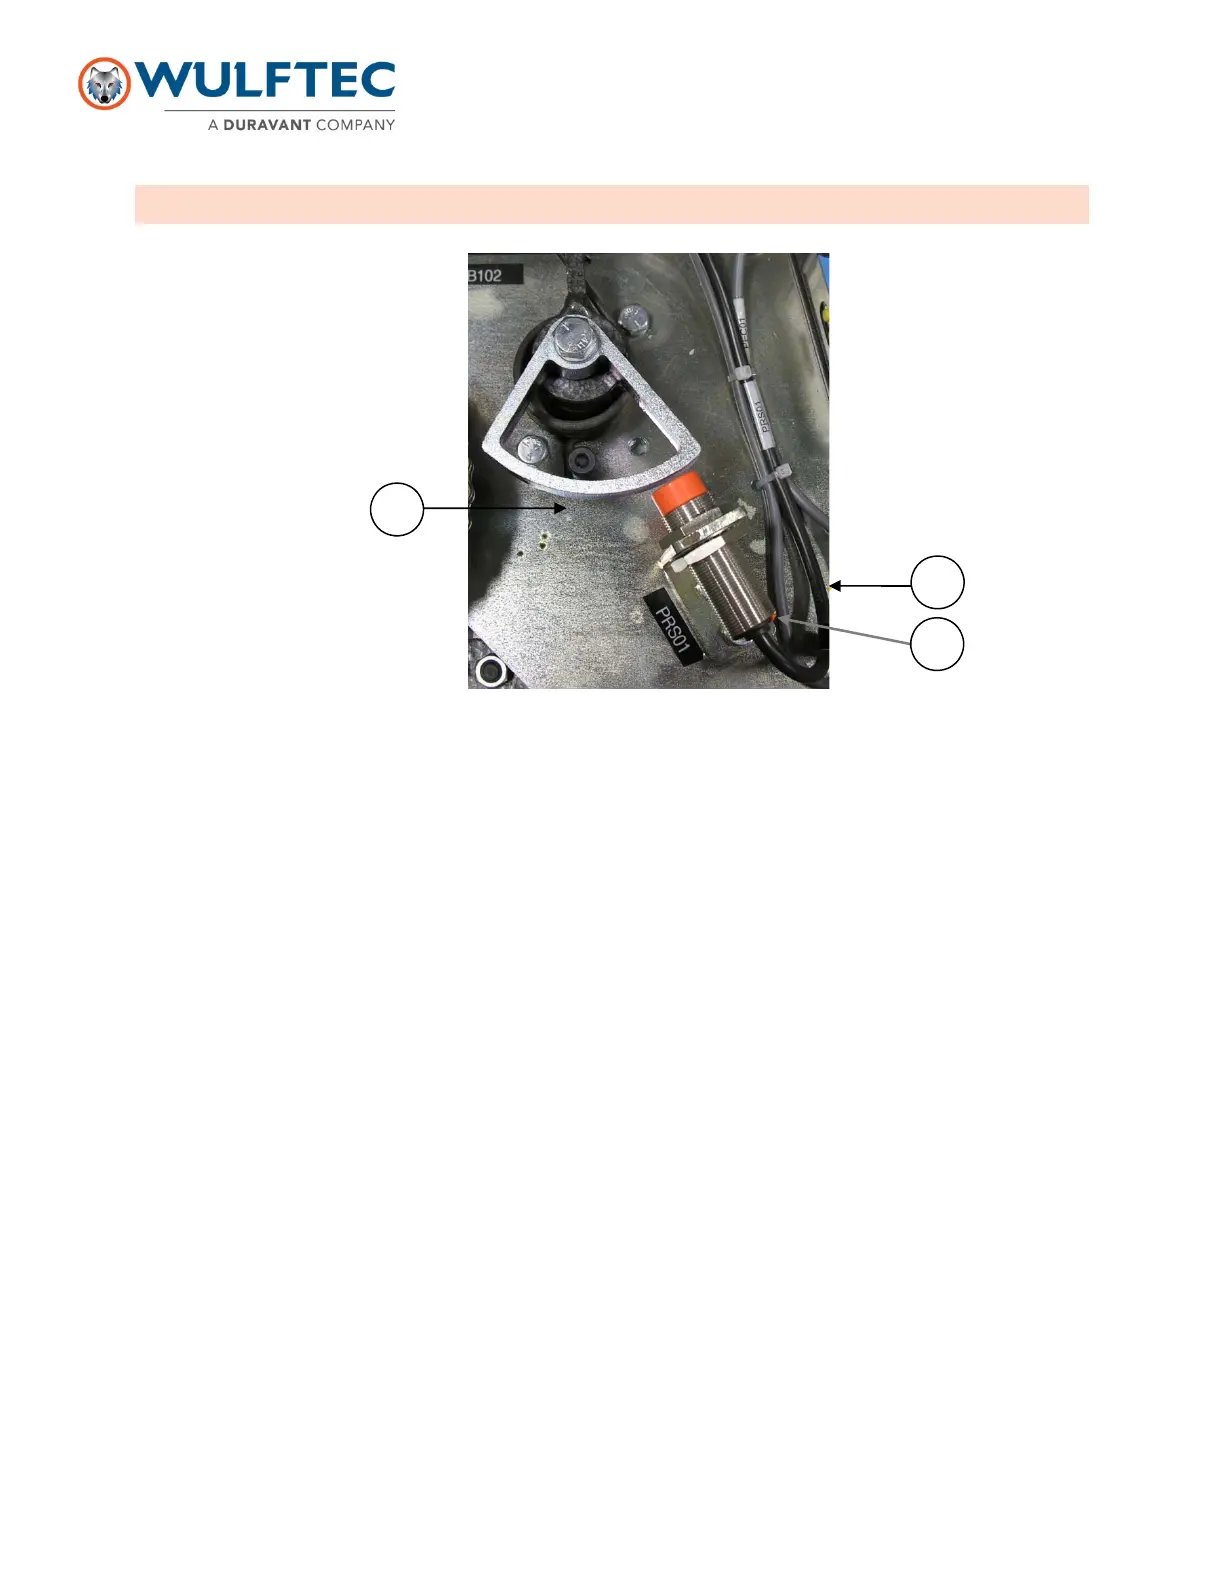
5. Using a ruler, align the right side of the cam with the edge of the analog sensor bracket (A). Tighten the bolt to
secure the cam in place.
6. Loosen the detector, lean it against cam. Then move back gradually until the light on the detector (B) stops
flashing and becomes constant, and then tighten the detector in position
7. Verify the spring tension. The spring should not be too tight, aim for a looser feel. Factory setting: the spring
bracket is perpendicular to the electrical terminal block (C).
8. Rearm the emergency stop circuit (Caution: the pre-stretch motor could restart).
For PowerFlex 523: make sure that parameter T095 is set to 10.
9. Make sure that when the dancer bar is completely retracted with its initial position, the motor does not turn, and
when the dancer bar is moved gently, the motor starts gradually. If the motor turns in initial position (too far from
the cam), or it starts too far (too close from the cam), loosen the nuts and readjust the analog sensor slightly. If
you need to readjust the analog sensor, make sure to activate the emergency stop to prevent injuries to
technicians or damage to machine.
10. When all adjustments are completed and satisfactory, reinstall the carriage cover.
11. Install film roll
Note: When the light on sensor is constant, the sensor is reading correctly. However, when it is flashing, it means it is
out of range for detection.
C
B