6
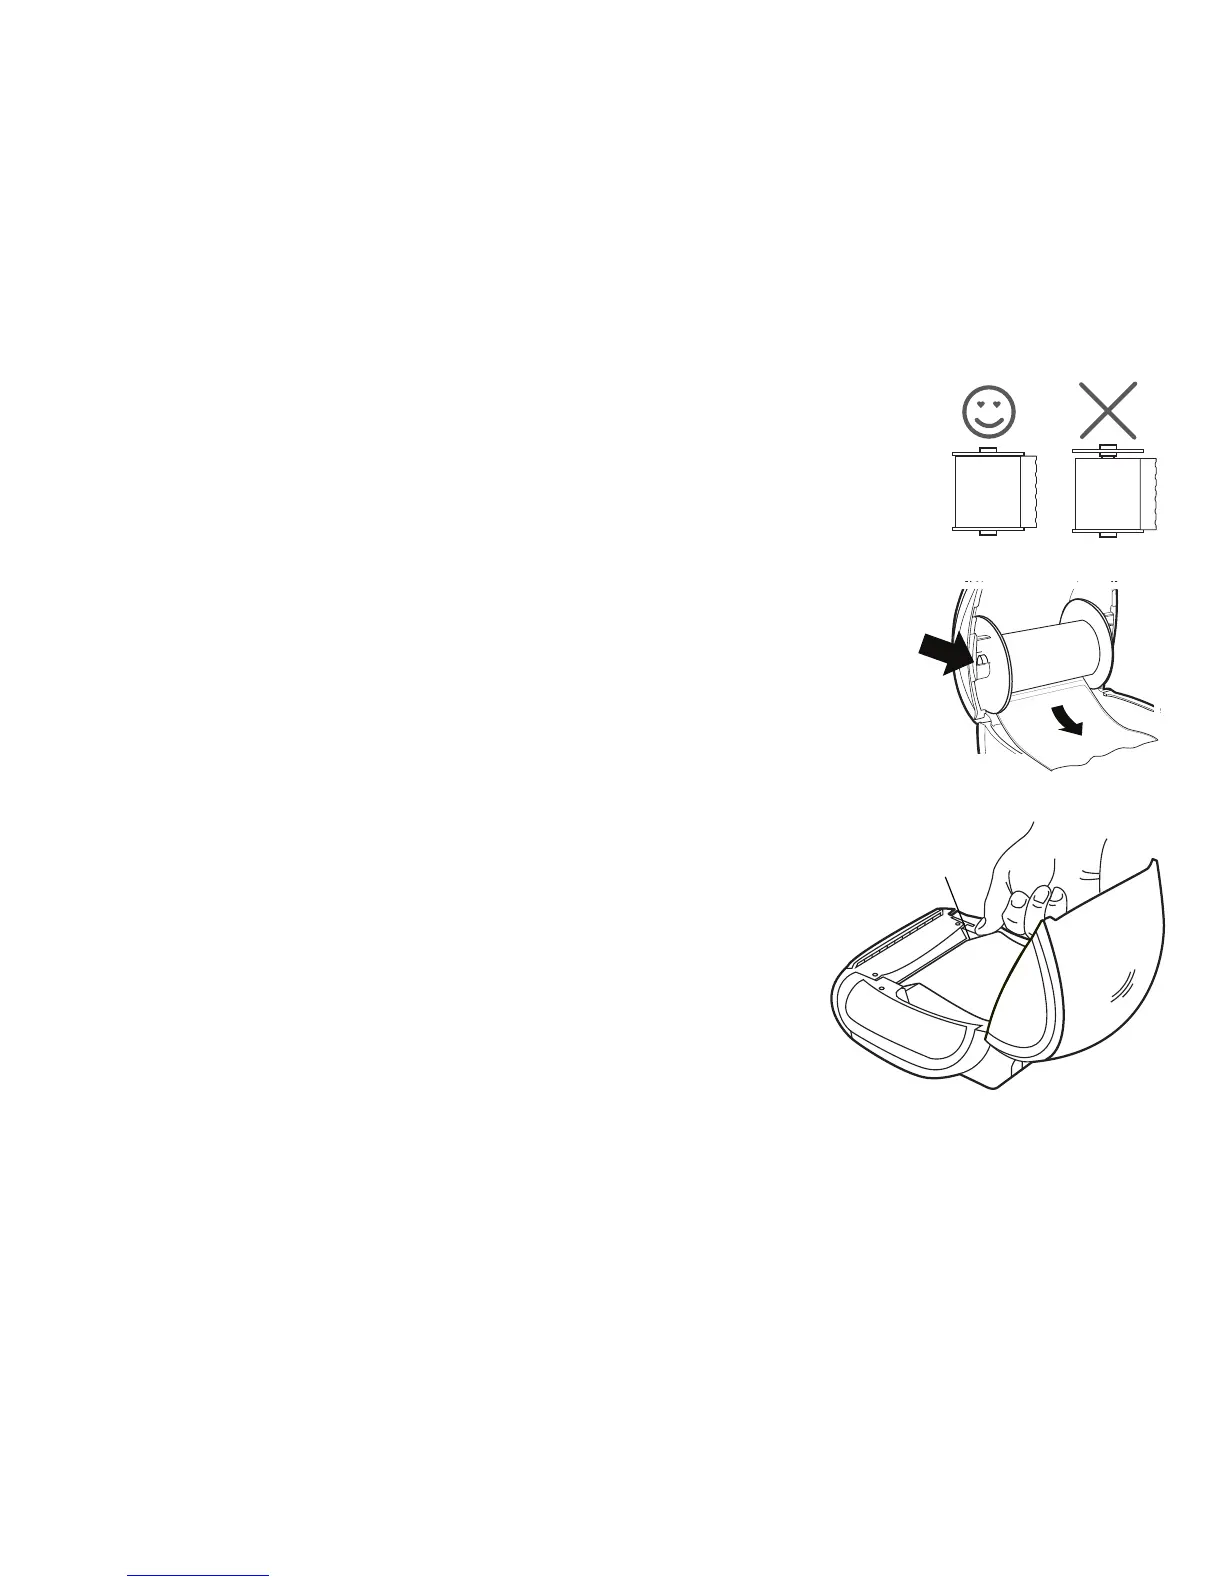
5 Slide the spool guide onto the right side of the spool and
press the guide tightly against the side of the label roll,
leaving no gap between the roll and the spool. See Figure 6.
NOTE To ensure proper feeding of labels during printing, the
label roll must fit snugly against both sides of the label spool,
with no gaps.
6 Insert the label spool into the slot in the printer cover with the
labels extending from underneath the roll. See Figure 7.
7 Align the left edge of the label with the left edge of the label
feed slot and insert the label into the slot. See Figure 8.
The printer automatically feeds the label, stopping at the
beginning of the first label.
If the printer does not feed the labels, make sure the first label
is fully inserted and then press the form-feed button.
If the first label on the roll is not a full label, press the form-feed
button to eject the partial label.
8 Carefully lower the top cover.

 Loading...