Installation, Operation and Service Manual LKP Series
© 2020 DynAmp, LLC Page 16
041736 N
Table 4.2
Measuring Head Resistance Chart
LKP-80
CABLE TO "A" HALF OF MEASURING HEAD
24 & 29 21-22 Coil Circuit - Channel #1A
Coil Circuit - Channel #2
26 & 31 10.5-12 Coil Circuit - Channel #3
Coil Circuit - Channel #4
28 & 33 21-22 Coil Circuit - Channel #5A
Hall Current - Channel # 1, 2,3, 4
11 & 12 240-550 Hall Signal - Channel #1
15 & 16 240-550 Hall Signal - Channel #3
17 & 18 240-550 Hall Signal - Channel #4
CABLE TO "B" HALF OF MEASURING HEAD
52 & 58 21-22 Coil Circuit - Channel #5B
49 & 55 10.5-12 Coil Circuit - Channel #6
50 & 56 10.5-12 Coil Circuit - Channel #7
51 & 57 10.5-12 Coil Circuit - Channel #8
48 & 54 21-22 Coil Circuit - Channel #1B
46 & 44 750-1000 Hall Current - Channel # 5, 6, 7, 8
36 & 37 240-550 Hall Signal - Channel #5
38 & 39 240-550 Hall Signal - Channel #6
40 & 41 240-550 Hall Signal - Channel #7
42 & 43 240-550 Hall Signal - Channel #8
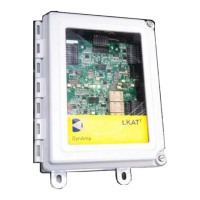
4.7 METERING UNIT INSTALLATION
The location of the Metering Unit should be determined by the following factors:
A.) An indoor location where the ambient air temperature is within -20°C to +55°C at all
times should be used.
B.) The location should be within reach of the Measuring Head cable length to be routed.
C.) The location should be approximately 8 feet (2.5 meters) or more from high current bus
bars. (Some installations have been made much closer to high current buses without
difficulty, but the distance given is on the safe side.)
D.) Mount the Metering Unit on a wall, column, instrument panel, or other convenient
location (refer to outline and mounting diagram in the back of the manual).
 Loading...