Page | 14
LEVELING
1. The boiler should be shimmed level.
2. If the floor is damp, it’s recommended that the
boiler be supported on blocks or framing with
a non-oxidizing material (brick, slate, etc.)
above the floor for ease of servicing and to
minimize piping and flue connection
requirements.
JACKETING
1. Verify that the three jacket panels in the box
are the correct size for your boiler. There
should be one top, one left and one right side
panel.
2. Attach the two side panels first and then the
top jacket to overlap the side panels.
a. Use the bolts, nuts and sheet metal
screws provided to fasten the panels to
the boiler.
3. Depending on which side of the boiler you’re
connecting the water return and exhaust to,
punch out the perforated openings on the
side jacket so you’ll have access. Don’t forget
to cap the flue opening that you aren’t using
with a flue cap.
4. Once the jacket panels are installed, affix the
appropriate safety label(s) to the outside of
the jacket and make sure they’re located in
plain sight.
a. These safety labels are included with your
new boiler packet.
PIPING
1. Make sure the jacket top is installed on the
boiler before connecting any piping. If it’s
not, install the top jacket first.
2. Connect piping to the water riser on top of
the boiler and the water return on the
bottom of the boiler.
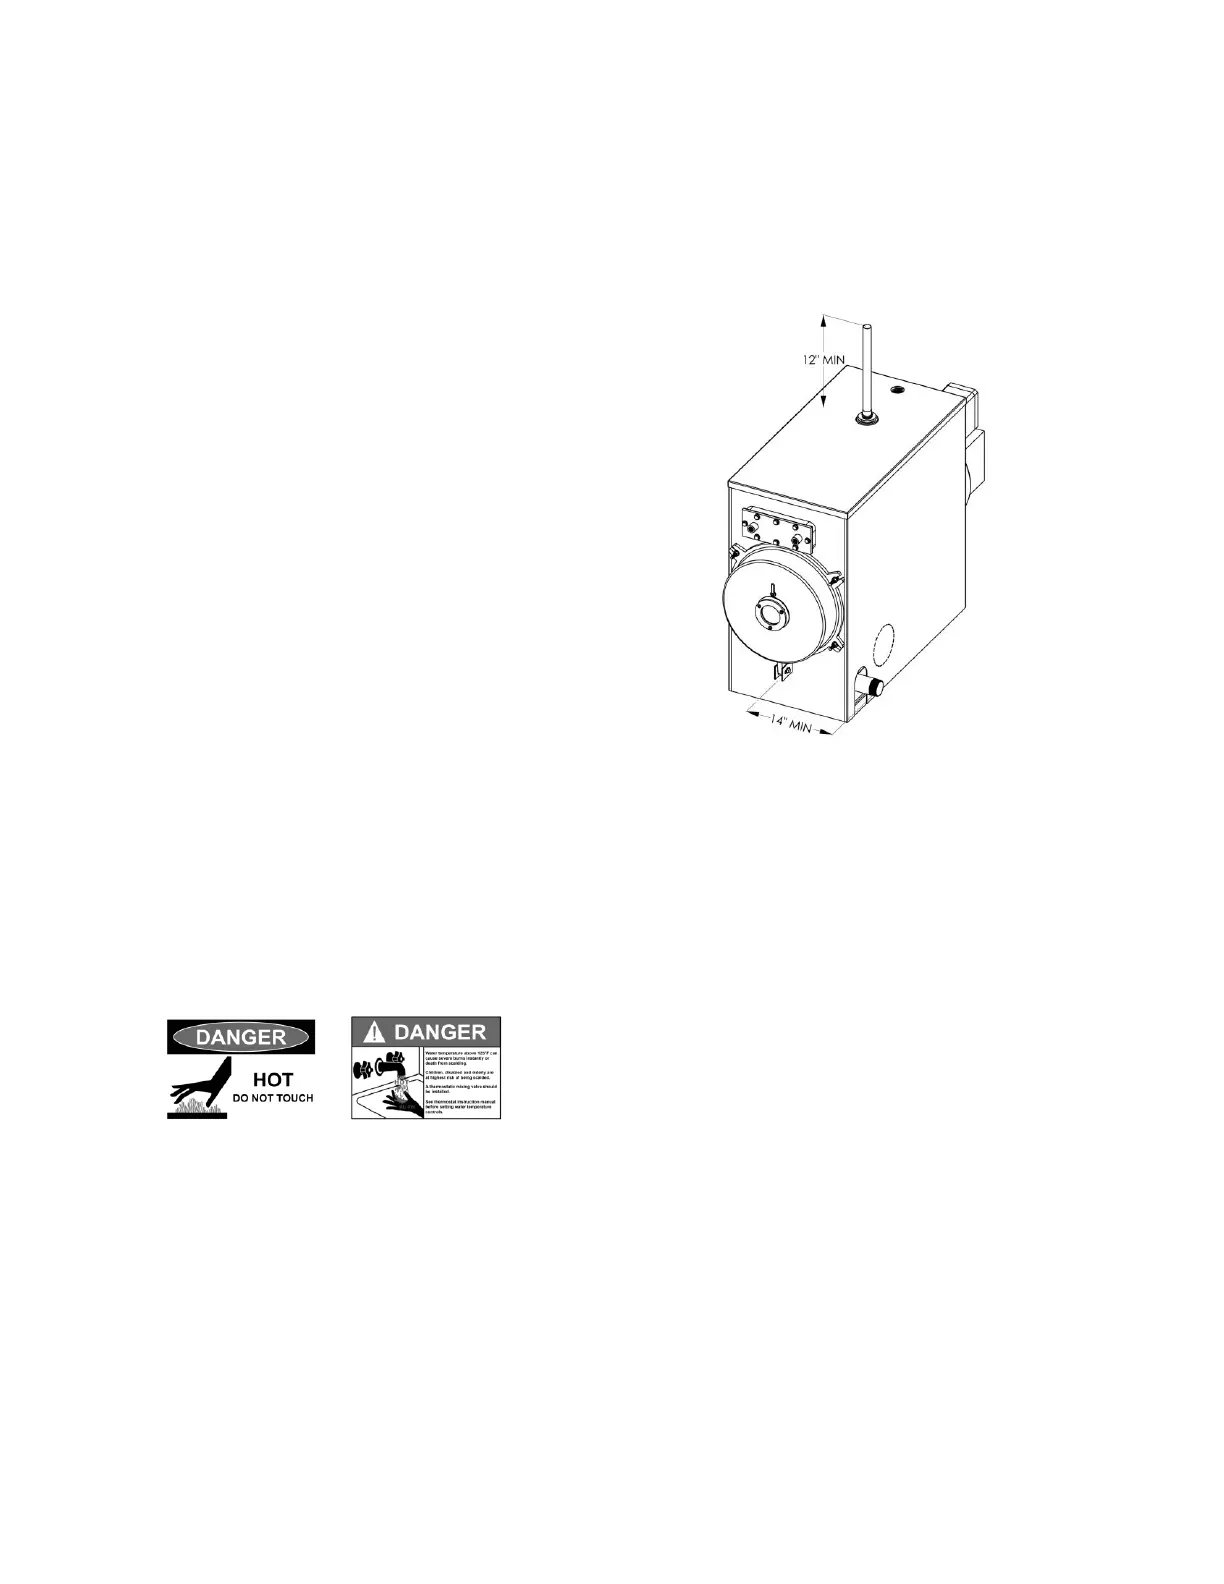
a. The riser should run a vertical distance of
a least 12” above the boiler outlet.
b. The return must run horizontally and be
at least 14” from the center of the boiler
to clear the side jacket panels. A 2” NPT X
12” male pipe nipple is recommended.
c. See Figure 2.
Figure 2
3. The unused water return connection should
be plugged and/or used as a boiler drain.
4. Install a pressure relief valve on top of the
boiler next to the water riser.
a. If a domestic hot water coil is installed on
the boiler, a separate pressure relief valve
should be installed on that line in
accordance with local codes.
5. Connect a discharge pipe to the pressure
relief valve(s) and direct the piping downward
toward the floor.
a. The pressure relief valve(s) and discharge
pipe(s) should be installed in accordance
with local codes.
6. A water make-up circuit should be installed
with the boiler.
7. Fill the boiler and system with water and
check for leaks.
a. If leaks are detected, drain the water and
address the leaks.
b. If no leaks are detected, add boiler water
treatment compounds as recommended
 Loading...