1. Remove the tail section by
removing the six push pins
on the underside of the tail
section.
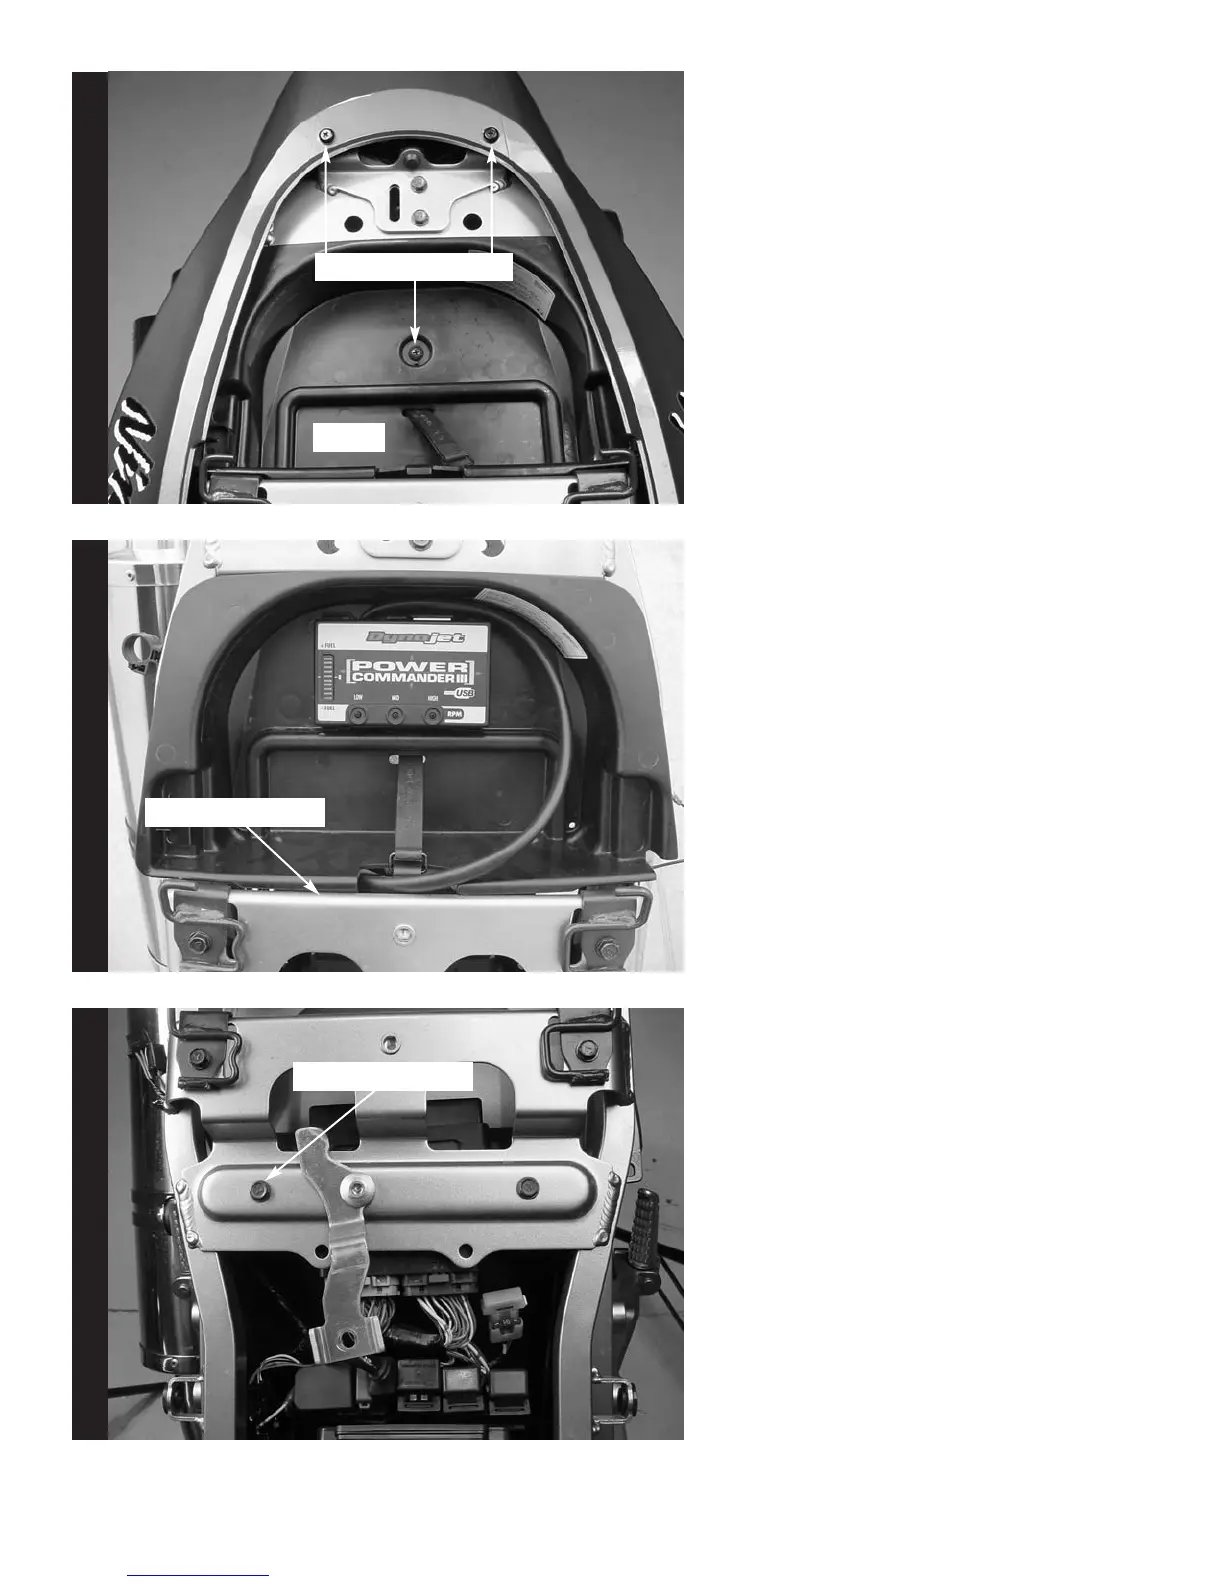
2. Remove the two bolts that
hold the tail section to the
subframe (Fig. A).
3. Pull the tray out of the tail
section. To remove the tray
remove the screw in the cen-
ter of the tray (Fig. A).
Route the PCIII harness
under the frame crossover
and thru the cutout in the
tray (Fig. B).
4. Remove the bolt shown in
Fig. C. This allows the inner
rear fender to be flexed
downwards to allow clear-
ance for the routing of the
PCIII harness.
Fig. AFig. B
Fig. C
2004 Kawasaki ZX6RR - PCIII USB - 2i213-411 www.powercommander.com
Remove these bolts
Remove this bolt
Tray
Frame Crossover

 Loading...