i216-411 www.powercommander.com 2004 Kawasaki ZX12R - PCIII USB - 2
1. Remove the main seat and
the passenger seat
2 Prop the front of the fuel
tank up.
3 Place the Power
Commander in the tail sec-
tion and route the wiring
harness on the inside of the
tail section towards the front
of the bike.
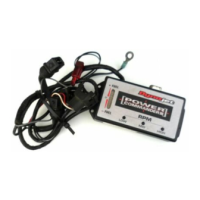
4 Locate the 16 pin grey con-
nector underneath the fuel
tank (Fig. A). Unplug this
connector.
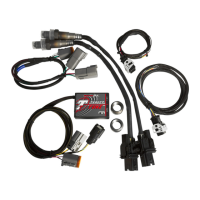
5 Plug the black connectors
from the PCIII in-line of the
stock grey connectors (Fig.
B).
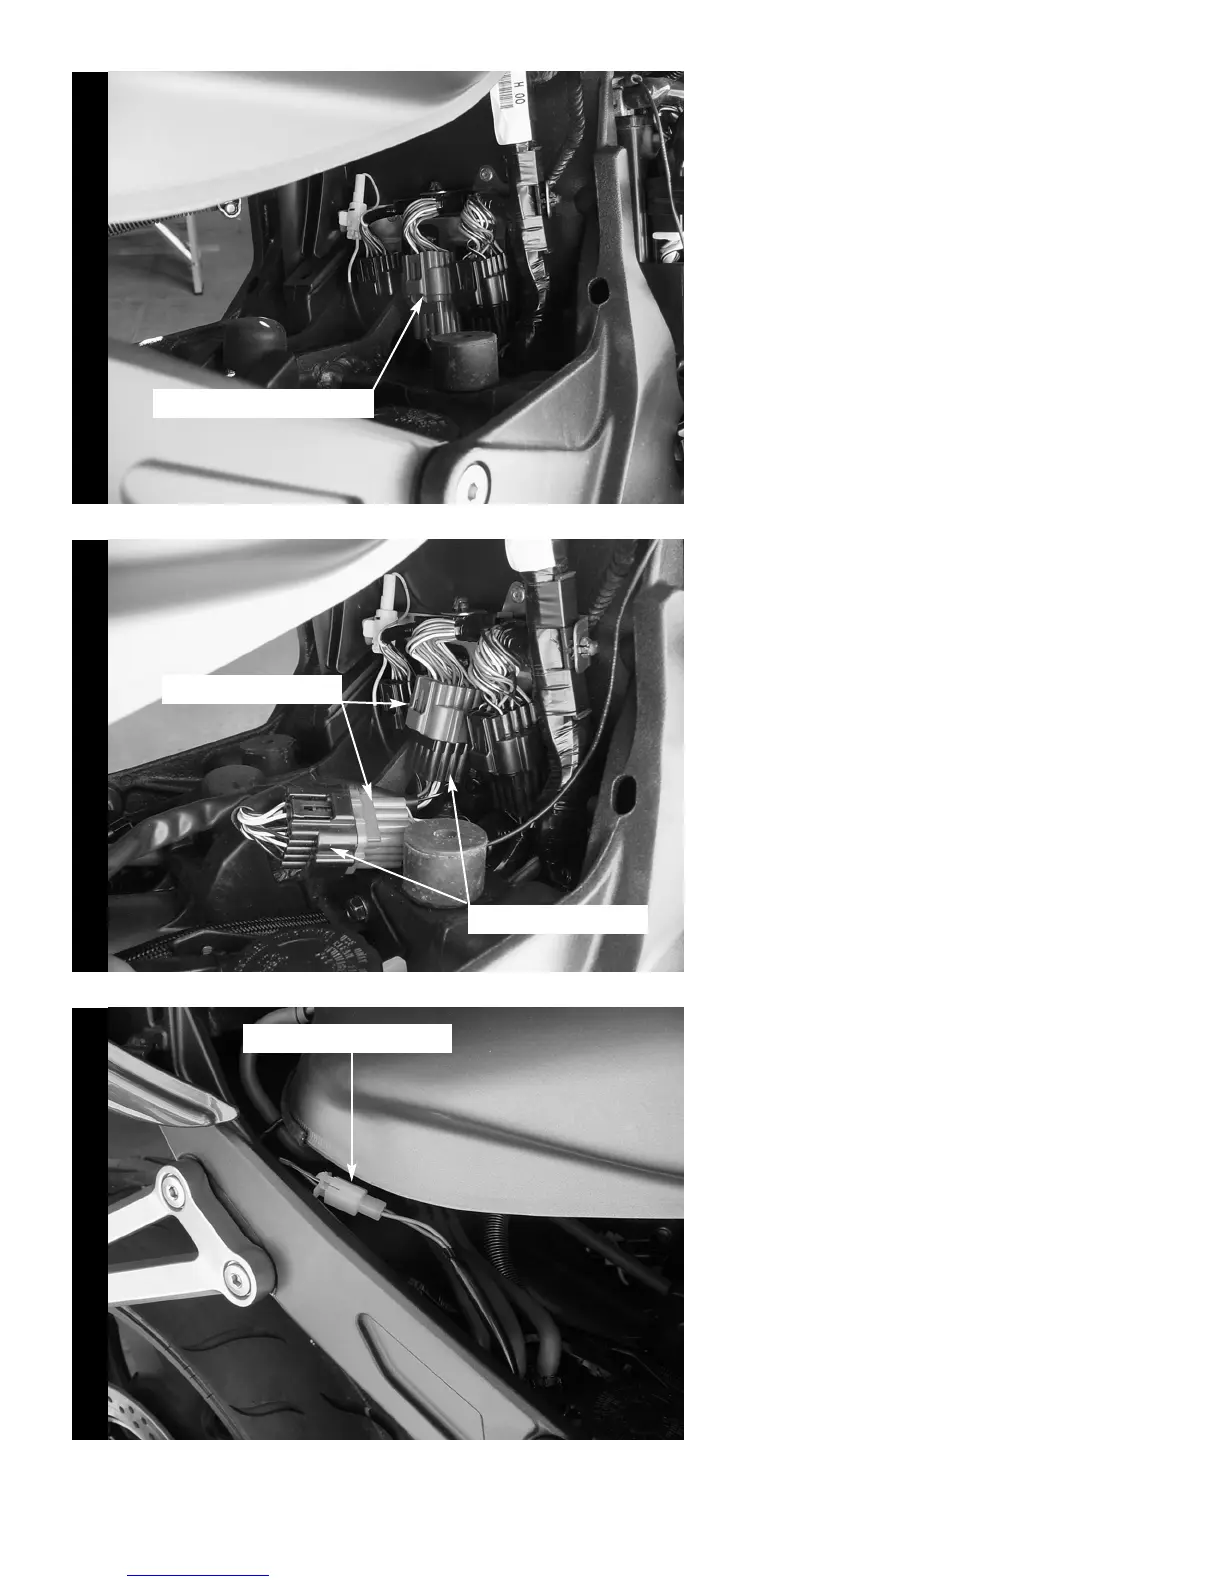
6. Locate the 2 pin white con-
nector underneath the fuel
tank towards the rear of the
bike (Fig. C). Unplug this
connector.
Fig. AFig. B
Fig. C
Unplug this connector
Stock connectors
Unplug this connector
PCIII connectors

 Loading...