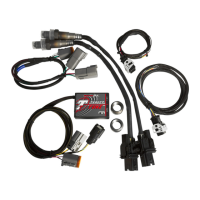
9
O2 SENSOR CONDITION TEST
The Target Tune kit has a built in function which allows
you to test the sensor accuracy and condition.
1 Remove the sensors from the exhaust system and hold in
ambient air.
2 Verify the Target Tune kit has been powered up for at least
1 minute and has a solid light.
3 Press and hold the function button on the front
of the Target Tune kit for 3 seconds to initiate the test on
sensor #1 and release the button once the light begins to
blink rapidly.
4 The LED light will blink rapidly, pause for a moment,
and then begin to fl ash a series of long blinks before
going back to solid. (You may get zero blinks before
going completely solid, which would indicate a perfect
condition if at or near sea-level.)
5 Count the number of long blinks and refer
to the chart.
6 Initiate the test a second time to get results for sensor
#2.
7 Retest the sensors if there is any question as to the purity
of the air during the test.
O2 SENSOR CONDITION TEST
PROGRAMMING THE ECM
Target Tune requires a special calibration to be fl ashed to your ECM in order to function properly. You will need to
send an e-mail request to pvtech@dynojet.com. Calibrations submitted to make the Target Tune function properly can
be:
• Copy of original or current tune
• Custom tunes
• Pre-confi gured tunes from Dynojet
The original tune that is being modifi ed to work with Target Tune should be as optimal as possible for the engine and
modifi cations that you are using. This means if you have a very unique or radical engine build, you may need to have
a more optimal starting point tune developed by other means before Target Tune can work effectively. This might be a
tune developed by a professional dyno tuner, a tune custom made by Dynojet staff, or a tune developed by Auto-tune
Basic or Auto-tune Pro methods.
Note: The Target Tune module can be utilized for AutoTune Pro tuning methods on most models.