This document is a user manual for the Dyson Purifier Humidify+Cool, also referred to as the Dyson Purifier Humidify+Cool Formaldehyde™ in some contexts, indicating a potential variant with enhanced formaldehyde sensing capabilities. It outlines the device's functions, usage, and maintenance procedures.
Function Description:
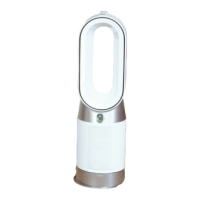
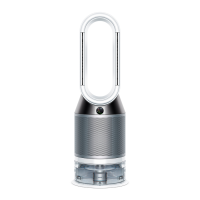
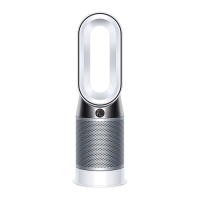
The Dyson Purifier Humidify+Cool is a multi-functional appliance designed to improve indoor air quality and comfort. Its primary functions include air purification, humidification, and cooling. The device intelligently adjusts its settings based on real-time environmental data collected by onboard sensors. It monitors various air quality metrics, including particulate matter (PM10 and PM2.5), nitrogen dioxide and other oxidizing gases, volatile organic compounds (VOCs), temperature, and humidity. This comprehensive monitoring allows the machine to react to changes in the environment and maintain optimal conditions. The purification system utilizes a HEPA+Carbon filter to capture microscopic particles, allergens, and harmful gases, while a permanent catalytic filter (in the Formaldehyde™ variant) continuously traps and breaks down formaldehyde molecules into water and CO2. The humidification function adds water vapor to the air to maintain a comfortable humidity level, and the cooling function provides airflow for personal comfort.
Usage Features:
The device can be controlled via a remote control or through the Dyson Link app, offering flexibility in operation.
- Getting Started: The manual provides clear instructions for assembling the machine, which involves fitting the HEPA+Carbon filter into the outer covers and positioning them onto the base. For the Formaldehyde™ variant, a catalytic filter is also fitted directly to the base. The remote control should be placed on top of the machine with buttons facing down.
- Connecting to the Dyson Link App: Users can download the Dyson Link app from the App Store or Google Play to gain full control over the machine. The app offers step-by-step setup, support, real-time air quality monitoring with visual updates, and automatic software updates.
- Filling the Water Tank: Detailed steps are provided for filling the water tank. Before removal, humidification modes should be turned off and the tank emptied. The cap, which contains power connections, must be kept dry and wiped thoroughly if wet. The tank is removed by pressing release buttons, carried by its handle, and filled to the Max level with cold tap water after unclipping the cap. After refilling, the cap is secured, ensuring it's dry, and the tank is slid back into place until it clicks.
- Power and Continuous Monitoring: The Stand-by on/off button on the machine or remote control stops the machine but allows it to continue monitoring air quality. Continuous monitoring, turned off by default, can be activated by pressing and holding the Auto mode button on the remote for 5 seconds. When active, it gathers air quality, temperature, and humidity data, displayed on the LCD screen and in the Dyson Link app.
- Wi-Fi Connectivity: Wi-Fi is on by default and can be toggled by pressing and holding the Stand-by on/off button on the machine for 5 seconds.
- Information Menu: The information button on the remote allows users to scroll through monitored data on the LCD screen, including air quality (12 seconds and 24 hours), indoor temperature, particulate matter (PM10 and PM2.5), nitrogen dioxide and other oxidizing gases, indoor humidity, filter life, evaporator status, Wi-Fi connection status, and volatile organic compounds (VOCs).
- Auto Purify Mode: In this mode, onboard sensors intelligently adjust settings based on air quality. The machine pauses when target air quality is reached and reactivates when levels drop. Airflow speed increases until target air quality and temperature are met.
- Auto Humidify Mode: Similar to auto purify, this mode uses sensors to adjust settings based on room temperature and humidity. The machine pauses when target humidity is reached and reactivates when levels drop. Airflow speed increases until the target humidity level is met. This mode can be turned off or humidity levels adjusted manually using the Humidity control button.
- Oscillation: The oscillation button allows users to select angles of 0°, 45°, 90°, or Breeze mode. Oscillation can be paused and resumed by pressing the button, and the direction can be reset to the center by pressing and holding for two seconds.
- Airflow Speed and Direction: Airflow speed can be increased or decreased using the dedicated button. The airflow direction button changes the flow from front to back, allowing for Fan mode (front airflow for purifying and cooling) or Backwards airflow mode (back airflow for purifying without cool air). Settings can be personalized via the Dyson Link app.
- Sleep Timer: The sleep timer allows the machine to turn off automatically after a selected amount of time. Users can scroll through time options and cancel the timer by selecting the cancel option.
- Night Mode: In Night mode, the machine continues to monitor and respond to changes in air quality and temperature using its quietest settings, with the LCD screen dimmed. If Auto purify or Auto humidify mode is set, airflow speed is reduced to a range of 1 to 4. Night mode settings can be personalized in the Dyson Link app.
Maintenance Features:
Regular maintenance is crucial for optimal performance and longevity of the Dyson Purifier Humidify+Cool.
- Deep Cleaning Your Machine: Regular deep cleaning is essential to remove mineral build-up, especially in hard water areas or after long periods without humidification. The machine will alert users when a deep clean is needed via the LCD screen or Dyson Link app.
- Step 1: Remove the water tank: Press the Deep clean cycle button, follow LCD instructions, push outer cover release buttons to remove covers, then push water tank release buttons and slide out the tank. Unclip the cap.
- Step 2: Remove the evaporator: Take out the evaporator from the machine, place it in the water tank, and refit the cap.
- Step 3: Make a descaling solution: Carry the water tank to the tap. Remove the cap and evaporator. Fill the tank halfway with cold tap water, add 150g of citric acid, and agitate until dissolved. Place the evaporator back in the tank and fill to the Max level with cold tap water.
- Step 4: Replace the cap: Secure the cap clips, wipe off excess water, and ensure the cap is completely dry.
- Step 5: Replace the tank: Slide the water tank back into the machine until it clicks. Press the Deep clean cycle button when prompted, and the cycle will start with a countdown timer on the LCD screen.
- Step 6: Remove the water tank (after deep clean): Once the LCD shows the deep clean is complete, push water tank release buttons, slide out the tank, and carry it to the tap.
- Step 7: Rinse: Unclip the cap, remove the evaporator, and rinse both under cold tap water. Wipe away excess water and debris. Rinse the water tank to remove any excess solution and debris.
- Step 8: Refill: Refill the water tank to the Max level, wipe off excess water, and replace the cap, ensuring clips are secured.
- Step 9: Reassemble: Push the evaporator back into its secure position in the machine. Close the inner door and replace the outer covers. Ensure the cap is completely dry. Slide the water tank back into place securely.
- Changing Your HEPA+Carbon Filter:
- To change the filter, push down on the buttons on either side of the machine to release the outer cover. Push down on tabs to remove the old filter.
- Push the replacement filter into the outer cover, ensuring tabs click into place.
- Position the outer covers onto the machine and push firmly until both click securely.
- Plug in and switch on the machine.
- Resetting Your Filter Life: After replacing the filter, it's important to reset the filter life. Press and hold the Night mode button on the remote control. The LCD screen will count down from five, then return to the default screen, indicating the filter life has been reset.
- General Cleaning: If the machine is dusty, wipe it with a damp lint-free cloth. Check for blockages in the air inlet holes on the filter and the small aperture inside the loop amplifier. Use a soft brush to remove dust and debris. Do not use detergents or polishes.
- Alerts: The manual describes two types of alert icons:
- Continuous alert icon: If this appears, switch off and unplug the machine, wait 10 seconds, then plug it back in and switch it on. If the alert persists, contact Dyson.
- Temporary alert icon: If this appears and then disappears, continue using the machine. For any other alert icons, contact Dyson for advice.