For more information visit: www.eaton.com IB01602008E
Instructional Booklet
Page 36 Effective: March 2014
ATC-300 Breaker Based Transfer Switch
Section 10: ATC-300 Controlled ATS
Quick Start Instructions
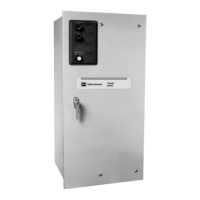
Step 1: Mount the ATS on a flat rigid surface (Figure 37). Shim if
necessary. For seismic mounting requirements, check the
main instruction sections of this manual.
Figure 37.Mounting Details.
Step 2: Install the power cables. Cables must be sized and
installed per National Electrical Code, refer to NFPA70.
The cables must be sized within the specified cable size
range on the side of the cable connectors.
Connect the cables and torque to the correct value indicated on
the label near the lugs in the following order:
1. Load Cables* (T1, T2, T3);
2. Source 1 or Utility Supply (N1, N2, N3); and
3. Source 2 or Generator Supply (E1, E2, E3).
For 4 pole transfer switches, connect the load cables (TN), Source
1 or utility supply (NN), and Source 2 or generator supply (EN).
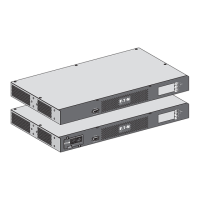
Refer to Figure 38 for the location of all parts discussed in this
document.
* Load cables on switches using the vertical design MUST be
connected and torqued BEFORE installing the SUPPLY cables
(Figures 38 and 39).
WARNING
THESE QUICK START INSTRUCTIONS ARE NOT A COMPLETE
SOURCE OF INFORMATION ON THE ATC-300 CONTROLLED ATS
EQUIPMENT. INSTALLATION SHOULD NOT BE STARTED UNTIL THE
ENTIRE INSTRUCTION BOOK HAS BEEN REVIEWED AND UNDER-
STOOD. FAILURE TO FOLLOW THE FULL INSTRUCTIONS CAN
RESULT IN DEATH, SEVERE PERSONAL INJURY, OR PROPERTY
DAMAGE.
WARNING
THESE QUICK START INSTRUCTIONS ARE PROVIDED FOR USE
ONLY BY TECHNICIANS HIGHLY FAMILIAR AND EXPERIENCED WITH
ATC-300 CONTROLLED ATS EQUIPMENT INSTALLATION, SET UP,
AND TESTING. IT IS STRONGLY SUGGESTED THAT THE FULL
INSTRUCTIONS BE FOLLOWED FOR ALL INSTALLATIONS, SET UP,
AND TESTING.
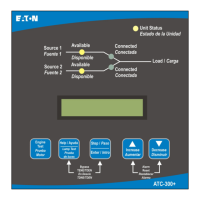
Source 1
Source 2
Available
Available
Connected
Connected
Load
Unit Status
Alarm
Reset
Engine
Test
Lamp
Test
Help
Step
Enter
Bypass
TDNE / TDEN

 Loading...