IB01602008E For more information visit: www.eaton.com
Instructional Booklet
Effective: March 2014 Page 19
ATC-300 Breaker Based Transfer Switch
Section 4: Installation and Wiring
4.1 General
Eaton ATSs are factory wired and tested. Installation requires sol-
idly mounting the enclosed unit and connecting power cables and
auxiliary pilot circuits. Physical mounting procedures and power
cable connections are covered in this section. All other required
wiring or electrical connection references are covered in a sepa-
rate Customer Wiring Booklet packaged with the ATS.
Locate the wiring schematic, review it, and keep it readily avail-
able for reference purposes during installation and testing. Once
an ATS is properly installed and wired, it should be mechanically
and electrically checked for proper installation and operation. The
procedures for these initial mechanical and electrical checks are
outlined in Section 6 of this instruction manual.
TO FACILITATE THE PROCEDURES DESCRIBED IN THIS SECTION, THE
SOLID STEEL SHIELD OVER THE POWER PANEL SHOULD BE
REMOVED. THE SHIELD IS ATTACHED TO THE RATCHET ASSEMBLY
WITH FOUR SCREWS. REMOVE THE FOUR SCREWS AND SHIELD
UNTIL THE PROCEDURES ARE COMPLETED.
BE CERTAIN THAT THE SOLID STEEL POWER PANEL SHIELD IS PROP-
ERLY INSTALLED BEFORE THE TRANSFER SWITCH EQUIPMENT IS
PUT INTO SERVICE. THE SHIELD PROVIDES PROTECTION FROM DAN-
GEROUS VOLTAGES AT THE LINE AND LOAD TERMINALS WHEN THE
EQUIPMENT IS IN OPERATION. FAILURE TO DO SO COULD RESULT IN
PERSONAL INJURY OR DEATH.
4.2 Mounting Location
Choose a location that offers a flat, rigid mounting surface capa-
ble of supporting the weight of the enclosed ATS equipment. For
standard ATSs, avoid locations that are moist, hot, or dusty.
However, Eaton offers optional enclosure designs that can be
used in special environments. If there are any doubts as to a loca-
tion’s suitability, discuss them with your Eaton representative.
Check to make certain that there are no pipes, wires, or other
mounting hazards in the immediate mounting area that could cre-
ate a problem.
Carefully remove all packing material from the ATS at the mount-
ing location. Even though an equipment inspection should have
been made when the equipment was received, make another care-
ful inspection of the enclosure and the enclosed ATS components
as the packing material is removed and the enclosure readied for
mounting. Be especially alert for distorted metal, loose wires, or
damaged components.
4.3 Mounting Procedure
SINCE THE ENCLOSED ATS MUST BE LIFTED INTO PLACE FOR
MOUNTING, BE CERTAIN THAT ADEQUATE RESOURCES ARE AVAIL-
ABLE FOR LIFTING TO AVOID PERSONNEL INJURIES OR EQUIPMENT
DAMAGE.
All vertical design ATS equipment enclosures and power panels
are of the same design. Only the overall physical dimensions
change. Note that the enclosure is provided with four teardrop
(elongated) mounting holes, two in the top mounting flange and
two in the bottom. Also notice that the power panel has two sets
of mounting holes. One set positions the power panel for top
entry of cables and one set for bottom entry. This will be covered
in more detail in Section 4.4.
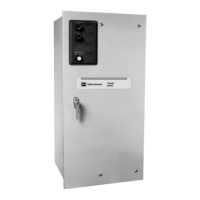
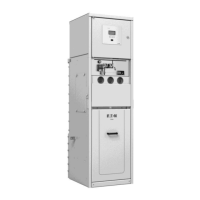
Eaton ATS equipment is assembled and supplied as standard for
top entry (see Figure 17), although equally adaptable to bottom
entry. Cable entry holes are not part of the enclosure when
shipped from the factory and must be provided in the field, either
before or after mounting the enclosure.
EXTREME CARE SHOULD BE TAKEN TO PROTECT THE TRANSFER
SWITCH FROM DRILL CHIPS, FILINGS, AND OTHER CONTAMINANTS
WHEN MAKING THE CABLE ENTRY HOLES. EXTREME CARE SHOULD
ALSO BE TAKEN WHEN MOUNTING THE ENCLOSURE TO PREVENT
COMPONENT DAMAGE OR A FUTURE MALFUNCTION.
Figure 17.Typical (30-150 A) Horizontal Design ATS Equipment
(Door Open).
NOTICE
WARNING
CAUTION
CAUTION

 Loading...