EasyManua.ls Logo

Eaton Cutler Hammer C30CN Series User Manual

Eaton Cutler Hammer C30CN Series
4 pages
To Next Page IconTo Next Page
Page #1 background imageLoading...
Page #1 background image
1
HAZARDOUS VOLTAGE
Disconnect all power before working on equipment.
Electrical shock will cause severe injury or death.
TENSION DANGEREUSE
Coupez l’alimentation avant travailler sur le produit.
Electrocution peut causer de sévères blessures ou la mort.
Description
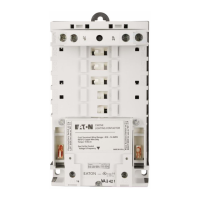
The Cutler Hammer C30CN Series is a magnetically operated
lighting contactor, and is available in both open and enclosed
forms. These contactors are field configurable for up to twelve
poles, with a maximum of eight normally closed “NC” poles.
Figure 1: Mechanically Held Contactor
1 MAIN BASE
1.1 Description
The base of the lighting contactor (see Figure 1) has provisions
to accept power poles at positions “1” to “6”. Provisions are
also provided for up to 2 “NO” and 2 “NC” auxiliary contacts.
1.2 Installation
1. Remove all packing material from the base and all the kits.
2. Contactor must be mounted in the vertical position on a
sturdy support.
3. Additional over-current protection may be required. Refer
to the National Electrical Code or local electrical code as
required.
4. Refer to Section 5.3 and Table D on page 3 for the wire
size and the required torque for the coil terminals.
2 POWER POLES:
C320PRP1 & C320PRP2
2.1 Description
Power poles are available in both single pole (C320PRP1) and
double pole (C320PRP2) versions. A maximum of twelve
poles may be installed on the base. Positions “1” to “4” on the
base can be configured as either normally open “NO” or “NC”
while positions “5” and “6” can be configured as “NO” only.
2.2 Removal and Conversion of Power Poles
1. If installed ensure that all power is disconnected.
2. For multiple possible configurations of the power poles,
refer to Table A below.
Table A
3. Remove block by using a screwdriver to pull the clip as
shown (see Figure 2). Rotate block 180 degrees to convert
from NO to NC or from NC to NO and install per 2.3
below.
Figure 2
2.3 Installation of Power Poles
1. Check moving carrier to assure free movement
2. Install the block by sliding foot into slot; using a
screwdriver pull the clip, and position block onto base.
Release the clip.
3. Check for the lettering on the base. “NO” should be
visible if the power pole is assembled as normally open,
and “NC” should be visible if it is assembled as normally
closed (see Figure 3).
# of NC Contacts Desired (3)
Standard Catalog # C30CNE43A0
WARNING !
!
Main Base
NO Aux.
Contact
NC Aux.
Contact
# of NO Contacts Desired (4)
C30CN Lighting Contactor Series
Instruction Sheet Pub50765
Revision A Page 1 of 4
DEH
-
41043
ECR LT#10001
Question and Answer IconNeed help?

Do you have a question about the Eaton Cutler Hammer C30CN Series and is the answer not in the manual?

Eaton Cutler Hammer C30CN Series Specifications

General IconGeneral
BrandEaton
ModelCutler Hammer C30CN Series
CategoryCircuit breakers
LanguageEnglish

Summary

1 MAIN BASE

1.1 Description

Details the provisions of the lighting contactor base for power poles and auxiliary contacts.

1.2 Installation

Provides steps for mounting the contactor, electrical code references, and torque specifications.

2 POWER POLES

2.1 Description

Describes single and double pole power pole versions and their pole configuration limits.

2.2 Removal and Conversion of Power Poles

Explains how to remove and convert power poles between NO and NC configurations.

2.3 Installation of Power Poles

Details the procedure for installing power poles onto the base, ensuring proper orientation.

2.4 Wiring

Specifies valid wire combinations and material requirements for power poles.

3 AUXILIARY CONTACTS

3.1 Description

Describes single and double pole auxiliary contact blocks and their placement.

4 CONTROL MODULE KITS

4.1 Description

Introduces control module kits for converting to mechanically held type and voltage limits.

4.2 Installation

Details the installation procedure for control modules and latch covers.

4.3 Wiring

Specifies wire size and torque for control module and auxiliary contact block terminals.

5 COIL KITS

5.1 Description

Details the availability of coils for electrically and mechanically held contactors and voltage ratings.

5.2 Installation

Provides instructions for replacing and mounting the coil on the contactor.

5.3 Wiring

Specifies valid wire combinations and torque for coil terminals.

Related product manuals