32
7. Maintaining the PXR trip unit
POWER XPERT® RELEASE TRIP UNIT FOR MAGNUM PXR CIRCUIT BREAKERS MN013015EN January 2022 www.eaton.com
Check to ensure the battery icon is showing full remaining
life in the lower right of the display.
The 3 V lithium battery (CR 2032) is easily removed and
replaced; pull to remove the battery tray, remove the old
battery from the holder, replace with new one (observe
proper polarity as marked on the tray), and then re-insert the
battery tray into the slot on the frame module. Accidentally
installing the battery in the reverse direction will not harm
the battery nor the trip unit but will defeat the function of the
battery. Remember to press the reset button and check the
battery icon in the display.
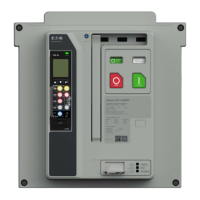
Figure 25. Replacing the battery.
7.4 Changing the breaker rating
Magnum PXR circuit breakers are pre-configured at the
factory for their In rating. The I
n
rating is printed in the lower
right corner of the frame module. A licensed feature of
the PXPM software allows you to modify the rating within
an allowed range based on the breaker construction and
certification. Order kit PXPM-SW-PXRIN-KIT-1 to obtain the
license and new rating labels. You can purchase this online
by navigating to www.eaton.com/PXPM and clicking Get
Licensed Today.
You are responsible to ensure that any rating change is
appropriate for the application and settings specified by
the engineer responsible for the installation. Protection
settings are based on the I
n
rating and affect the time-current
response of the breaker. Modification of the rating requires
re-evaluation of the circuit breaker’s protection settings and
the system coordination to ensure proper application.
To change the current rating (I
n
) on the circuit breaker using
PXPM, start the application and click on the Device Settings
icon. Then click the Change Rated Current (I
n
) icon and you
will see the screen shown in Figure 26. Select an available
rating from the drop down. After you apply the new rating,
remember to apply the correct label from the kit.
Figure 26. Frame Rating Modification screen.

 Loading...