3 Installation
3.1 Installing the receiver unit
Install the receiver unit only inside the vehicle, preferably under
the instrument panel.
Fix the receiver unit using the adhesive pad included in the scope
of supply or with cable ties.
Note
The receiver unit must not be completely enclosed by metal,
especially the antenna area. Ensure that the distance between the
receiver unit and people is >20cm (USA / Canada).
When installing the receiver unit, ensure that there is sufficient
space available for connecting the cable looms.
1 EasyStart Web receiver unit
2 Adhesive pad
3 Fastening tabs
4 Antenna area
3.2 Installing the button
Note
The button included in the scope of supply must be installed.
Discuss the mounting position with the vehicle owner.
When drilling the mounting hole ensure that no important func-
tional components or cables behind the mounting surface are
damaged.
To install the button, drill a Ø 8 hole within the driver's reach in an
easily accessed part of the instrument panel or centre console.
Feed the button cable loom into the hole and clip in the button.
Snap the “Button cable loom” cables into the 3-pin connector
(small parts bag) as shown.
Plug the connector into the 3-pin slot (2nd from right) of the
receiver unit.
Æ
EasyStart Web receiver unit, 3-pin slot
1 BNYE cable
2 BN cable
3 RDYE cable
3.3 Installing the interior temperature sensor
Note
Discuss the mounting position with the vehicle owner.
The temperature sensor
– do not mount near a hot air outlet.
– do not mount in the hot air stream.
– mount in a place protected from draughts.
– mount in a place protected from direct sunshine.
When drilling the fixing or connection hole ensure that no impor-
tant functional components or cables behind the mounting surface
are damaged.
Install the temperature sensor included in the scope of supply to
display or query the interior temperature.
Use a self-tapping screw C2.9×19 to mount the temperature
sensor onto the instrument panel or another suitable place in the
vehicle with concealed or visible lead harness (length 1.5 m).
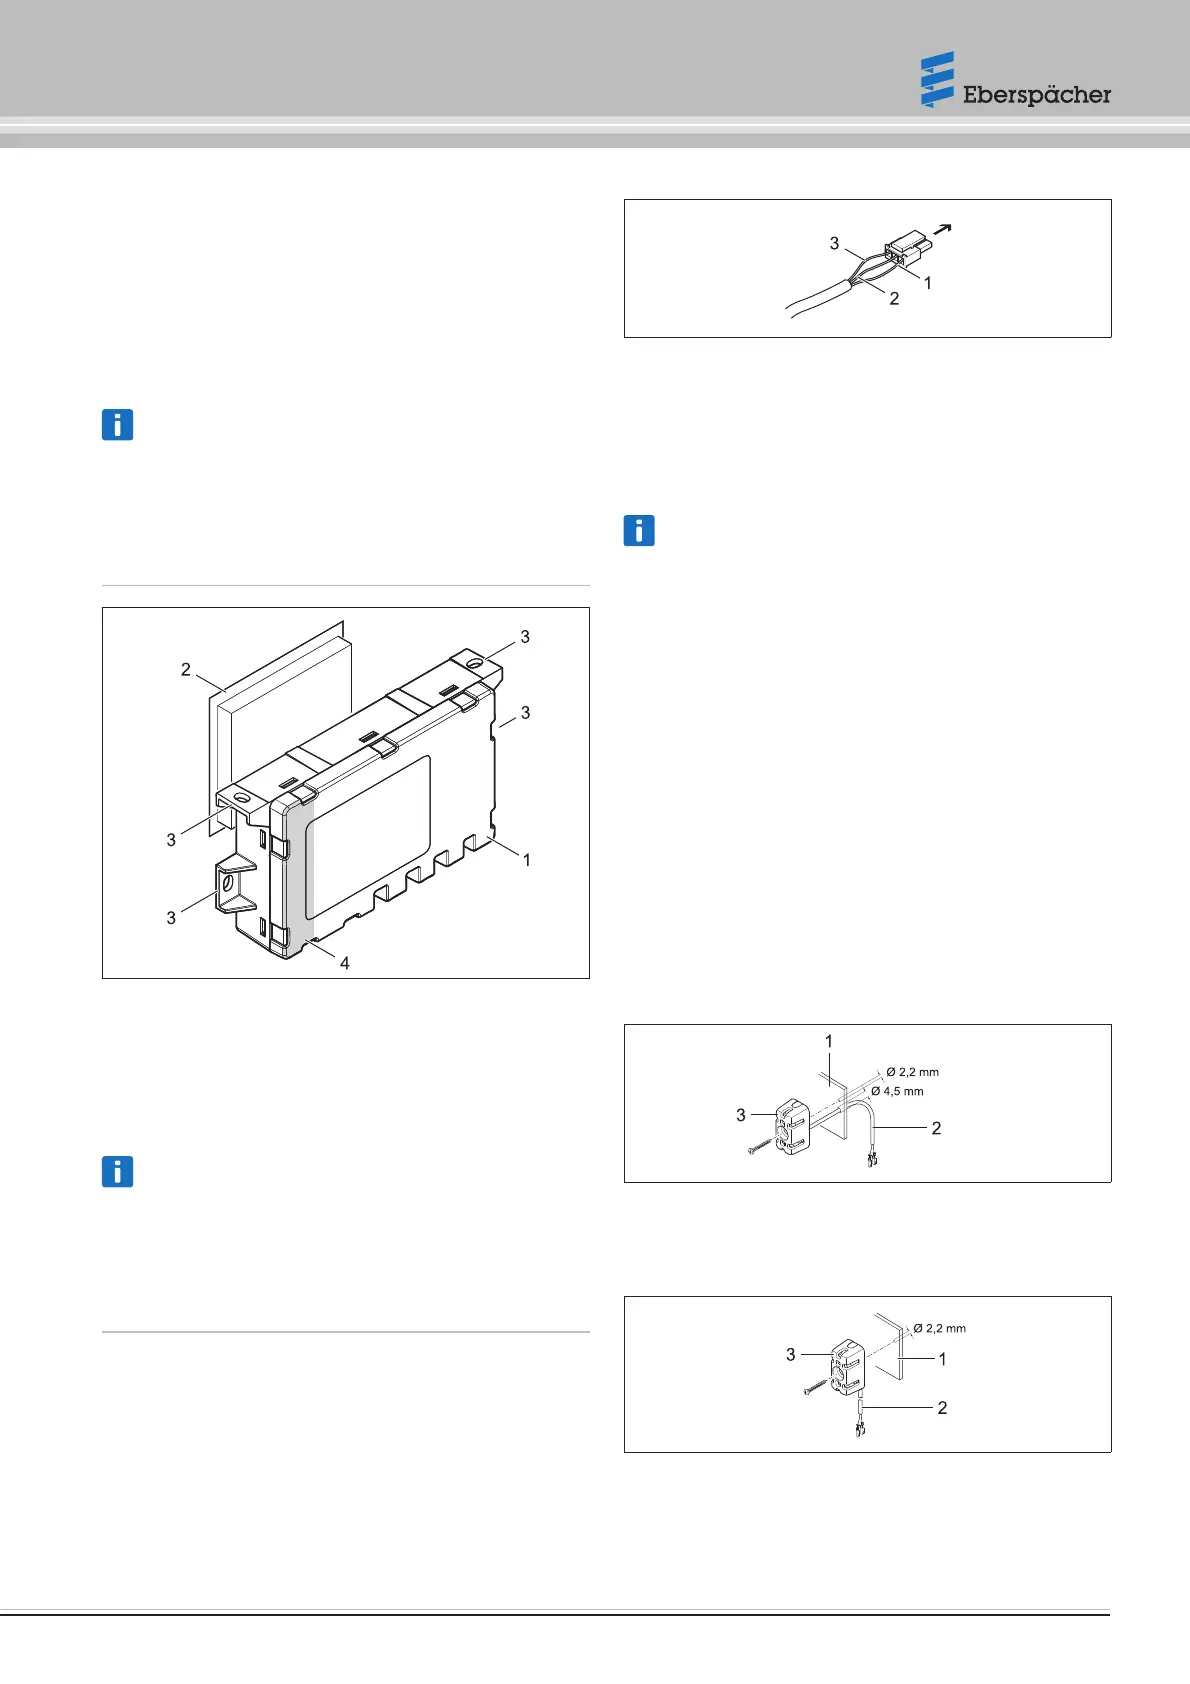
3.3.1 Install the temperature sensor lead harness
Variant 1: Install with lead harness concealed (hole in the instrument
panel).
1 Instrument panel
2 Lead harness
3 Temperature sensor
Variant 2: Install with lead harness visible.
1 Instrument panel
2 Lead harness
3 Temperature sensor
22.1000.34.5106.0D EN | 06.2019 7
Operating instructions | EasyStart Web
 Loading...