EBS Ink Jet Systeme GmbH D-51588 Nümbrecht, Germany, Alte Ziegelei 19-25 ++49 (0)2293/939-0 ++49 (0)2293/939-3 e-mail: mail@ebs-inkjet.de
20 20140417#2.2 edited on 2014.04.17 13
In the example referred to above, only the Offset parameter needs modifying. The default settings can
be used for the other parameters.
Soon after the editing of printing parameters has been finished (acknowledged with the
icon)
the parameters can be saved together as a block. The assigned name of the parameter block is the same as
the name of the active text file.
NOTE:
Not all combinations of the Height and Speed parameters and the matrix height
given as a number of dots
(the Height (pix) printing parameter) are available. Should an unavailable combination be chosen,
a fragment of the following message is displayed in the printer status window:
Increase PRINT.PARAM. Height or
decrease PRINT.PARAM. Speed or
decrease text height [dots].. In order to get the entire message displayed press the
icon.
If the Generator parameter is set to GEN, the printer will make prints regardless of whether an object
moves in front of the print head or not. If the object remains still, the text will be jetted onto one place giving
a vertical line only. While testing the printer where an internal generator is used for timing
, it is advisable to
set the Text rpt. parameter to a higher value.
If the Generator parameter is set to SHAFT, the head will make prints only when a shaft-encoder is con-
nected and its axle rotates (for more details on this optional device refer to section Adjusting the Print Rate
in The
BOLTMARK
®
-series Printer User’s Manual). If this is the case, there may be the need (espe-
cially during trials) to complete printing the current text by turning the shaft-encoder axle manually.
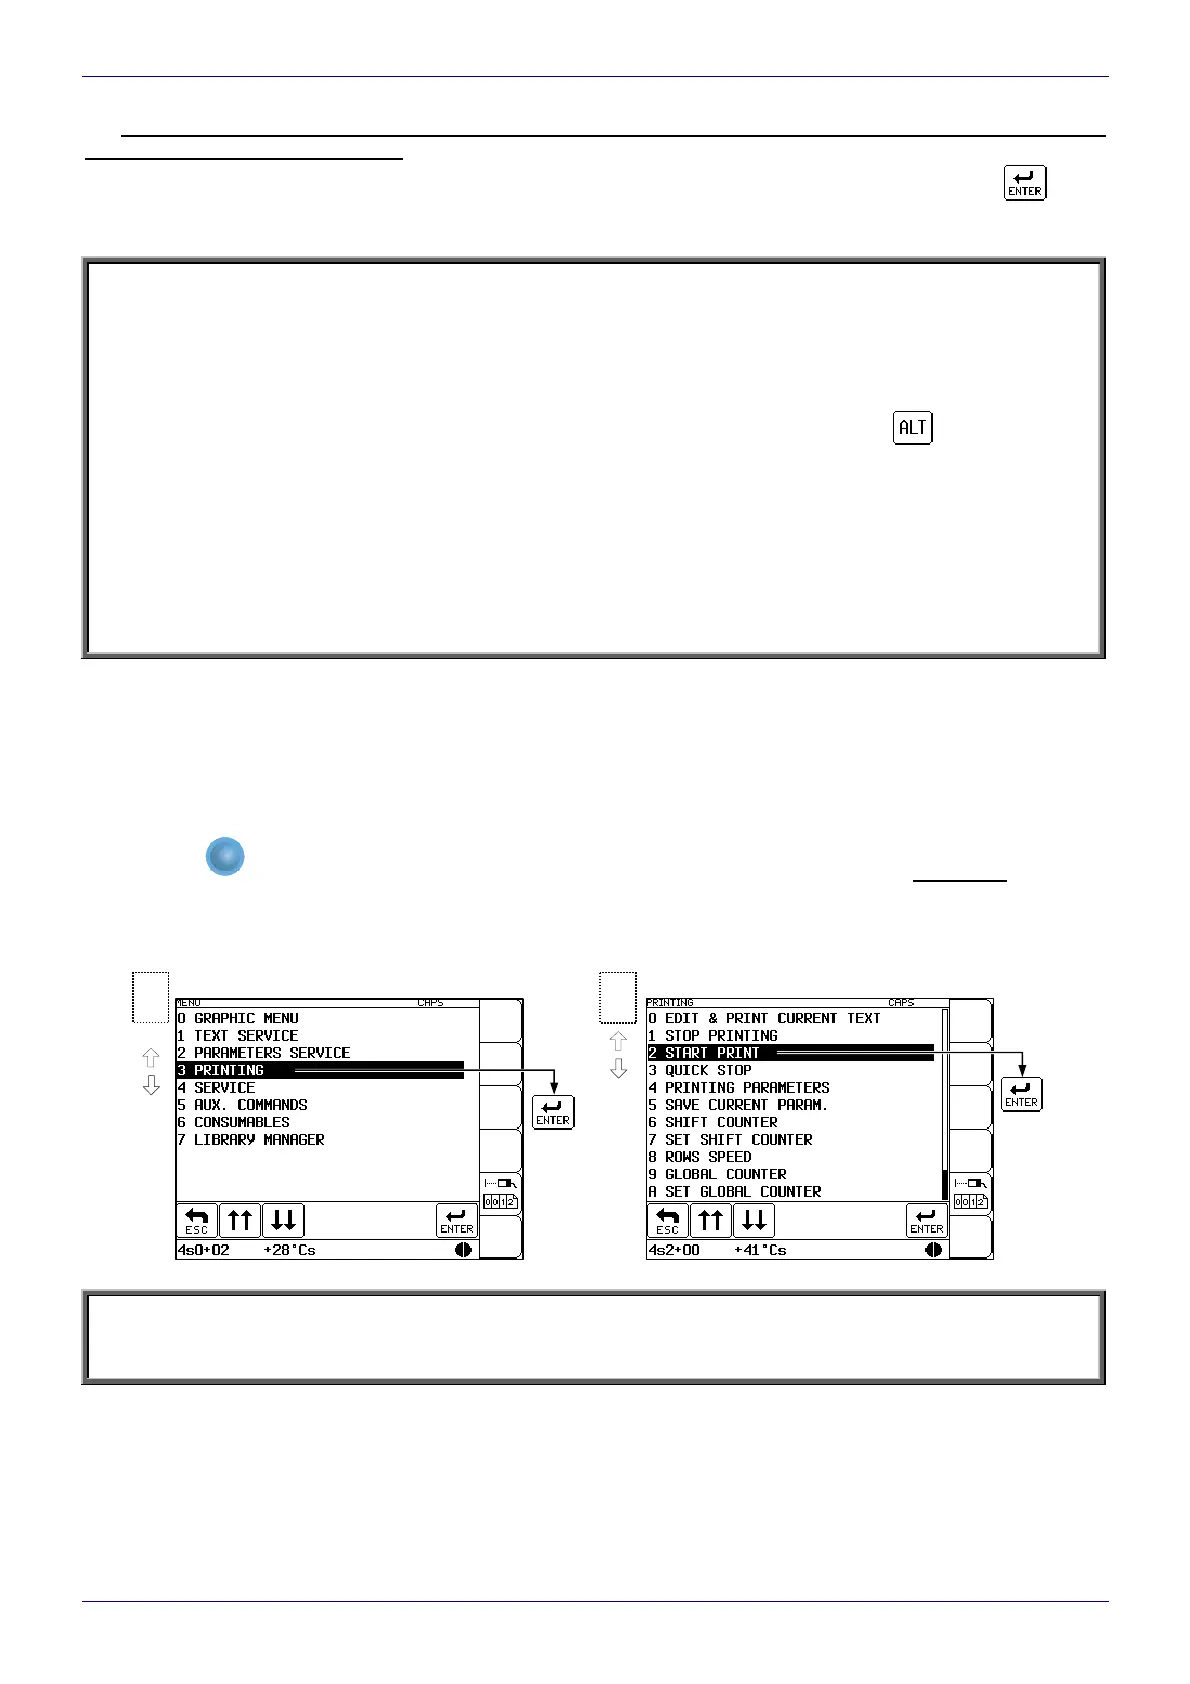
4.6. Printing
4.6.1. Starting Printing
Printing can be initiated in two parallel, independent ways:
With the START PRINT command selected on the terminal (description on the figures below).
With the
PRINT
ON / OFF
key on the operation-panel function pad. When the key is pressed, the active text is printed.
The key can be used no matter where the cursor is positioned within the control menu (for example, you can
start printing while editing a text file).
In order to print the text file called DATE prepared in the example in section 4.4 follow the ste
p given below:
NOTE:
Printing can be initiated only and exclusively when the head cover is installed. An attempt to start printing when
no cover is installed causes the Head cover removed message to be displayed and makes printing impossible.
Printing menu
2
Main menu
1