Do you have a question about the ECS H61H2-M3 and is the answer not in the manual?
Introduces the motherboard and its basic features.
Covers the installation of the motherboard and its components.
Explains how to use the BIOS Setup Utility.
Details how to install and use motherboard software.
Guides users through setting up the eJIFFY feature.
Provides tips for troubleshooting common issues.
Provides an overview and introduction to the motherboard.
Lists the key features of the motherboard.
Details the technical specifications of the motherboard.
Identifies the main components on the motherboard.
Lists essential safety measures before installation.
Guides on selecting an appropriate computer case.
Provides instructions for physically installing the motherboard.
Explains the purpose and functionality of the BIOS Setup Utility.
Discusses the default BIOS settings.
Details how to access the BIOS setup interface.
Describes the contents of the support software disc.
Instructions for automatic software installation.
Introduces the eJIFFY fast boot program.
Addresses issues encountered during initial PC assembly.
Covers problems that arise after extended usage.
Provides advice for maintaining the motherboard.
Provides an overview and introduction to the motherboard.
Lists the key features of the motherboard.
Details the technical specifications of the motherboard.
Identifies the main components on the motherboard.
Lists the key features of the motherboard.
Details the motherboard's chipset.
Mentions additional chips on the motherboard.
Describes the memory support and specifications.
Covers the audio codec and its features.
Lists features of the optional onboard LAN.
Details the available expansion slots.
Describes the integrated input/output ports.
Explains the motherboard's BIOS firmware features.
Details the technical specifications of the motherboard.
Specifies the CPU socket and features.
Details the motherboard's chipset.
Describes the memory support and specifications.
Details the available expansion slots.
Describes storage connectivity options.
Covers the audio codec and its features.
Details the onboard LAN specifications.
Lists the ports on the motherboard's rear panel.
Describes internal connectors and headers.
Lists the features of the system BIOS.
Specifies the motherboard's physical form factor.
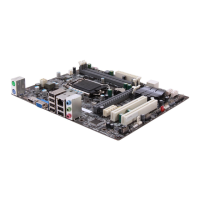
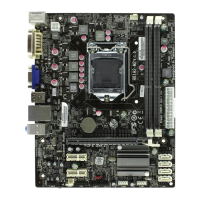
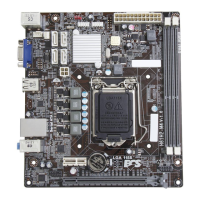
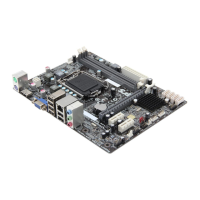
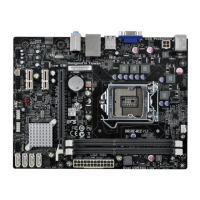
Illustrates and labels the physical components on the motherboard.
Provides a detailed list of motherboard components and their labels.
Lists essential safety measures before installation.
Guides on selecting an appropriate computer case.
Provides instructions for physically installing the motherboard.
Explains how to check and set motherboard jumpers.
Details the procedure for setting jumpers.
Explains how to check and set motherboard jumpers.
Provides specific jumper settings and their functions.
Instructions for installing the CPU onto the motherboard.
Preparatory steps before CPU installation.
Steps to recover from overclocking failures.
Step-by-step guide for CPU installation.
Guide for installing RAM modules.
Table showing DDR3 memory module specifications.
Step-by-step procedure for memory installation.
Details SATA connectors for drives.
Explains front panel USB header connections.
Details the motherboard's expansion slots (PCIe, PCI).
Instructions for installing expansion cards.
Information on the PCI Express x16 slot.
Information on the PCI Express x1 slot.
Information on the standard PCI slots.
Step-by-step guide for installing add-on cards.
Guides on connecting optional motherboard devices.
Details the front panel audio header pinout.
Explains SATA connectors for drives.
Instructions for connecting case components to the motherboard.
Details the connection of the 24-pin ATX power cable.
Details the connection of the 4-pin ATX 12V power cable.
Explains the CPU fan power connector pinout.
Explains the system fan power connector pinout.
Details the ATX 24-pin power connector pinout.
Details the ATX 12V power connector pinout.
Explains the internal speaker connector pinout.
Explains the front panel header pinout and functions.
Describes the function of the hard drive activity LED.
Describes LEDs for power, sleep, and message status.
Explains the function of the reset switch connection.
Explains the function of the power switch connection.
Explains the purpose and functionality of the BIOS Setup Utility.
Discusses the default BIOS settings.
Details how to access the BIOS setup interface.
Instructions for resetting CMOS to default values.
General guidance on navigating the BIOS utility.
Lists keys used for navigating BIOS menus.
Overview of the BIOS main menu options.
Explains the multi-language support in BIOS.
How to view and set system date and time in BIOS.
Details the options available in the Advanced BIOS menu.
Settings for onboard LAN configuration in BIOS.
How to enable/disable the ECS eJIFFY function in BIOS.
Monitors system hardware status like fan speed and voltage.
Displays characteristics of system components.
Configures system power management settings.
Enables system resume via modem activity.
Enables system resume via PCI/PCI-E/LAN activity.
Enables USB device wake-up from S3 mode.
Enables keyboard activity wake-up from S3 mode.
Enables mouse activity wake-up from S3 mode.
Enables or disables EUP support.
Configures ACPI sleep states.
Settings related to the CPU and its features.
Displays CPU model, speed, and core information.
Enables/disables CPUID limit for stability.
Enables/disables Execute Disable Bit for security.
Enables/disables Intel Virtualization Technology.
Controls the processor's energy efficiency mode.
Configures serial SATA options.
Selects the SATA mode (IDE, AHCI, RAID).
Selects Serial-ATA controller options.
Shows status of SATA ports.
Configures USB devices and legacy support.
Enables or disables all USB devices.
Enables or disables legacy USB support.
Configures Super IO chip settings.
Details serial port configuration.
Shows serial port device settings and allows changes.
Settings for North chipset, South chipset, and ME subsystem.
Configuration options for the North Bridge.
Selects the primary graphics adapter.
Shows integrated graphics memory allocation.
Selects the Dynamic Video Memory Technology mode.
Sets memory for DVMT or Fixed mode.
Enables or disables multi-monitor support for integrated graphics.
Explains how to use multiple display devices.
Steps to enable multi-monitor in BIOS.
Steps to configure display settings in Windows.
Configures display devices and extends desktop.
Steps to configure display settings.
Configuration options for the South Bridge.
Configures system behavior after power loss.
Settings for onboard audio.
Enables or disables Azalia HD Audio.
Enables or disables Azalia Internal HDMI codec.
Enables or disables case open warning.
Configuration for the Intel ME Subsystem.
Enables or disables the ME Subsystem.
Settings for clock speed and system bus.
Configuration for the integrated clock chip.
Enables or disables current ICC.
Options for tuning system performance.
Configuration settings related to the CPU.
Controls non-turbo CPU ratio.
Controls CPU current limit for Turbo mode.
Controls the TDP limit for Turbo mode.
Controls Power Limit 2 for Turbo mode.
Controls Power Limit 2 for Turbo mode excursions.
Controls the time window for PL1 value maintenance.
Enables or disables EIST.
Controls Intel Turbo Boost Technology.
Shows core ratio limit values.
Settings related to chipset configuration.
Configuration for memory timing parameters.
Sets CAS Latency for DDR SDRAM.
Sets Row Precharge Time.
Sets RAS# to CAS# Delay.
Sets RAS# Active Time.
Settings for integrated graphics.
Controls internal GFX Turbo mode.
Enables or disables B.O.M.P technology.
Enables automatic detection of DIMM/PCI clocks.
Reduces EMI by enabling spread spectrum.
Sets the command rate for memory.
Adjusts CPU voltage.
Adjusts IMC voltage.
Adjusts DIMM voltage.
Displays CPU model, speed, and core information.
Shows the current processor speed.
Shows the total system memory.
Displays the current CPU voltage.
Displays the current IMC voltage.
Displays the current VDIMM voltage.
Settings for keyboard NumLock state and boot options.
Shows boot configuration information.
Sets the NumLock state at system startup.
Enables or disables quiet boot mode.
Selects boot priorities for devices.
Settings for administrator and user passwords.
Sets or changes the administrator password.
Sets or changes the administrator password.
Installs or changes the user password.
Defines when the password is required.
Options for saving changes and exiting BIOS setup.
Saves changes and exits the setup.
Discards changes and exits the setup.
Saves changes and resets the system.
Discards changes and resets the system.
Options for saving configuration.
Restores system default settings.
Selects the boot device.
Instructions for downloading and installing BIOS updates.
Describes the contents of the support software disc.
Instructions for automatic software installation.
Accessing drivers from the software disc.
Accessing utilities from the software disc.
Navigating the software disc contents.
Displays paths for software and drivers.
Steps to run the software installation program.
Choosing features during software installation.
Example installation screen for ATI software.
Steps for manual driver installation.
Lists available utility software.
Introduces the eJIFFY fast boot program.
How to access the eJIFFY operating system.
Steps for installing and activating eJIFFY.
Activating eJIFFY via DVD utility.
Configuring eJIFFY display and keyboard language.
Guides on setting up keyboard language.
Steps to restart after eJIFFY installation.
Enabling eJIFFY function in BIOS.
How to access the eJIFFY operating system.
Explains the icons available in the eJIFFY menu.
Frequently asked questions about eJIFFY usage.
Guides on setting up keyboard language.
Steps to change the display language.
Guides on setting up network connections.
Steps to edit network connections.
Steps to add a new network connection.
Details different types of network connections.
Configuration for wired network connection.
Configuration for wireless network connection.
Configuration for DSL network connection.
Addresses issues encountered during initial PC assembly.
Troubleshoots power and fan issues.
Troubleshoots display issues when power is on.
Troubleshoots sudden shutdowns during boot.
Covers problems that arise after extended usage.
Provides advice for maintaining the motherboard.
A flowchart for diagnosing PC issues.
| Brand | ECS |
|---|---|
| Model | H61H2-M3 |
| Category | Motherboard |
| Language | English |