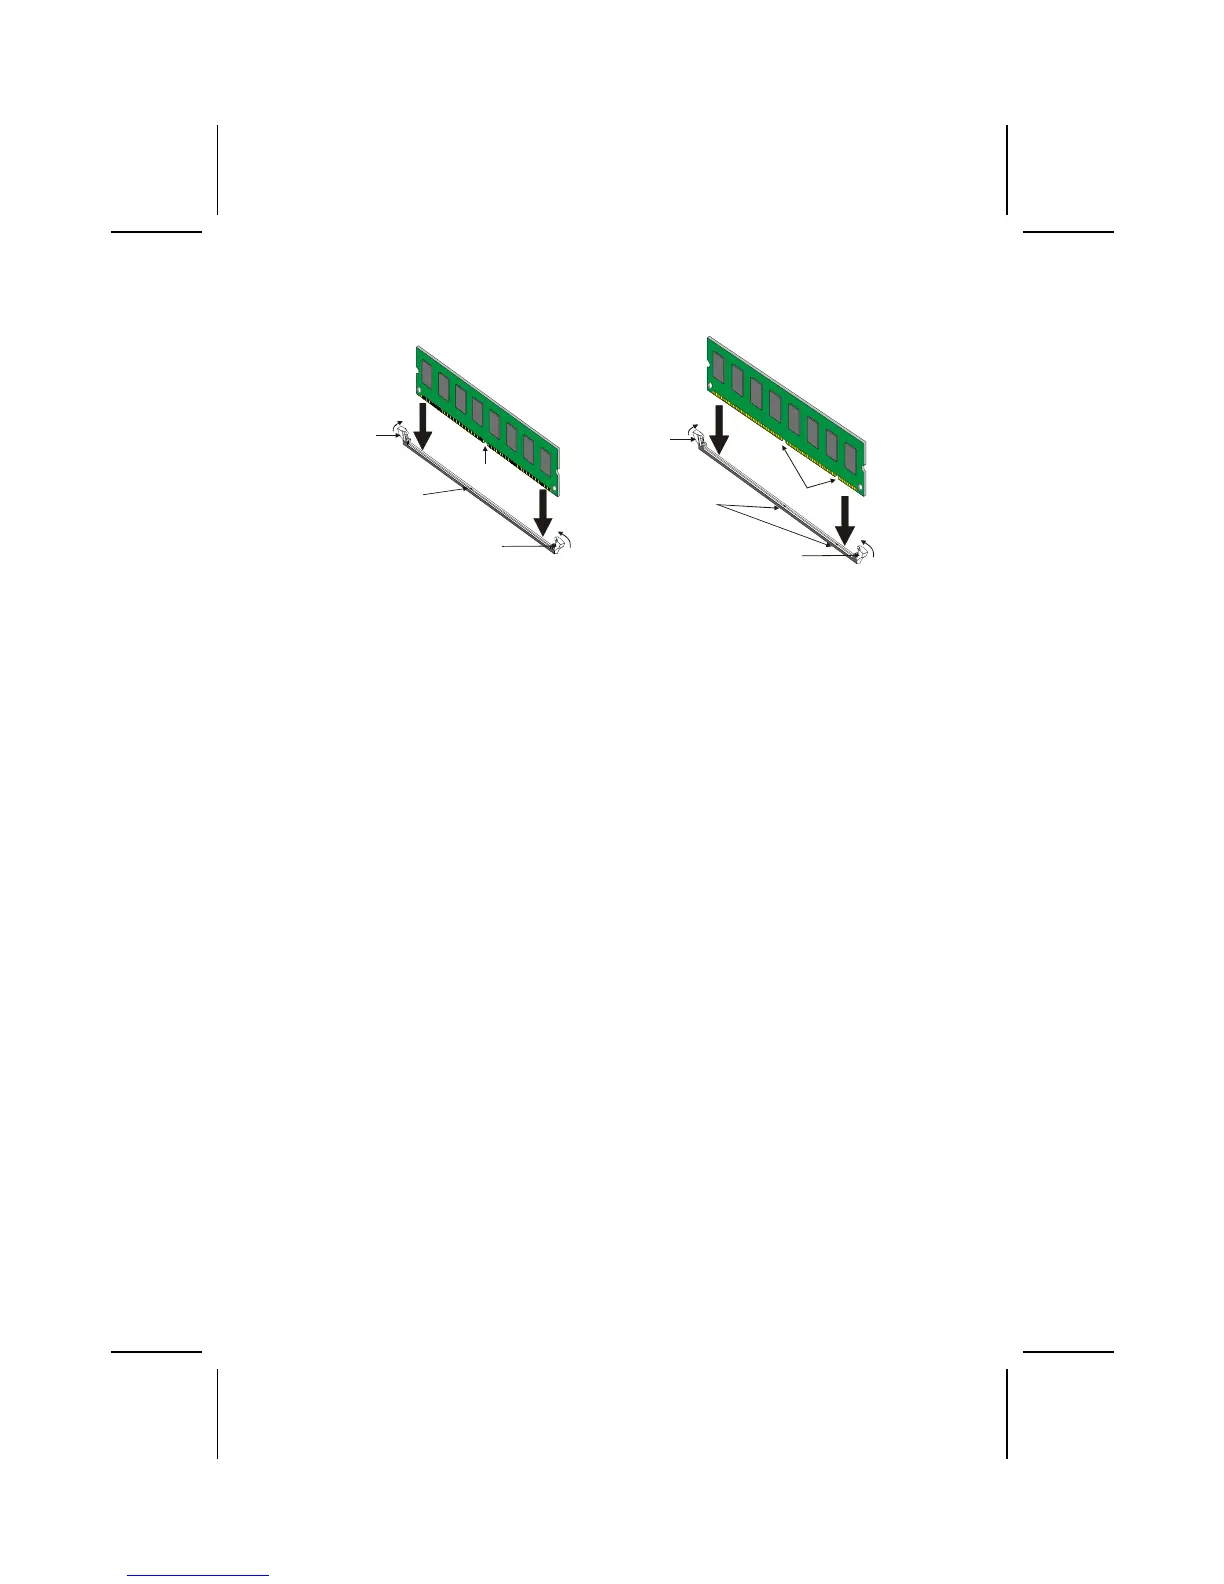
3. Check that the cutouts on the DIMM module edge connector match the
notches in the DIMM slot:
Cutout
Notch
Latch
Latch
Cutouts
Notches
Latch
Latch
DDR SDRAM Module SDRAM Module
4. Install the DIMM module into the slot and press it firmly down until it
seats correctly. The slot latches are levered upwards and latch on to the
edges of the DIMM.
5. Install any remaining DIMM modules.
Installing a Hard Disk Drive/CD-ROM
This section describes how to install IDE devices such as a hard disk drive
and a CD-ROM drive.
About IDE Devices
Your mainboard has a primary and secondary IDE channel interface (IDE1 and
IDE2). An IDE ribbon cable supporting two IDE devices is bundled with the main-
board.
If you want to install more than two IDE devices, get a second IDE cable and
you can add two more devices to the secondary IDE channel.
IDE devices have jumpers or switches that are used to set the IDE device as
MASTER or SLAVE. Refer to the IDE device user’s manual. When installing two
IDE devices on one cable, ensure that one device is set to MASTER and the
other device is set to SLAVE. The documentation of your IDE device explains
how to do this.
About UltraDMA
This mainboard supports UltraDMA 66/100. UDMA is a technology that accel-
erates the performance of devices in the IDE channel. To maximize
performance, install IDE devices that support UDMA and use 80-pin IDE ca-
bles that support UDMA 66/100.
13
 Loading...