Do you have a question about the Edge-Core AS5610-52X and is the answer not in the manual?
Includes two brackets and eight screws for switch mounting.
Included with DC PSUs only for proper electrical grounding.
Provided for Japan, US, Continental Europe, or UK power sources.
Connects the switch console port to a PC via RJ-45 to DB-9.
Contains the Quick Start Guide and Safety and Regulatory Information.
Secure the provided mounting brackets to the switch chassis.
Use supplied screws to fasten the switch securely into the rack.
Ensure the rack is properly grounded and has good electrical connection.
Attach grounding wire to switch rear panel and rack ground.
Install AC or DC power modules, matching airflow direction.
Connect the switch to an external AC or DC power source.
Verify PSU, Diag, and Fan LEDs are green for normal operation.
Connect PC to console, configure serial port, and log in to CLI.
Connect Mgmt port to network server and boot switch for NOS installation.
Connect the RJ-45 Management port with a Category 5e or better cable.
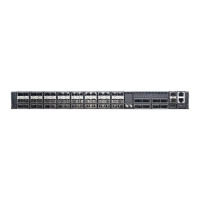
Connect DAC or fiber optic cables to SFP+/QSFP+ slots or transceivers.
| operating temperature | 0° C to 40° C |
|---|---|
| storage temperature | -40° C to 70° C |
| operating humidity | 5% to 95% (non-condensing) |
| AC input voltage | 100-240 VAC |
|---|---|
| AC input frequency | 50-60 Hz |
| AC input current | 6-3 A |
| DC output 5V | 3 A |
| DC output 12V | 33 A |
| power consumption | 165 Watts maximum |
| maximum current at 100 VAC | 6 A |
| maximum current at 240 VAC | 3 A |
| power supply power | 400 Watts @ 240V/100V per module |
| width | 438.4 mm |
|---|---|
| depth | 473 mm |
| height | 43.4 mm |
| weight | 8.395 kg |
| power supply width | 54.5 mm |
| power supply depth | 220 mm |
| power supply height | 40.25 mm |