Do you have a question about the EdgeStar IB650 and is the answer not in the manual?
Details on removing the top panel of the unit, involving screws on the back.
Instructions for detaching the lid stopping bar by removing screws.
Steps to detach the unit's lid handle by removing internal screws.
Guidance on removing the old lid assembly and sliding in the replacement.
Procedures for refitting the lid stopping bar by securing screws.
Instructions for reattaching the lid handle, aligning and tightening screws.
How to position and slide the top panel back into place correctly.
Final step to secure the unit's back panel by reinstalling top screws.
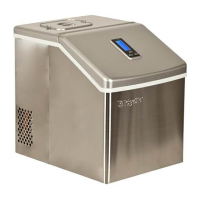
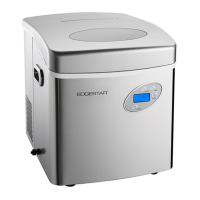
This document outlines the procedure for replacing the lid of an EdgeStar IB650 unit, providing a step-by-step guide for users or service technicians. The device, likely an ice maker or a similar appliance with a top-opening lid, requires specific tools and careful handling during the replacement process. The primary function of this guide is to enable the user to successfully remove and replace the lid assembly, ensuring the unit remains operational and safe.
The replacement process begins with the removal of the top panel of the unit. This involves unscrewing a total of four Phillips screws located on each side of the back of the unit. Once these screws are removed, the top half of the back panel can be gently pulled away, revealing two additional screws that secure the top panel itself. These two screws must also be removed to fully detach the top panel. A crucial safety note is provided at this stage, warning users that the edges of the unit can be sharp, emphasizing the need for caution during handling. After the screws are removed, the top panel is lifted up and slid backward to completely remove it from the unit.
The next step focuses on removing the lid stopping bar. This bar is secured by two screws located in the front of the unit. Once these two screws are removed, the lid stopping bar can be detached. Following this, the lid handle needs to be removed. This involves locating and removing two screws on the inside of the lid that attach the handle. These screws are typically circled in the provided images to clearly indicate their position.
With the handle removed, the main lid assembly can be detached. This is achieved by sliding the door from the front of the unit towards the back. The replacement door is then installed by sliding it in the same manner as the original was removed. A key detail for proper reinstallation is that each side of the lid has a built-in hook. These hooks must slide over corresponding pins on the unit as the door is slid back into place. This ensures the lid is correctly aligned and secured.
After the lid assembly is in place, the lid stopping bar is reinstalled. This involves positioning the bar and tightening its screws. A critical maintenance feature at this point is the instruction to test the door. Users are advised to verify that the door opens and closes properly before proceeding. This is an important troubleshooting step, as the guide notes that getting the lid onto the pins can be tricky, and if it doesn't work correctly, previous steps may need to be revisited. This proactive check helps prevent further complications and ensures the lid is functioning as intended.
The penultimate step involves reinstalling the lid handle. The handle should be lined up with its respective holes, and the screws should be finger-tightened first to ensure proper alignment. Once aligned, a Phillips screwdriver is used to fully tighten the screws, securing the handle firmly in place.
Finally, the top panel of the unit is reinstalled. This step requires careful attention to detail. The front of the top panel must be slid under the lid assembly at a steep angle. This specific angle is necessary to ensure that the lid fits properly behind the lid stopping bar. Once the top panel is correctly positioned, it is laid back down and slid into place. The process concludes with the installation of the two Phillips screws on the rear of the unit, which secure the top panel. The final step is to reinstall the top four Phillips screws that attach the back panel of the unit, completing the entire lid replacement procedure.
Throughout the document, the importance of using a Phillips screwdriver is highlighted as the primary tool required for this maintenance task. The clear, step-by-step instructions, coupled with visual aids (though not explicitly described in this text, implied by the format of a manual), make the process accessible for users. The inclusion of safety warnings and troubleshooting tips enhances the usability and effectiveness of the guide, ensuring a successful lid replacement for the EdgeStar IB650 unit. The overall usage feature of this guide is its clarity and methodical approach to a common maintenance task, empowering users to perform repairs without professional assistance, provided they follow the instructions carefully.
| Ice Storage Capacity | 2.2 lbs |
|---|---|
| Ice Shape | Bullet |
| Drain | Manual |
| Refrigerant | R134A |
| Voltage | 115V |
| Type | Portable Ice Maker |
| Ice Cube Size | Small |