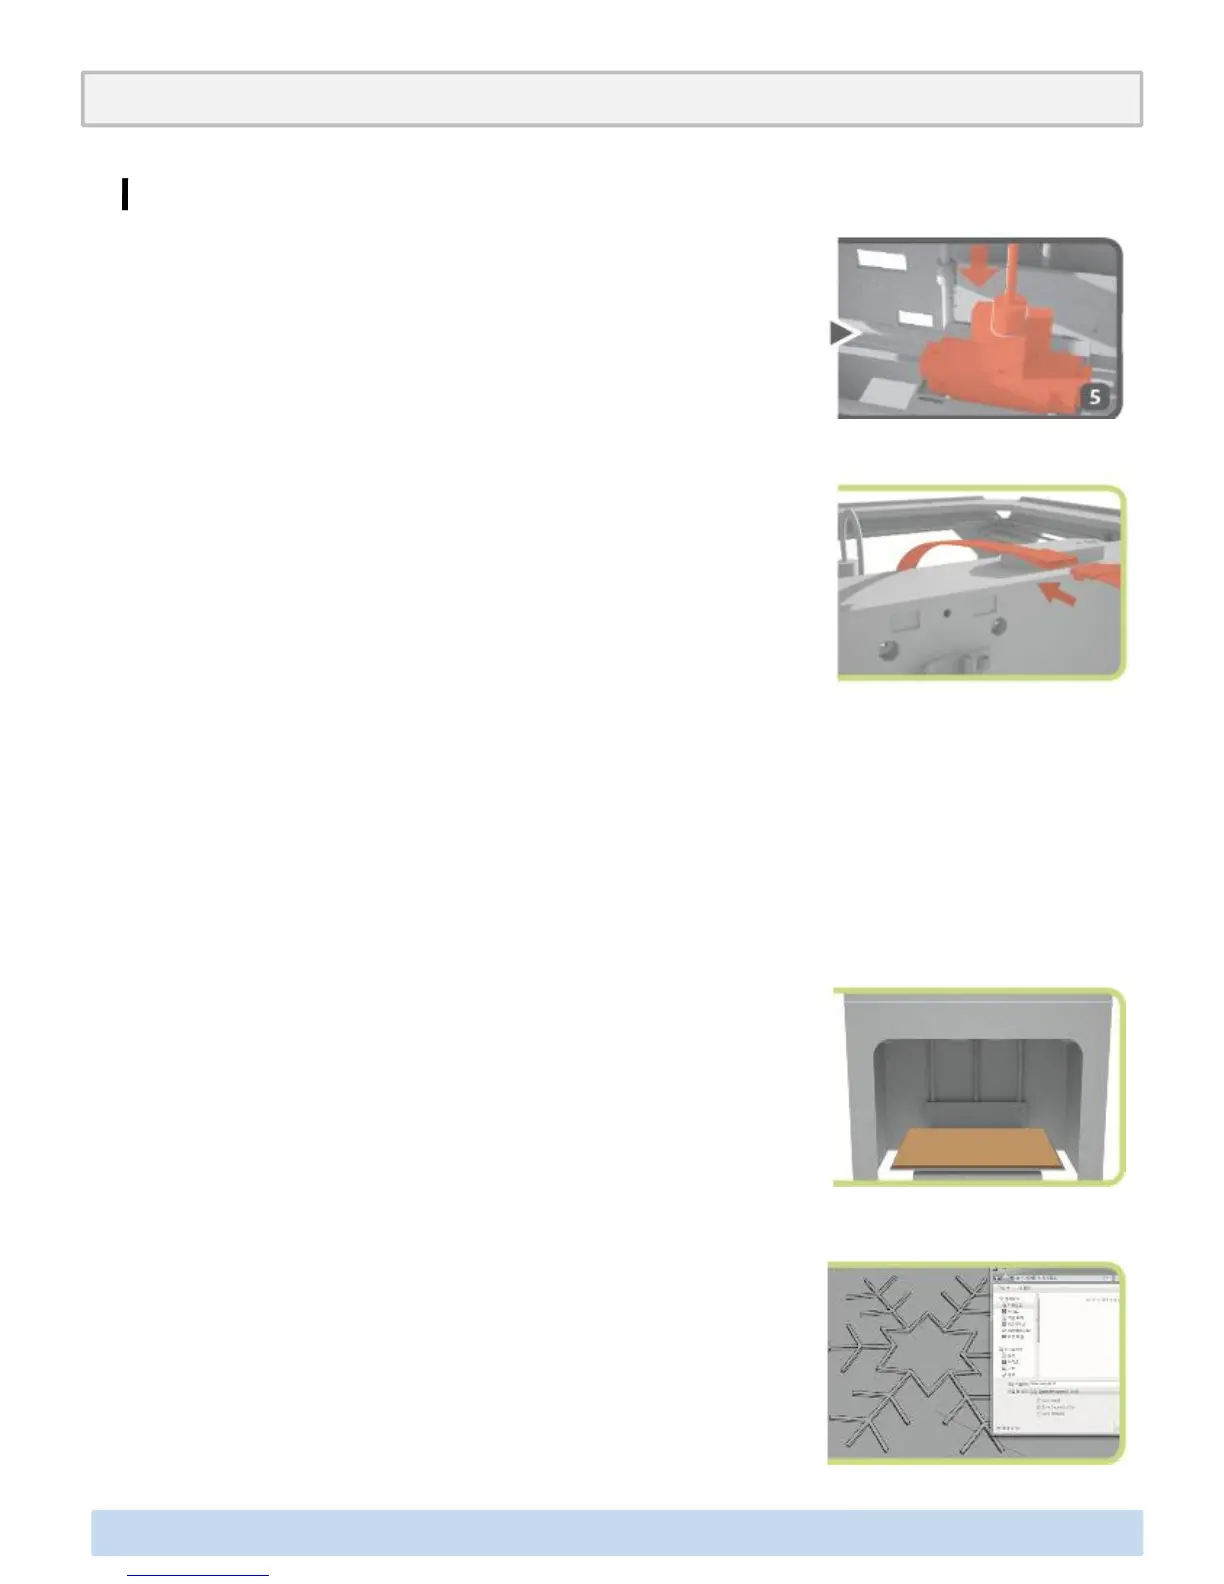
Insert the laser nozzle bar into the laser mount and fix it.
Switch on power after connecting the laser connector to
the PCB connector.
Laser Engraver(Continued)
Annex2. Options for Premium(Laser Engraver/ WiFi Camera/ Embedded Battery)
Put the plywood or acrylic plate to cut on the printing bed
of the printer.
WARNING : Do NOT disassemble the laser mounted in the aluminum
socket. This is designed for user’s safety. A laser is a light source that
can be dangerous to people exposed to it. Even low power lasers can
be hazardous to a person's eyesight.
NOTE : Before exchanging the existing extruder, please make sure that
the hot end reaches the printing bed .
∃DISON PRO User Manual V.1 32
Perform 3D modeling for the shape to cut in line of 0.4mm
width and store the 3D modeling in STL file format.
The height of the object on 3D modeling should be 1 mm.
NOTE : In using this laser engraver, it is possible to cut a maximum 3
mm-high acryl and a maximum 2 mm-high plywood.