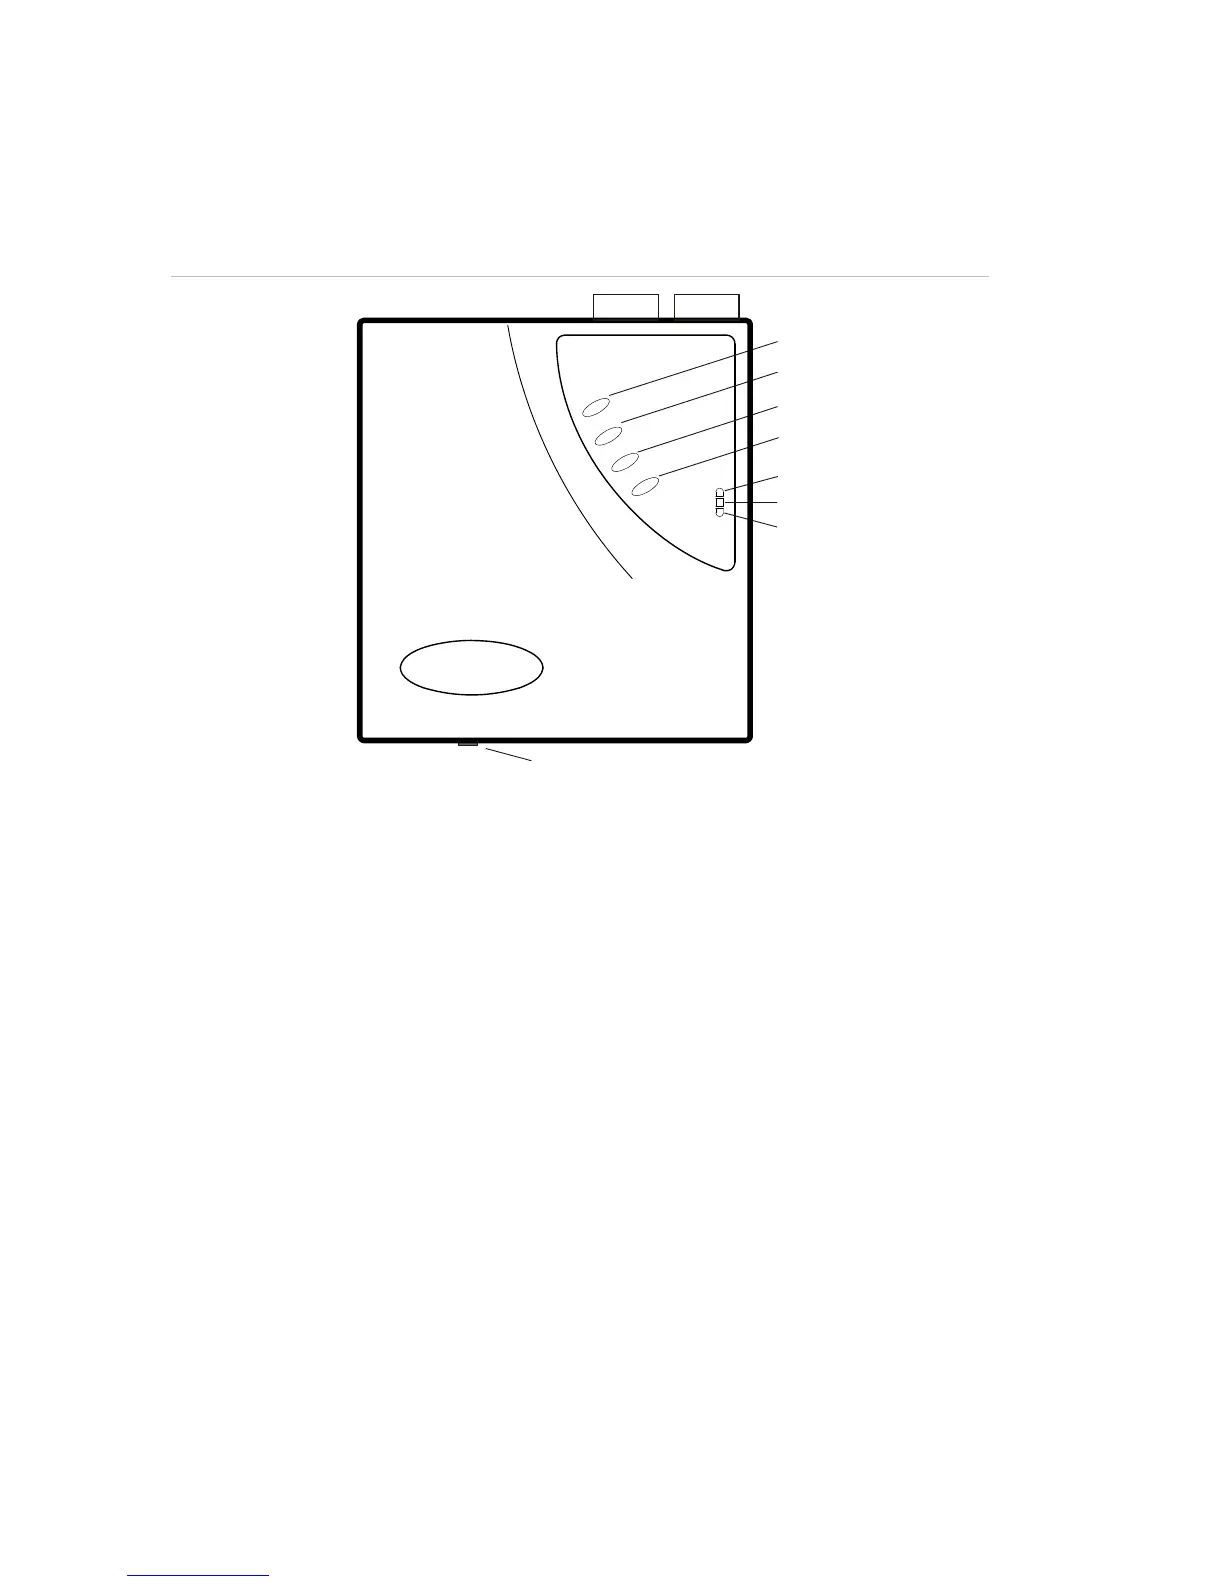
(1) Alarm: Illuminates to indicate that the smoke level has passed the detector’s Fire 1 threshold,
and the normally open ALARM relay contacts have closed.
(2) Pre-Alarm: Illuminates to indicate that the smoke level has passed the detector’s Pre-Alarm
threshold, and the normally open PRE-ALARM relay contacts have closed.
(3) Fault: Illuminates to indicate a fault condition and that the normally closed FAULT relay
contacts have opened. Three additional LEDs indicate the type of fault.
If the Fault LED is illuminated but none of the additional LEDs are lit, it indicates a problem
with the power supply if its fault output is connected to the detector’s INPUT terminals and
DIP switch 7 is set to OFF (its default position). Alternatively, this can happen if the INPUT
terminals are left open circuit and DIP switch 7 is OFF.
(4) OK: Illuminates to confirm normal operation.
During initial setup, the OK LED will flash for 15 minutes while the detector learns its
operating environment. This does not indicate a problem with the detector.
(5) Flow: Illuminates to indicate an airflow fault. This may be due to blocked or broken pipes,
although it can also occur if, for example, factory warehouse doors are opened on a windy
day, a large pressure change occurs, or if industrial air conditioning turns on. Another
possible cause is that the aspiration fan connection cable is damaged or disconnected.
(6) Filter: Illuminates to indicate that the detector’s air filter needs to be changed.
(7) Laser: Illuminates to indicate a problem with the detector laser chamber, as might be caused
by the laser head connecting cable is damaged or disconnected. It can also be caused by
certain kinds of internal systems faults, which appear in the detector’s event log as “process
errors.”
(8) Front cover securing screw: Leave sufficient clearance below the detector to allow
screwdriver access to this screw.
 Loading...