14
▀
The motherboard
G1 Temp sensor boiler NTC 22 kΩ
G2 Sensor flue gas PT1000
G3 Extern control
G4
G5 Sensor accumulator tank low NTC 22 kΩ
G6 Sensor accumulator tank high NTC 22 kΩ
G7 Sensor, radiator flow NTC 22 kΩ
G8 Flame sensor
1U. Connection to display board
2U. Connection electricity board
1. Outdoor sensor
2. Outdoor sensor
3. Room sensor (6)
4. Room sensor (1)
5. Room sensor (4)
PE Incoming Earth
N Incoming zero
L1 Incoming phase 6,3 A/230 VAC
PE Earth
N Zero
11 Radiator pump 2A/230 VAC
12 Shunt motor
N Zero
13 Shunt motor 2A/230 VAC
PE Earth
N Zero
14 Solenoid valve AERO 2A/230 VAC
PE Earth
N Zero
15 Compressor 2A/ 230 VAC
PE Earth
N Zero
16 Magnet motor tube cleaning 2A/230 VAC
N Zero
17 Loading pump 2A/230 VAC
Remember to always cut the power to the boiler before starting any work
on it. All electrical work should be done by a certified electrician, for everyo-
nes safety.
▀
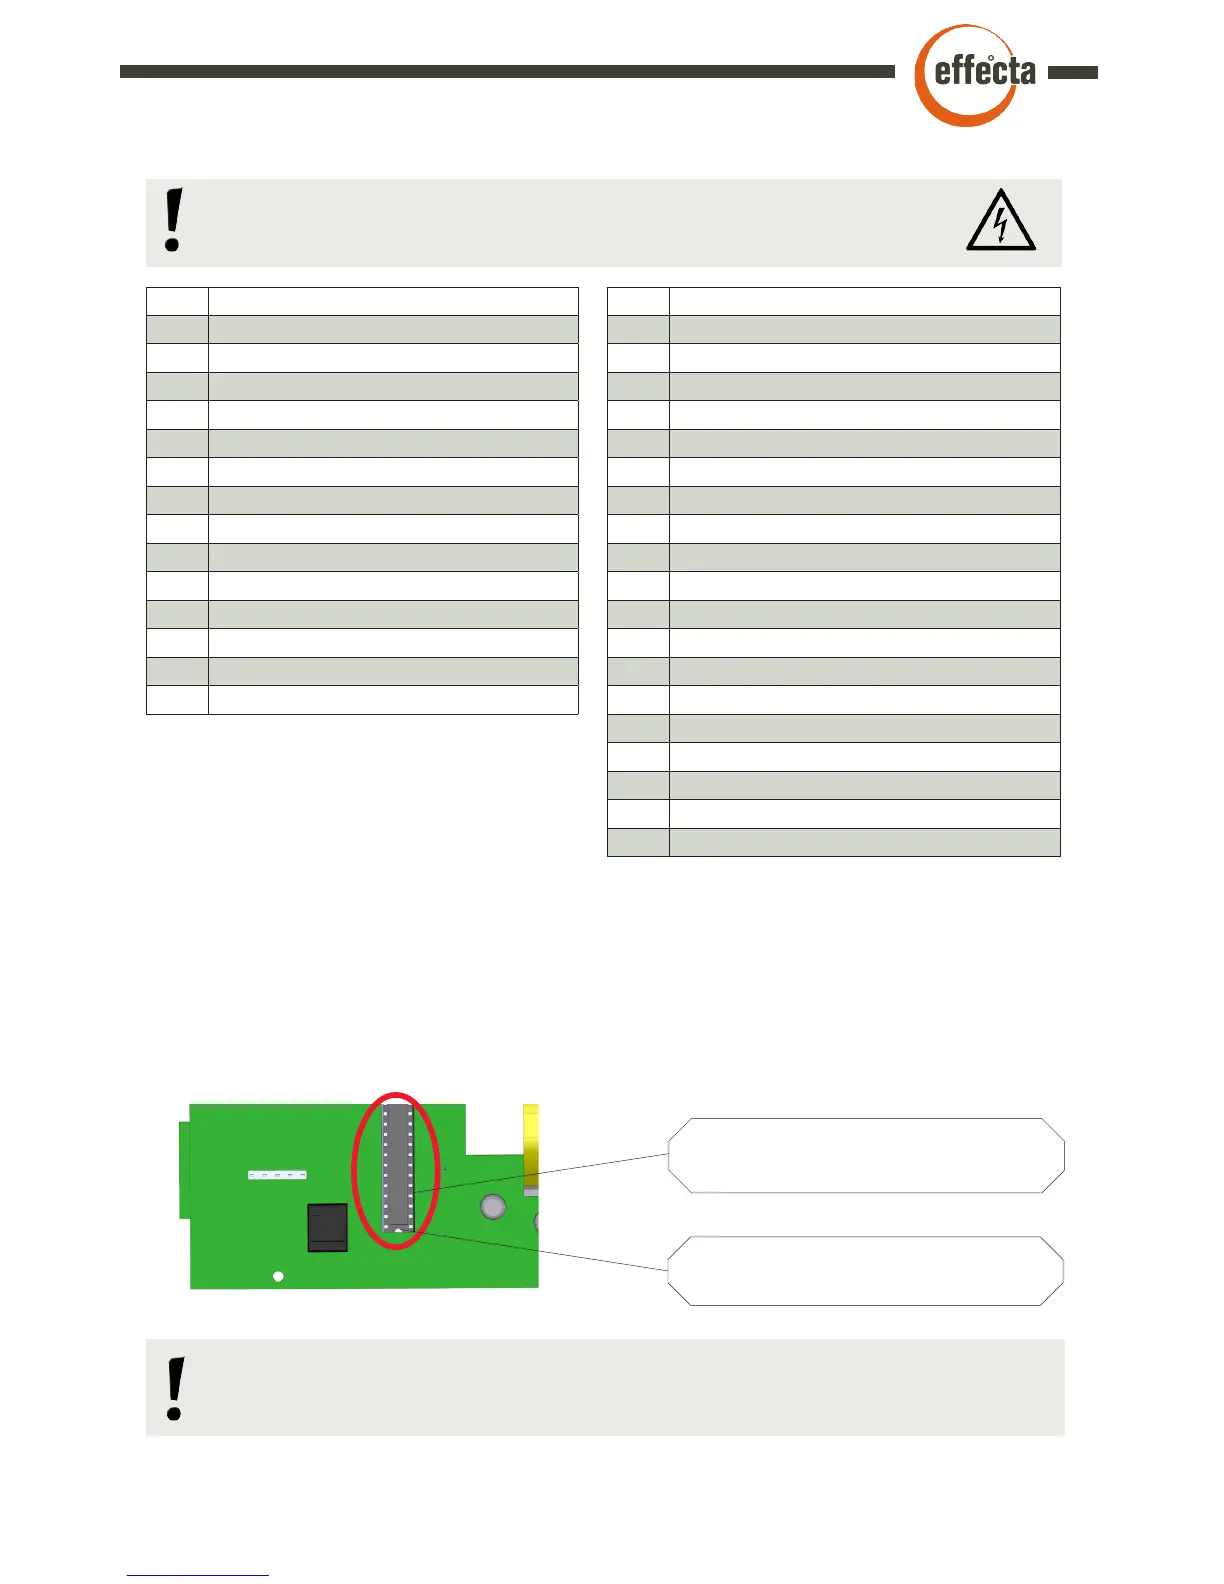
Change of e-prom
Cut the power to the boiler. Remove the front panel on the boiler so you can reach the backside
of the display. Gently remove the e-prom. Fit the new e-prom and gently push it into place.
Reassembly the front panel.
Check so that the marking of the
prom is set at the correct side.
Before shifting a e-prom make sure to write down all the settings that has been done
to the boiler. This since all the changes that has been done will be lost.
While mounting the e-prom make
sure that the ”legs” isn´t damaged