2 9
S Y S T E M M E N U
EDIT PROGRAM - Record Controller - Working With Built-In Program [continued]
3. Program Selection for Auto Pro Part
• Select “Edit Program”.
• Press ENTER to conrm.
• Select “Select Programs”.
• Press ENTER to conrm.
• Select “Auto Pro Part 1”, “Auto Pro Part 2” or “Auto Pro Part 3”, and select which Secondary
program is to be sent. Selection “Part 1” means, that the Secondary unit runs the same program as
the Primary units.
• Press ENTER to conrm.
• Press MODE/ESC in order to return to the main menu.
4. Program Selection for Edit Program
• Select “Edit Program”.
• Press ENTER to conrm.
• Select “Edit Program”.
• Press ENTER to conrm.
• Select the desired program to edit specic scenes into a specic program.
• Press ENTER to conrm.
• Press MODE/ESC in order to return to the main menu.
5. Automatic Scene Recording
• Select “Edit Program”.
• Press ENTER to conrm.
• Select “Edit Scenes”.
• Press ENTER to conrm.
• Select desired scene numbers. A maximum of 250 scenes can be programmed.
• Press ENTER to conrm.
• Press MODE/ESC in order to return to the main menu.
EDIT PROGRAM - Record Controller - Working With Built - In Program [continued]
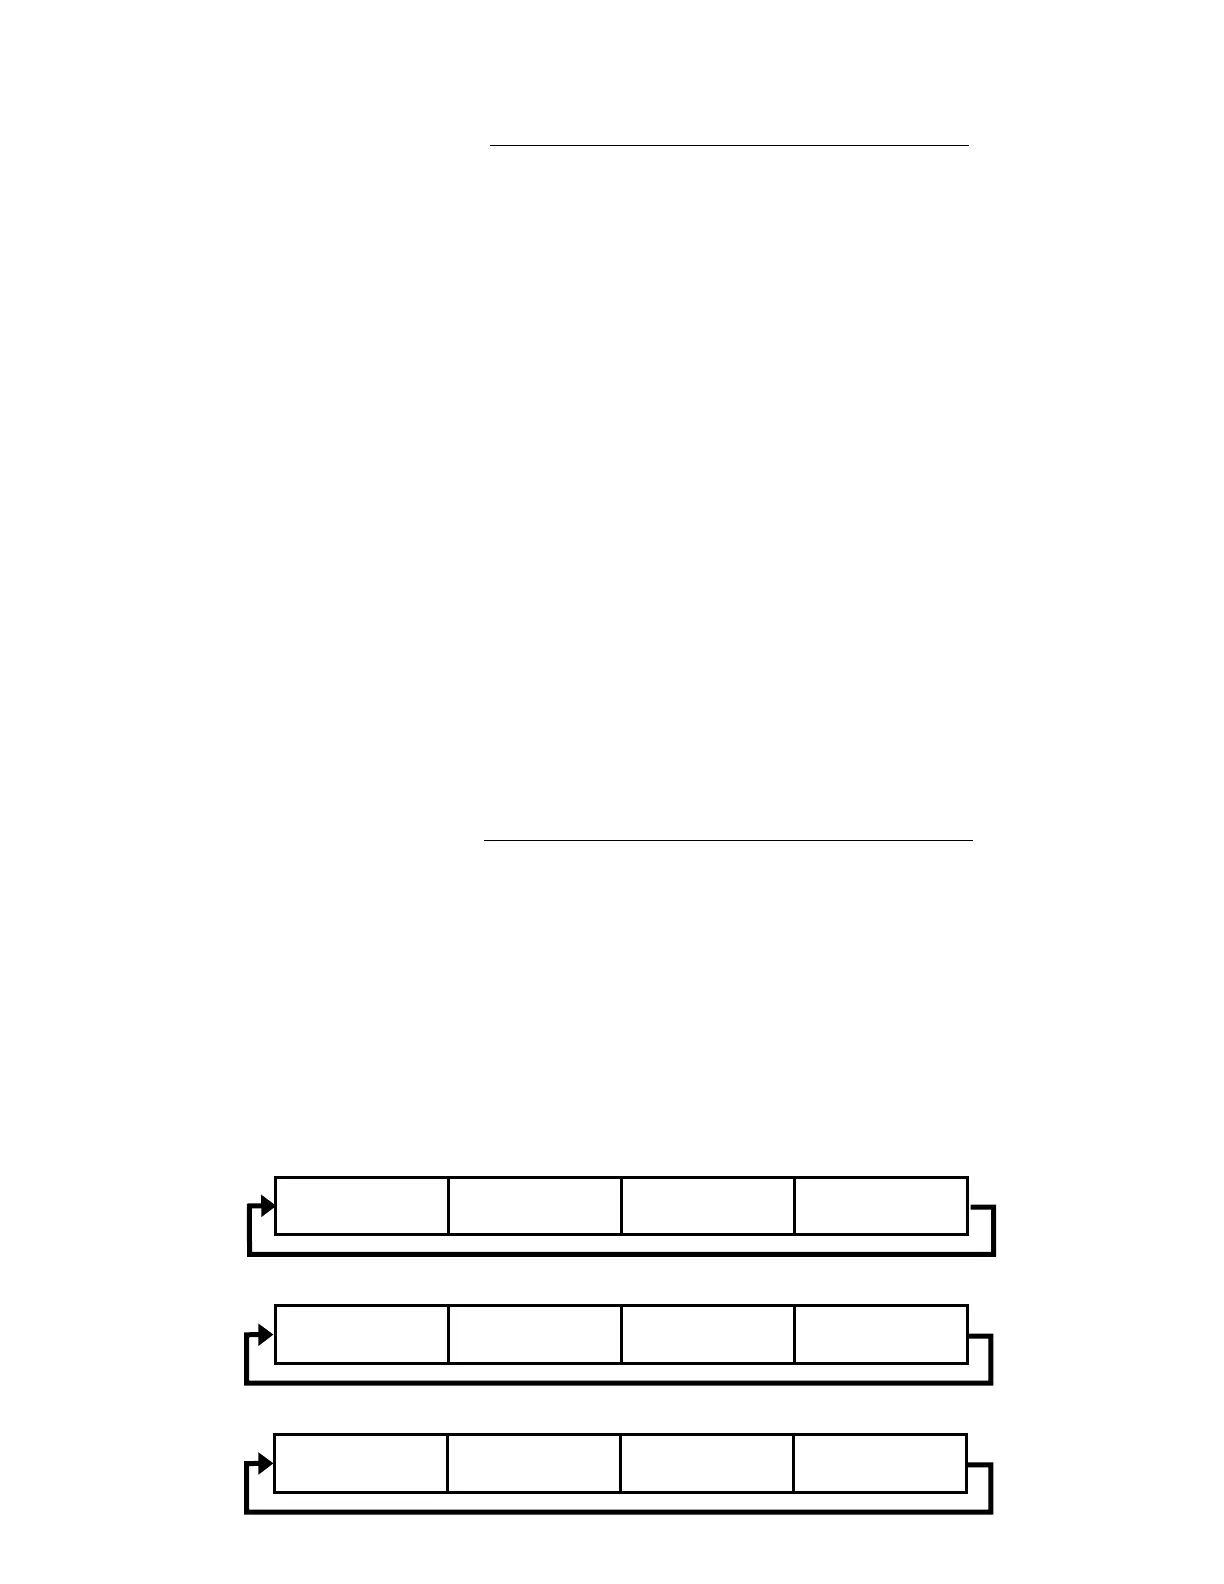
Example:
Program 2 includes scenes: 10, 11, 12, & 13
Program 4 includes scenes: 8, 9, & 10
Program 6 includes scenes: 12, 13, 14, & 15
Auto Pro Part 1 is Program 2
Auto Pro Part 2 is Program 3
Auto Pro Part 3 is Program 6
The 3 Secondary groups run the Auto Program in certain time segments.
Scene 10 Scene 11 Scene 12 Scene 13
Part 1
Scene 8 Scene 9 Scene 10 Scene 8+
Part 2
Scene 12 Scene 13 Scene 14 Scene 15
Part 3