8 AFTER TEST (continued)
7 Wipe the dolly test surface with a solvent to remove oil and
grease.
5 To remove any remaining adhesive, rub the dry, cool dolly with
fine sandpaper or similar.
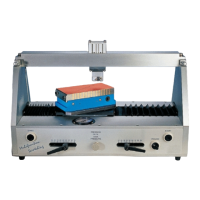
1 Plug the heating tongs into the mains supply and leave to warm
a
up for 5 minutes.
2 Heat the dolly with the tongs for 3 to 5 minutes. This will soften
the adhesive.
6 Use the dolly tool to clear any adhesive from the dolly centre.
4 Drop the dolly into water or allow to cool naturally. Do not put the
heating tongs into water.
3 Using a sharp blade, remove the adhesive/coating from the test
surface of the dolly.
www.elcometer.com
en-8
R
9 USING A DOLLY PLUG
3 Press the dolly and dolly plug onto the sample area for about 10
seconds.
Each gauge is supplied complete with five dolly plugs. Additional plugs
are available to purchase separately, see Section 10.4 ‘Dolly Plugs’ on
page en-13.
1 Place the dolly plug through the centre hole on the dolly so that
the tip protrudes just below the test surface.
4 Remove the dolly plug from the centre of the dolly and wipe the
end clean using tissue soaked in a suitable solvent. If the dolly
plug becomes stuck to the dolly, use pliers to remove it.
To use the dolly plug:
Particularly in the case of low viscosity adhesives it is advisable to
place a nylon plug in the centre of the dolly before gluing it to the
surface.
This dolly plug stops glue going up the centre of the dolly, which can
impede the pin and prevent the test being carried out properly. Careful
cleaning of the centre hole increases the adhesion values for tests on
a given coating.
2 Apply the adhesive to the dolly test surface, see Section 4
‘Securing the Dolly’ on page en-4, taking care not to get adhesive
on the plug.
5 Complete the test as described in Sections 5 to 6.
a
The Elcometer 108 is supplied with or without heating tongs depending on the part number ordered.
Heating tongs are also available to purchase separately, see Section 10.7 on page en-13 for details.