7
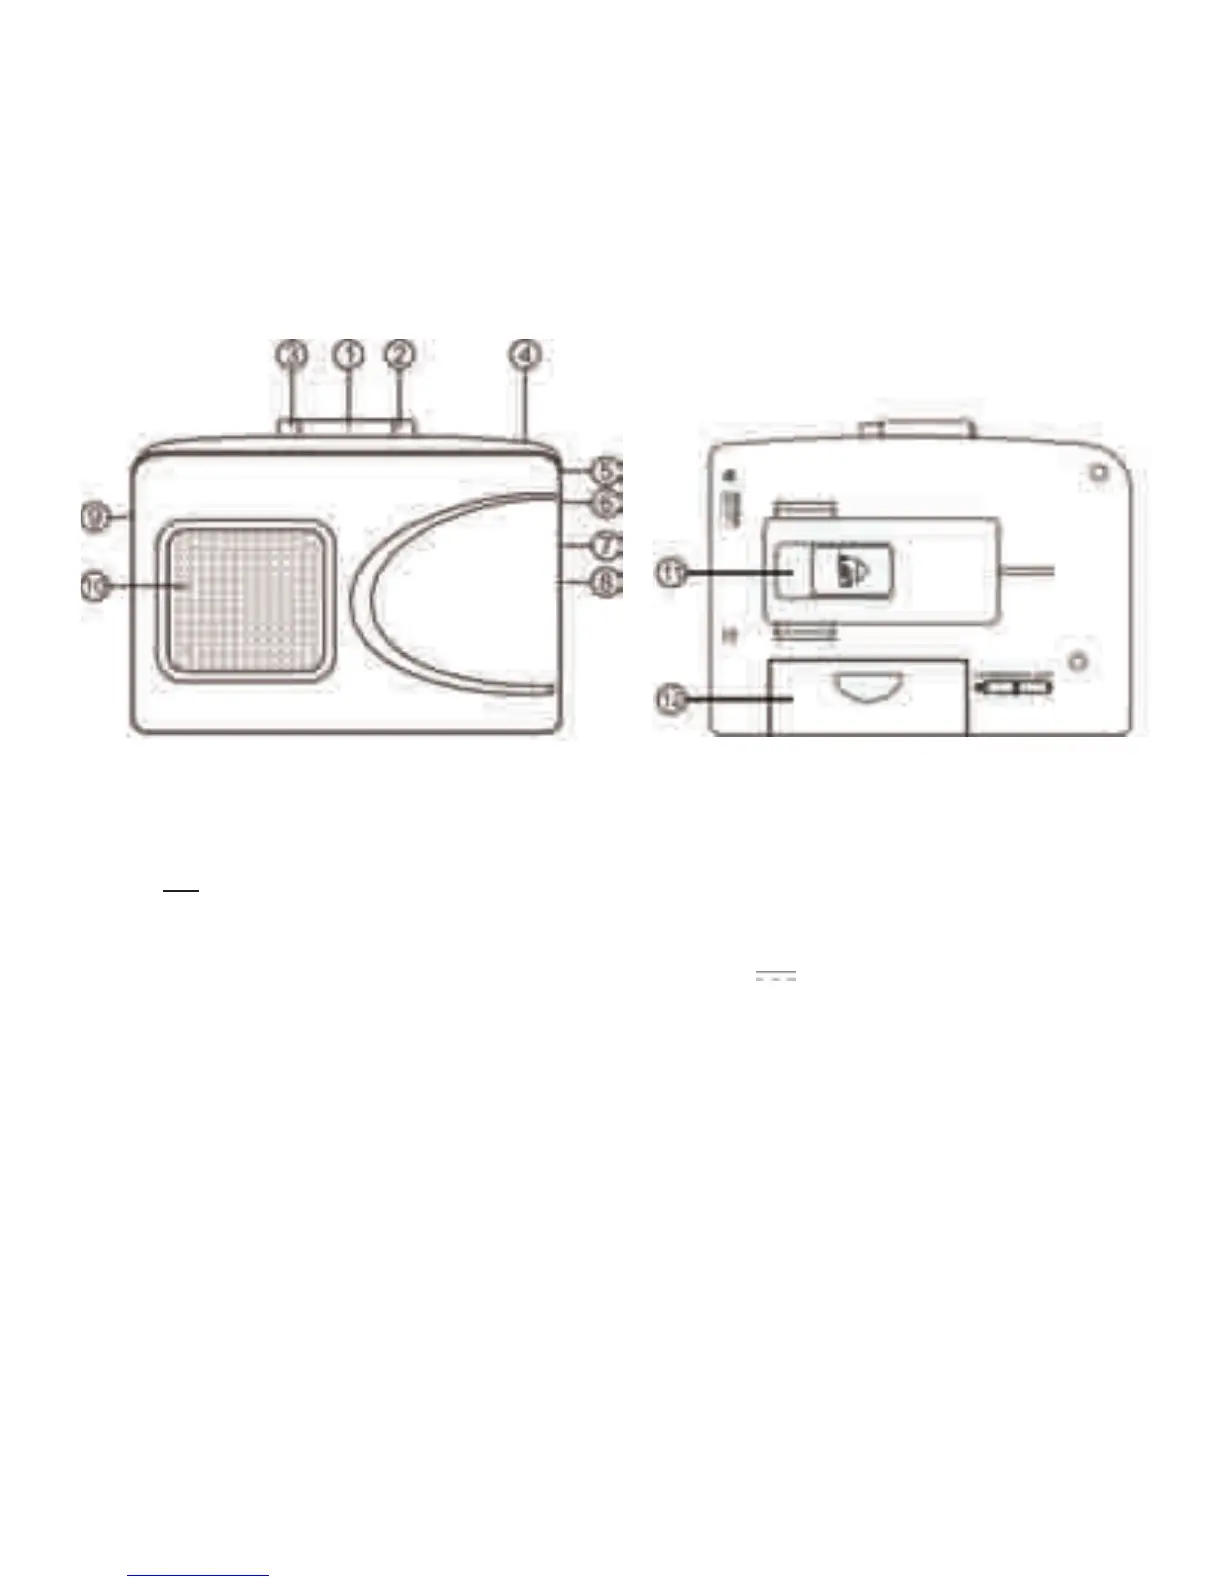
LOCATION OF CONTROLS
1. PLAY BUTTON
2. F.FWD BUTTON
3. STOP BUTTON
4. BATTERY LED INDICATOR
7. VOLUME KNOB
8. MINI USB DEVICE JACK
9. DC IN SOCKET
10. SPEAKER
11. BELT CLIP
12. BATTERY COMPARTMENT
5. EARPHONE SOCKET
6. ON/OFF SPEAKER SWITCH
BASIC OPERATION
1. POWER
When not
connected to a computer:
• DC powered: Connect one end of the AC/DC adaptor (not included) into the DC IN socket at
the side of the unit. Connect the other end into any AC outlet.
NOTE: The specificaon of the AC/DC adaptor is DC
3V, inner - outer +.
• Baery powered: Open the baery door and then place 2 ‘AA’ size baeries (not included)
into the baery compartment. Be sure to match the baery polarity shown on the
compartment (+/-). Then close the baery door.
NOTE: To prevent possible damage to this unit:
*Load new baeries with their polaries (“+” and“-”) aligned correctly.
*Do not apply heat to baeries, or internal short circuit may occur.
*If this unit is not to be used for a long period of me, remove all baeries and
store them in a cool and dry place.
*Remove old, drained baeries immediat
ely and dispose of them.
When connected to a computer:
NOTE: Remove baeries while connected to computer.
• USB powered: Connect one end of the USB cable (included) to the mini USB socket on the
unit. Connect the other end into the USB socket on your computer.
2. Adjust the VOLUME knob to your desired volume level.
 Loading...