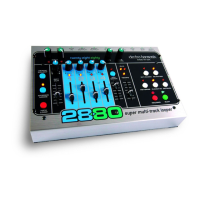
3. PLAY Button and LED: The PLAY button is used to enter/exit Playback mode depending on the current
mode it is in. The PLAY LED will light anytime the 2880 is Playing or Overdubbing audio. Below is a table
displaying the Record/Playback modes and the resultant mode the 2880 enters after pressing the PLAY button:
Current Mode New Mode (PLAY LED State)
Idle (If Loop in Storage) Playback (PLAY LED = ON)
Playback Idle (PLAY LED = OFF)
Overdubbing Idle (PLAY LED = OFF)
Record-Ready Playback of Loop in Storage (PLAY LED = ON)
Recording New Loop Overdubbing (PLAY LED = ON)
When a loop cycles back to the beginning, the PLAY LED blinks once, signifying the start of the loop.
4. REVERSE Button and LED: Press the REVERSE button and the loop will reverse its Playback/Record
direction. The REVERSE button can be used at all times except when recording a New Loop. The REVERSE LED
will light up when the Reverse function is active.
5. OCTAVE Button and LED: The OCTAVE button will lower the pitch and tempo of the loop by exactly
one octave. The OCTAVE button can be used at all times except when recording a New Loop. The OCTAVE LED
will light up when the Octave function is active.
6. PUNCH IN Button and LED: When the PUNCH IN function is activated, Overdubbing Mode will
change into Punch In Mode. When recording with Punch In active, whatever was previously recorded on the
active track will be erased, no matter where the volume fader is set to for that track. The Punch In function is
useful for fixing bad notes or mistakes. When Punch In is active its LED will light up.
7. QUANTIZE Button and LED: The QUANTIZE button toggles between Non-Quantize (NQ) and
Quantize modes. When the QUANTIZE LED is lit, the 2880 is in Quantize mode. When you record a New Loop
in Quantize mode, the 2880 will give you a 4 beat count-in and extend the loop length to the nearest full bar;
the loop is quantized to the nearest bar. This means the 2880 will continue recording a New Loop (after
pressing the RECORD or PLAY buttons to end the loop) until it reaches the end of the current bar. All bars are 4
beats long. In Non-Quantize mode, the length of the loop is defined by the time between pressing the RECORD
button (to begin recording) and then the RECORD or PLAY buttons (to end the loop).
8. EXT. CLOCK Button and LED: Pressing the EXT. CLOCK button will enable the 2880 to follow the
external M
I
DI S
ync it receives at its M
IDI IN jack. The EXT. CLOCK LED will light up when in Ext. Clock mode.
While in Ext. Clock mode, the 2880 will wait for the MIDI Sync signal. If no MIDI Sync is available when you
press the PLAY button, the PLAY and EXT. CLOCK LEDs will blink rapidly telling you there is no sync. You will see
the same blinking if you tr
y to Overdub or record a Ne
w Loop with no MIDI Sync present. The one exception is
when recording a New Loop, if you press the RECORD button twice, the 2880 will look to its internal tempo
setting and record the loop, ignoring the fact that there is no MIDI Sync signal.
+ PLAY =
}
8