- 22 -
10.2003 R.K. 599 518 355
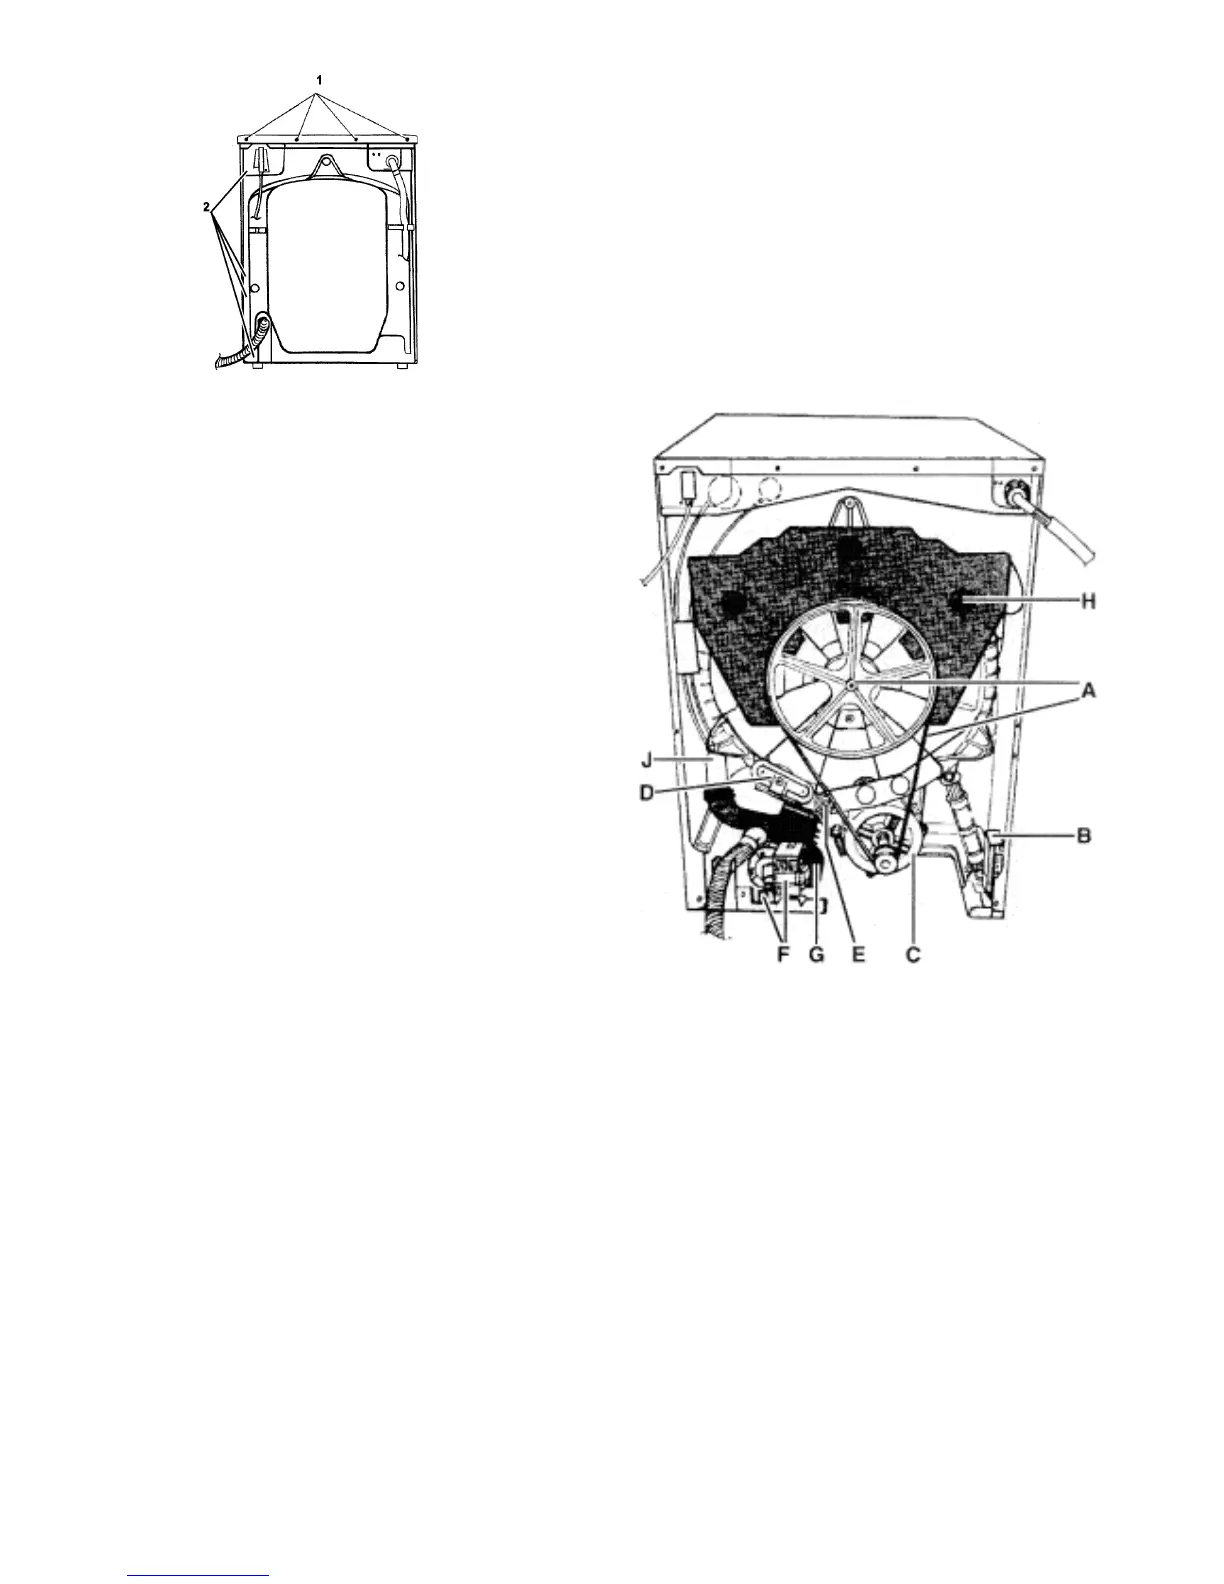
Rear of machine
1 Remove the 4 screws fixing the back plate to the top plate (1).
2 Remove the 11 screws around the edges of the back plate (2).
3 Remove the back plate.
Accessibility:
A Belt and pulley
The pulley is fixed to the drum axie with
a 5 mm hex.socket head screw.
B Electronic circuit board for speed control of motor
Disconnect the electrical contacts and press the
plastic snap fixing (under the machine ) to the
side and then lift out the electronics unit.
C Motor
This is fixed with 4 hex. socket head screws to
the outer drum. Use an 8 mm Allen key to remove
these screws.
D Removal of heating element
Disconnect the electrical contacts.
Remove the nut at the middle of the element
(that which expanded the pack-ing).
Then press the threaded section inward.
Withdraw the element from the outer drum.
E Temperature sensor, NTC thermistor
Disconnect the electrical contacts.
Carefully lever, using a screwdriver, the rubber bushing from the outer drum.
Remove the NTC thermistor from the rubber bushing.
F Removal of drainage pump
Slacken the hose clamps and remove the hoses from the pump.
Disconnect the electrical contacts and remove the plastic protection over the pump.
Push down the plastic projection (H) and withdraw the pump backward.
G Rubber bottom, (pin trap)
Slacken the clamps holding the hoses fixed to the rubber bottom.
H Rear counterweight
Remove the belt and pulley.
Remove the 3 screws fixing the counterweight to the outer drum.
Lift the counterweight away from the expander bolt fixmgs.
J Pressure chamber
Remove the hose clamp at the rubber bottom.
Remove the screw (8 mm socket) holding the pressure chamber to the outer drum.
Draw the Container backward and remove the hoses to the pressure (water level) switch.