- 11 -
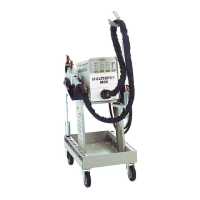
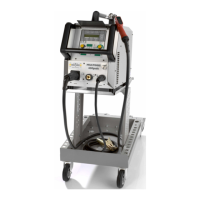
6.0 Working with the spot-welding tong
Caution! Switch off power supply unit or set to “push spot
welding” mode during breaks or when changing electrodes
or adjusting electrode spacing!
Otherwise danger of crushing!
– Insert the central plug of the spot welding tongs – with arrow
pointing upwards – into the central socket (63) of the power
supply unit until limit stop.
– The unit will switch over to symbol “tongs” automatically.
– When using uncoded tongs, set to “tongs” symbol with keys
AB.
– Tighten the sleeve nut of the central connection by turning
clockwise.
– Insert electrode arms (25 and 26) in tongs.
– Make sure the movable electrode arm (26) clicks home.
– Insert and adjust electrodes (27).
– Electrode spacing 6 to max. 8 mm.
– Check with size 6 Allen key.
– Tighten socket-head cap screws.
– Re-check electrode spacing after the initial spot welding
procedures and re-adjust, if necessary!
The condition of the electrode caps is essential for proper weld-
ing results! Change or grind worn caps!
For item no. of the cutter please see Accessory List!
The electrode caps can easily be changed by turning with pliers.
Simply place fresh electrode caps on the taper of the electrode
and press in position.
In order to accommodate bulky body parts, such as door sills and
posts, the movable electrode arm (26) can be released by
pressing the release button (30). When the electrode arms (25)
and (26) are pressed together manually, the arm will engage
automatically.
6.1 Preparation of the welding area
The area of the sheets to be welded should be ground to a bright
metal finish.
Important! The contact points of electrode cap to sheet and
sheet to sheet must be absolutely free of grinding swarf,
paint residues and rust. Otherwise welding will cause