- 33 -
11.0 Appendix/self-test and troubleshooting
11.1 Self-test
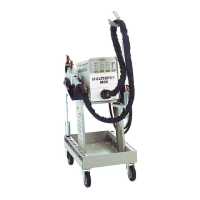
The MULTISPOT M80 is provided with a self-test program to check and evaluate
the functions of the unit.The results are shown via LED.
11.2 Checking the LED displays and the solenoid valves
– Detach the tongs or gun from the power supply unit.
– Connect the unit to the power supply.
– Connect 8 bar compressed air supply.
– Switch the unit OFF.
– Depress key “A”, switch the unit ON, release the key “A”. All the
LEDs on the operating panel will be switched on in sequence. At the
end of the LED test, the cooling and the pneumatic solenoid valve
will each be opened for 1 sec. The test ends after 5 cycles or when
any key is pressed.
11.3 Mains-supply test and troubleshooting
– Connect spot-welding tongs
– Clean electrode caps/ separation 6mm.
– Set to an overall plate thickness of 3mm/ 8 bar air pressure
– Perform short-circuit weld (i.e. no plate) = maximum mains load.
If spot-weld tongs are not available, perform the test in the following way:
– Connect gun and select the “Push spot weld” mode: C D keys.
– Set plate thickness to 2mm: E F keys. Time to max: G H keys
– Insert spot electrode in the gun.
– Press the spot electrode firmly onto the earth shoe (36), press the the gun
trigger and perform the short-circuit weld.
Evaluating the test
LEDs under the mains plug symbol:
Green No mains drop, full welding performance available
Green+yellow Insignificant mains drop, good welding performance
Yellow Larger mains drop, no longer possible to weld plates
thicker than 0.8 mm
Yellow+red Critical mains drop, max. welding thickness <= 0.8 mm.
Red Mains drop too great, spot welding is not possible.