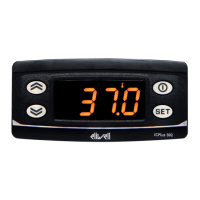
MACHINE STATUS MENU
Access the Machine Status menu by pressing and releasing the key. If no alarms are active, the ‘SEt’ label appears.
Use the keys and to scroll through all the folders in the menu:
- AL: alarms folder (only visible if an alarm is active);
- SP1: Setpoint 1 setting folder;
- Pb1: probe 1 - Pb1 folder;
Setting the Setpoint:
To display the Setpoint value press the key when the ‘SEt’ label is displayed.
The Setpoint value appears on the display. To change the Setpoint value, press the and keys within 15
seconds. Press to confirm the modification.
Displaying probes:
When label Pb1 is present, press the key to view the value measured by the corresponding probe (NOTE:
the value cannot be modified).
PROGRAMMING MENU
To access the ‘Programming’ menu, press the key for more than 5 seconds. If specified, an access PASSWORD
will be requested: ‘PA1’ for User parameters and ‘PA2’ for Installer parameters (see ‘PASSWORD’ paragraph).
User Parameter: When accessed, the display will show the first parameter (e.g. ‘diF’). Press and to scroll through all the parameters on
the current level. Select the desired parameter by pressing . Press and to modify it and to save the changes.
Installer Parameter: When accessed, the display will show the first folder (e.g. ‘CP’). Press and to scroll through the folders on the
current level. Select the desired folder using . Press and to scroll through the parameters in the current folder and select the
parameter using . Press and to modify it and to save the changes.
NOTE: Make sure you switch the instrument off and on again each time the parameter configuration is changed, in order to prevent mal-
functioning in the configuration and/or timing in progress.

 Loading...