EasyManua.ls Logo

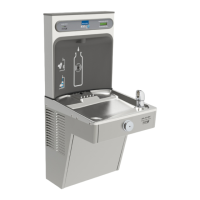
Elkay FLEXI-GUARD SOFT SIDES ezH2O EDFP217WS F Series User Manual

Elkay FLEXI-GUARD SOFT SIDES ezH2O EDFP217WS F Series
8 pages
To Next Page IconTo Next Page
Page #1 background imageLoading...
Page #1 background image
0000001028 (Rev. G - 11/18)
EDFP217WS EDFP217WS*F
Page 1
Review these instructions before beginning installation. Be sure that installation
conforms to all plumbing, electrical and other applicable codes.
When installation is complete, ensure these instructions are left in the plastic bag
provided inside the installed unit for future reference.
Service to be performed by authorized service personnel only.
INSTALLER
NOTE: It is common practice to ground electrical hardware such as telephones, computers and other devices
to available water lines. This can, however, cause electrical feedback in the plumbing circuit, which
results in an “electrolysis” e󰀨ect occurring in the fountain. This may result in water which has a
metallic taste to it or has a noticeable increase in the metallic content of the water.
When inspecting plumbing circuit, remember the line may be grounded some distance from the
installation, and may occur outside the building or area in which the unit is being installed.
This condition can be avoided (in most cases) by using recommended materials during installation.
Any drain ttings provided by the installer should be made of plastic which will electronically isolate
the fountain from the remainder of the building’s plumbing circuits.
SOFT SIDES
®
Fountains with FLEXI-GUARD
®
and ezH2O
®
Bottle Filler
INSTALLATION & USE MANUAL
LZWS-EDFP217KEZWS-EDFP217K
Questions and Answers:

Elkay FLEXI-GUARD SOFT SIDES ezH2O EDFP217WS F Series Specifications

General IconGeneral
ModelEDFP217WS
SeriesF Series
TypeOutdoor Fountain
MaterialStainless Steel
ADA CompliantYes
Activation MethodPush Button
FilteredYes
FinishStainless Steel
Installation LocationOutdoor
Number of Stations1
Warranty5 Years

Summary

Installer Guidelines

Safety and Operational Warnings

Covers cautions, service, and grounding notes for installers.

Installation Instructions Reference

Reminds installers to leave instructions with the unit for future reference.

Rough-in Dimensions

Required Tools and Materials

Installation Steps

Plumbing and Frame Setup

Connect water supply, flush line, and install mounting frame.

Filter and Panel Installation

Install filter head, tubing, hang panel, and remove protective coating.

Reset Switch Setup

Install and secure the bottle filler reset switch.

Fountain Assembly and Connections

Water and Waste Line Connections

Connect fountain water lines, waste tubes, and final supply.

System Checks and Adjustments

Verify pressure, electrical, dispensing, and adjust stream height.

Panel and Cover Installation

Install bottom cover plates, back panel screws, and optional panels.

Bubbler Details and Notes

Bubbler Locknut Tightening

Tighten locknut snugly; do not overtighten.

Filter Parts List

Control Board Programming

Software and Button Access

Verify software version and locate the programming button.

Setting Configuration Options

Covers filter reset, IR range, unit type, bottle count, and filter capacity.

Installation Package and Parts

Package Components and Lists

Details boxed components and main/replacement parts lists.

Troubleshooting and Maintenance

Orifice and Regulator Care

Cleaning the orifice assembly and adjusting the stream regulator.

Quick Connect Fittings

Fitting Operation

Instructions for connecting and disconnecting water tubing.

Related product manuals