36
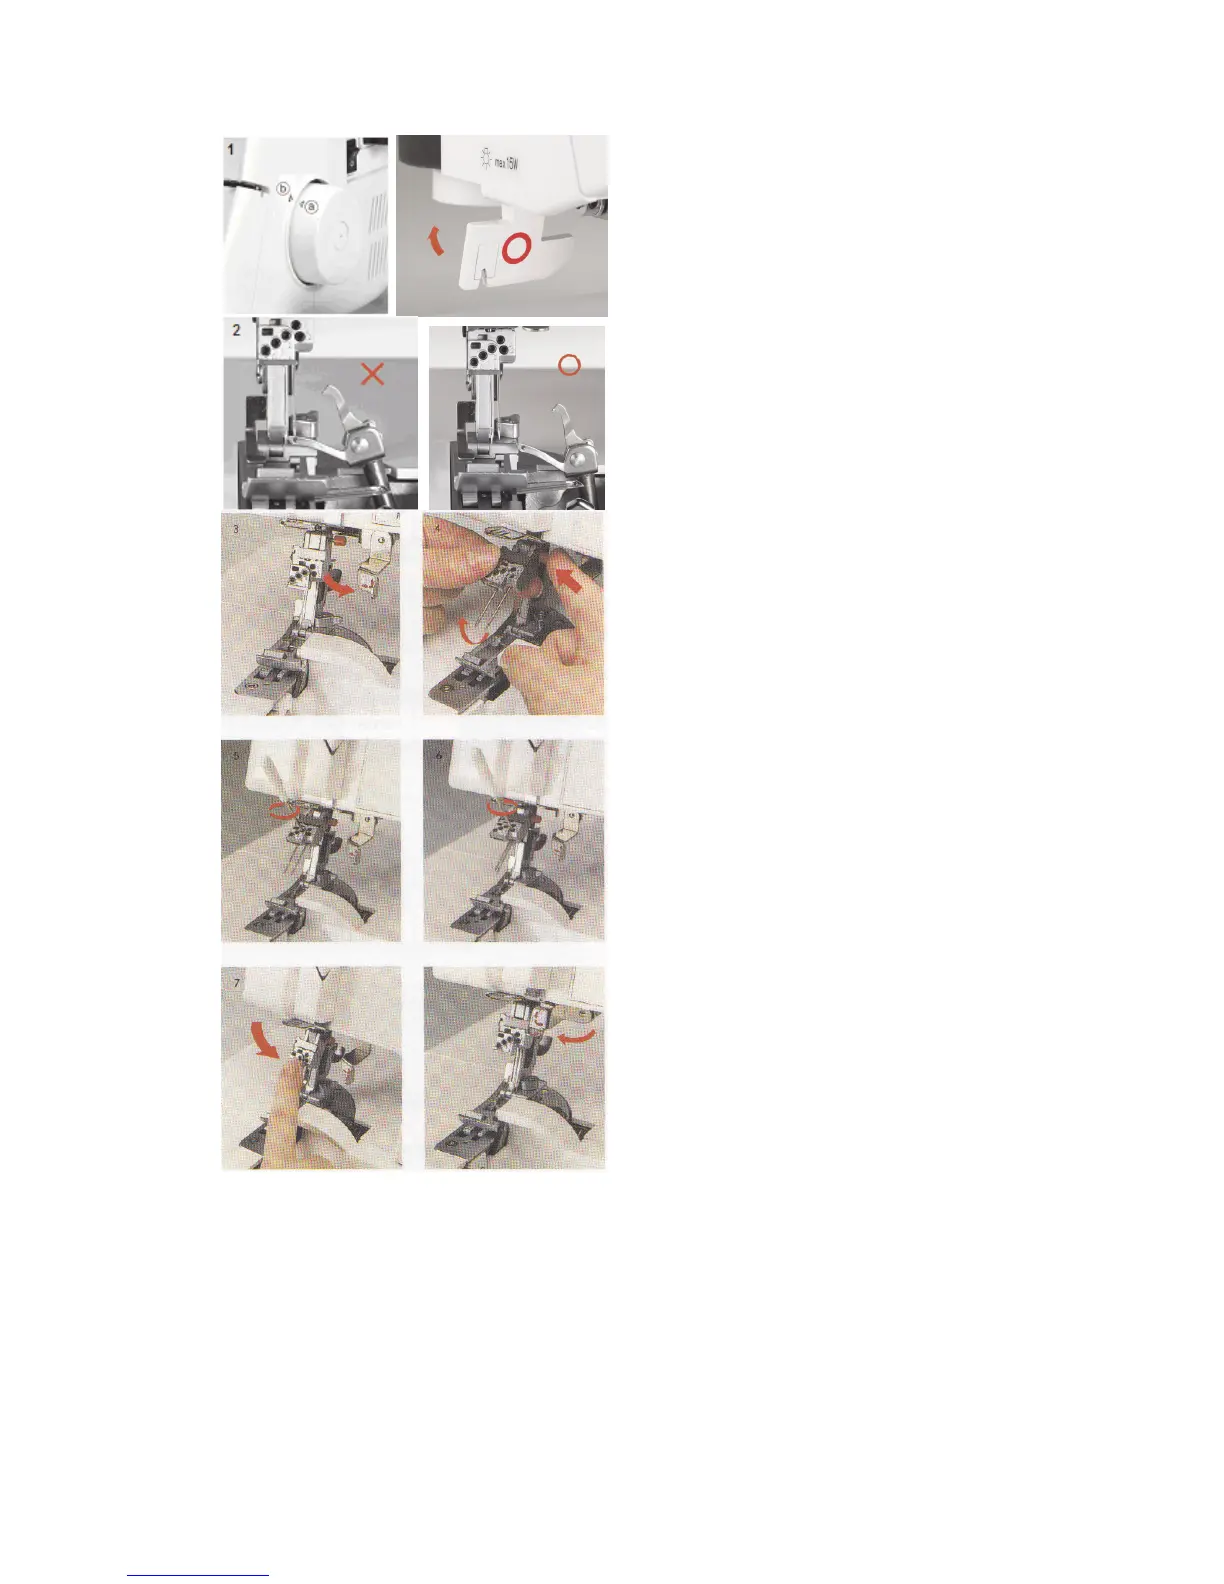
Tilting Needle Clamp
1. The needle clamp can be tilted up to
ensure easy needle placement. Hand turn
the flywheel towards you to move needle
clamp/upper looper. Align triangle mark
“a” with “b”. Lower the presser foot.
2. Before attempting to tilt the needle clamp,
make sure the needle clamp is up and the
upper looper is not in front of any needle
position.
3. Swing the needle clamp safety lever down
to the right.
4. Press the needle clamp release button
(red) while tilting the clamp towards you.
5. Each needle position has a set screw.
Use the allen screwdriver to loosen the
set screw. Insert needle(s) with flat side to
the back into new position(s).
6. Tighten set screw.
NOTE: Needles will always sit unevenly.
If needles are even, loosen set screws
and reinsert needles.
7. Tilt down the needle clamp and put the
needle clamp safety lever back in
position.
NOTE: After moving needles, always
hand turn the flywheel to test that needles
will pass through the needle plate.