www.eltekvalere.com
Headquarters:
Eltek Valere
Gråterudv. 8, PB 2340 Strømsø, 3003 Drammen, Nor
Phone: +47 32 20 32 00 Fax: +47 32 20 32 10
Form 171-gb-v5-C01_356825-103_qstart_flatpack2-4u-distr-sp2-syst_2v0.docx_ mafe_2010-05-25
MAINTENANCE PROCEDURE
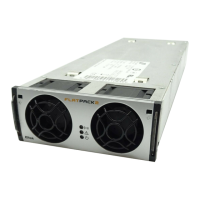
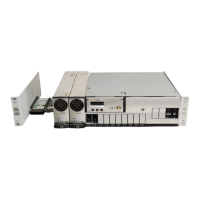
System Data Flatpack2 PS System
Flatpack
Power Supply System, type:
rticle No.:
Site, name:
Serial No.: Software, version No.:
Rectifiers, type & number of:
C Input Voltage, measured: Battery Type: Battery Capacity:
Maintenance carried out by, name:
System Inspection Power is ON!
CARRY OUT FOLLOWING: OK
1. Site specific parameters and settings are known.
User manuals and site specific connection & arrangement drawings are available.
2. The battery bank has been fully charged in advance.
At least for 12 hours since start-up or mains failure. Enables correct measurements & calibration
3. The equipment is free from damage, dust or dirt; verify.
Carefully vacuum clean or remove any accumulation of dust, corrosion or dirt.
4. All cabling and copper bars are securely terminated and supported.
Correct any loose connections, excessive cable temperature, defective insulation, etc.
5. The system controllers & all rectifier modules are ON, no alarm present; verify.
Otherwise, correct and put the PS system in normal mode of operation.
6. All rectifier’s functionality & controller’s keys and display work OK; verify
Correct possible abnormalities before continuing.
7. Connect the system’s controller to a PC (Ethernet connection)
Access the controller from the PC’s web browser, thus enabling system configuration
8. Rectifiers’ load current sharing; verify. (Using the keypad on the controller or from the PC)
Check all rectifiers output the same amount of current (1A)
9. Display the stored log of Alarm Messages.
Using the keypad on the controller or from the PC.
System Adjustment Power is ON!
CARRY OUT FOLLOWING: OK
1. DC Output Voltage Calibration; ensure correct display readings.
If measured DC output voltage at the load terminals deviates more than 1% from the display reading, calibrate the
output voltage from the controller’s keypad or the PC.
2. Load & Battery Current Calibration; verify correct display readings.
Measure with a clip-on ammeter the battery current & every load circuit current. Calculate the total load & battery
current. If the calculated total values deviate more than 2% from the display readings, calibrate the current from the
PC (calibration value>50% of system’s max. capacity)
3. DC Output Voltage Adjustment; measure and adjust.
Measure and, if required, adjust the output voltage to the nominal voltage recommended by the battery manufacturer.
(Voltage measurements to be done at the DC rail, with little load current)
4. Alarm Relay Test; verify all alarm relays are working correctly.
From the controller’s keypad or PC use the Relay Test function; verify activation of external equipment
5. Battery bank control; measure and verify battery specifications.
Follow the recommendations of the actual battery manufacturer.
Approval
Responsible of maintenance control, sign.: Date:
pproved by customer, sign.:
Electric
Shock
WARNING: Maintenance work on live equipment is only to be performed by authorized and qualified
persons using calibrated instruments of measurement and insulated tools. Hazardous voltages inside may
cause terminal injury.