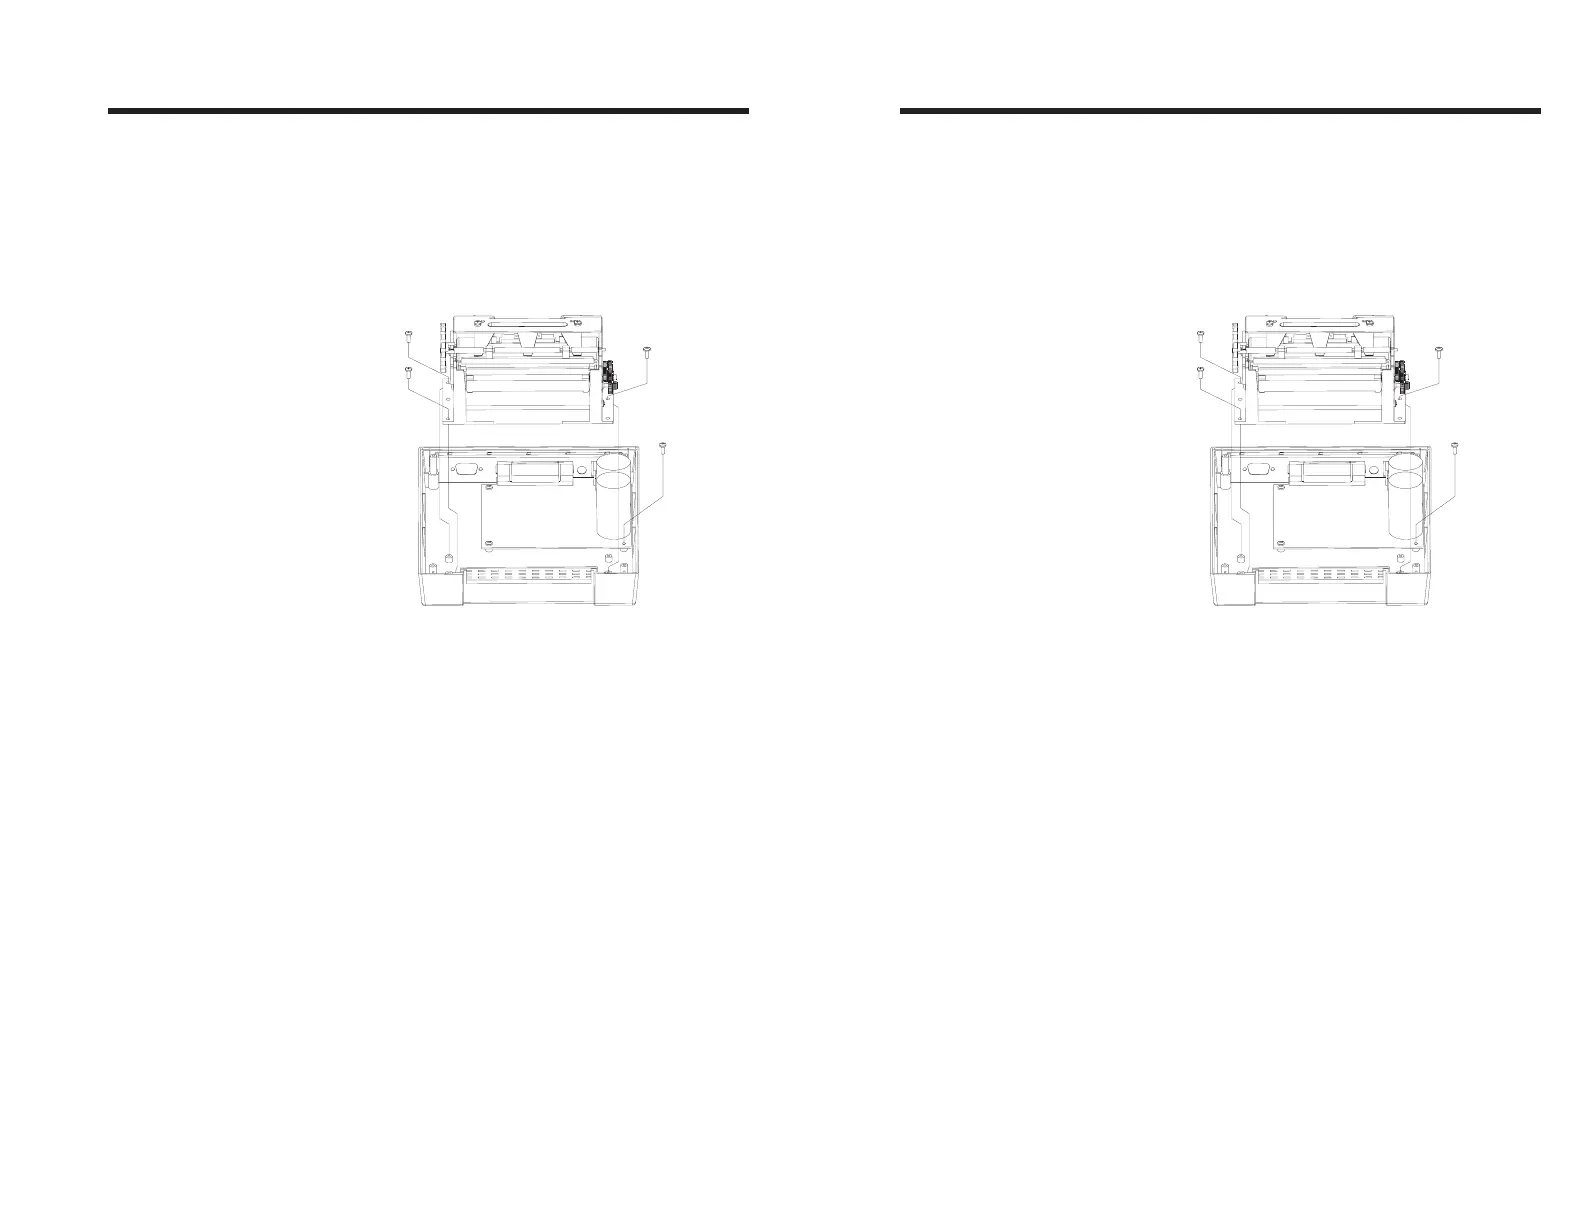
Step ➏
Install Print
Mechanism
Replace the lower sensor assembly by sliding
back into the mechanism until it locks in place.
Reconnect the four connectors to the main
board. Position the print mechanism on the
printer base and install the three screws re-
moved earlier. Install the ground wire retaining
screw.
Replace the top cover and secure with the four
screws removed earlier. Press the four rubber
feet into the screw holes. Perform the Auto-
Sense procedure it check for proper operation
of the printer.
Troubleshooting
980090-001 Rev. B 49