EMC Rails and Enclosures (CX3-10 Class and CX3-20 Class Storage Systems) Field Installation Guide
15
Installing a 1U SPS tray and SPS units in a cabinet
Removing the filler panels
In most cases, the front space into which you will install your
component is covered by a filler panel, which is attached to latch
brackets.
Remove any filler panel, then use a flat-blade screwdriver or similar
tool to pry off the latch brackets.
Installing the rails in the cabinet
This section describes how to mount the rails in the cabinet.
1. After you decide where in the cabinet you want to install the SPS
tray, find the unoccupied 1U section on the rear channels. We
suggest that you install the SPS tray immediately above the SPE3,
if possible (refer to the device placement examples beginning on
page 3).
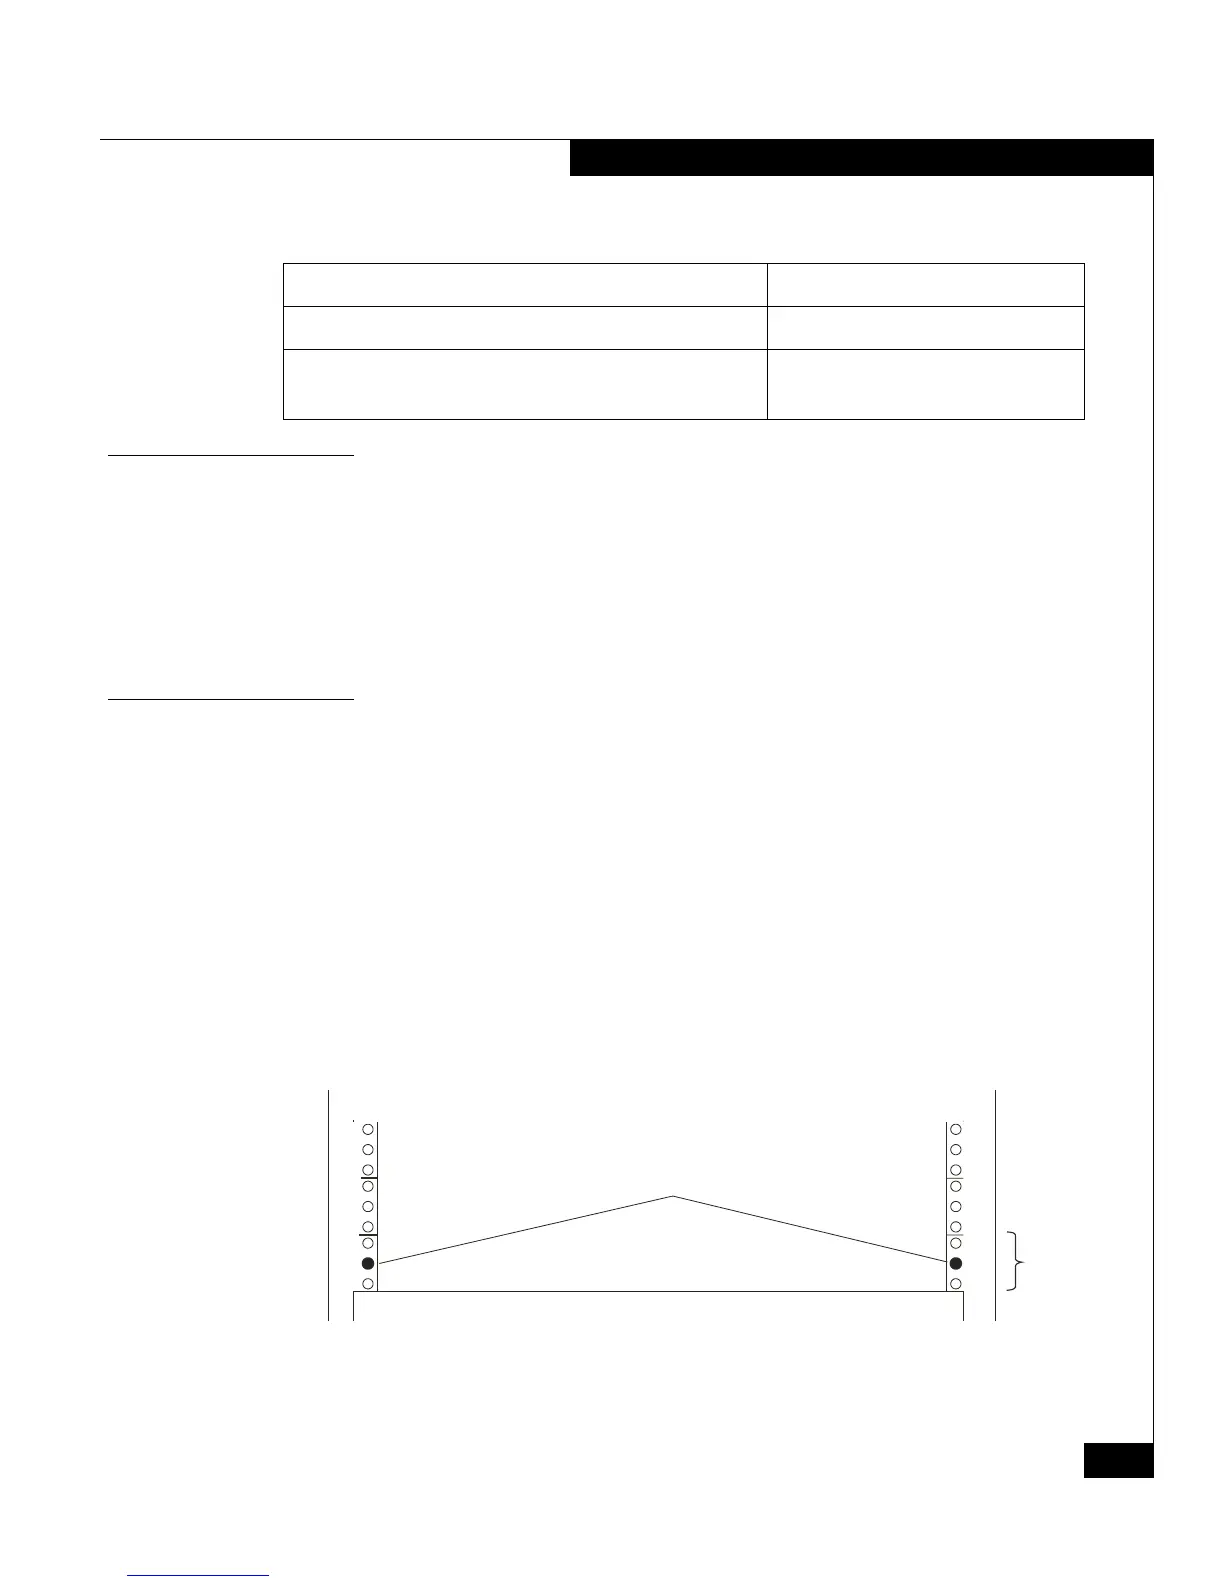
2. From the front of the cabinet, insert the alignment pin on one
mounting rail assembly into the middle hole of the selected 1U
space on a rear channel. Figure 8 shows the correct channel holes
for the alignment pins.
Figure 8 Aligning pins in a 1U section on the cabinet rear rails
1U mounting tray bezel (see Figure 12 on page 19) 1 per tray
26-inch IEC power cord, straight C13 to C14 1 per SPS
(Select per cabinet PDU outlets.)
Table 4 SPS mounting materials (continued)
Component Use
1U
Alignment Pin
Here
EMC2922
 Loading...