EMC Rails and Enclosures (CX4 Series Storage Systems) Field Installation Guide
21
Installing a 2U SPS tray (100-561-369) and SPS units in a cabinet
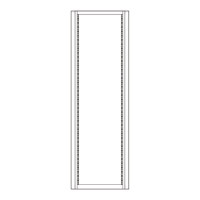
Removing the filler panels
In most cases, the space into which you will install your enclosure is
covered by a filler panel, which is attached to latch brackets.
Remove any filler panel, then use a flat-blade screwdriver or similar
tool to pry off the latch brackets. Figure 14 shows how to remove a
common filler panel and latch bracket.
Figure 14 Removing a filler panel
Adjusting the rails to your cabinet
1. Measure the distance between the inside edges of your front and
back NEMA channels.
10 Phillips M5 x 16-mm panhead screws
(black)
Attach the rail mounting hardware
in a 40U cabinet
2U mounting tray bezel (see Figure 27 on page 34) 1 per tray
26-inch IEC power cord, straight C13 to C14 1 per SPS
(Select per cabinet PDU outlets)
Table 5 SPS mounting materials (Model 100-561-369) (continued)
Component Use
EMC2938a
Left Channel
Flat-blade
screwdriver
 Loading...