6 EMC VNXe3100/VNXe3150 — Replacing an Input/Output Module
Tasks to replace an I/O module
Task 5: Install the replacement I/O module
Before you start
Unpack the replacement I/O module and then place it on a flat, static free work area.
Retain the packaging to return the faulted I/O module.
Procedure
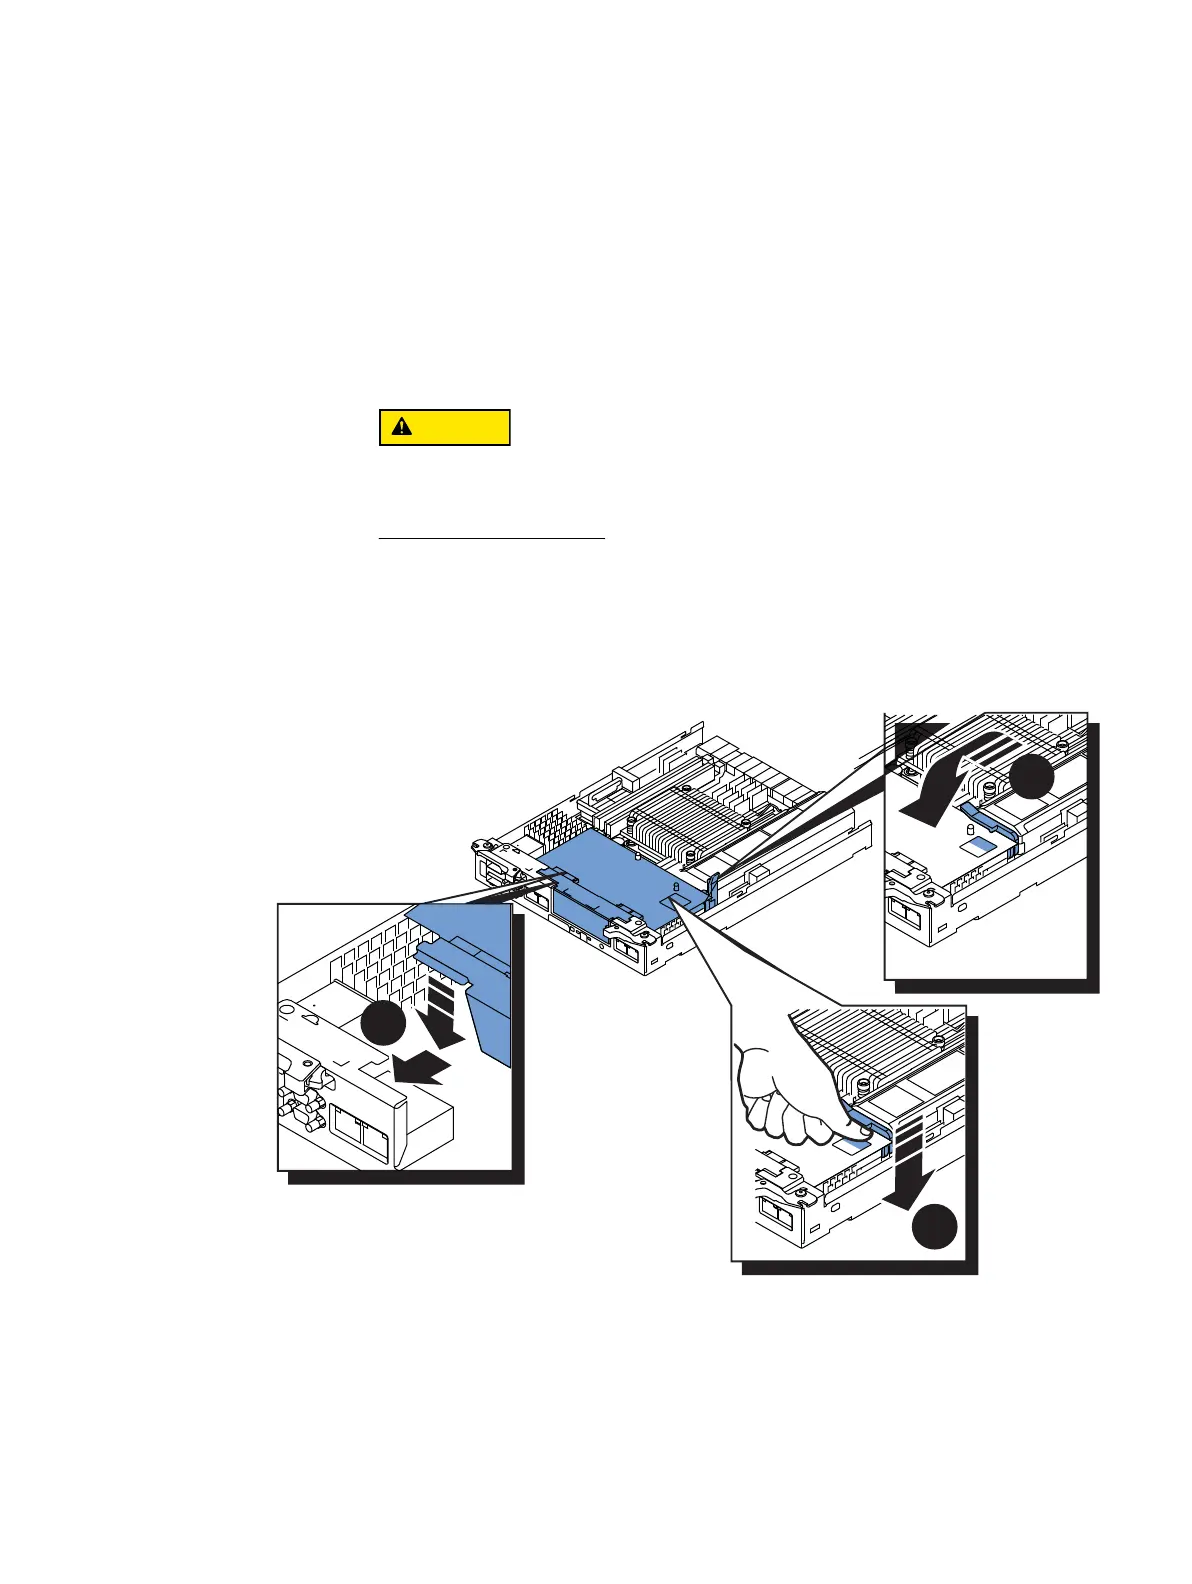
1. Angle the I/O module slightly so it fits into the canister and align it with the blue
alignment pins.
Do not attempt to seat the I/O module into the CPU connector while you are holding
the I/O module at an angle. Doing so will damage the connections. The I/O module
should be flat before you attempt to seat the connector.
2. With the module aligned and parallel to the CPU board, press the latch down to fully
seat the module in the connector.
3. Push down on the force point indicated on the I/O module to ensure that the module
is completely seated on the processor board.

 Loading...

