July 2020
Installation, Operation and Maintenance Manual
VA-DC-000-1803 Rev. 2
20
Section 3: Actuator Reassembly
Actuator Reassembly
3.2.30 NOTE: Do this step only if groove pins (1 - 130) have been pulled or if the pins
are being replaced. Drive groove pins (1 - 130) through housing cover (1 - 20) and
into housing (1 - 10). The groove pins should be ush with the cover.
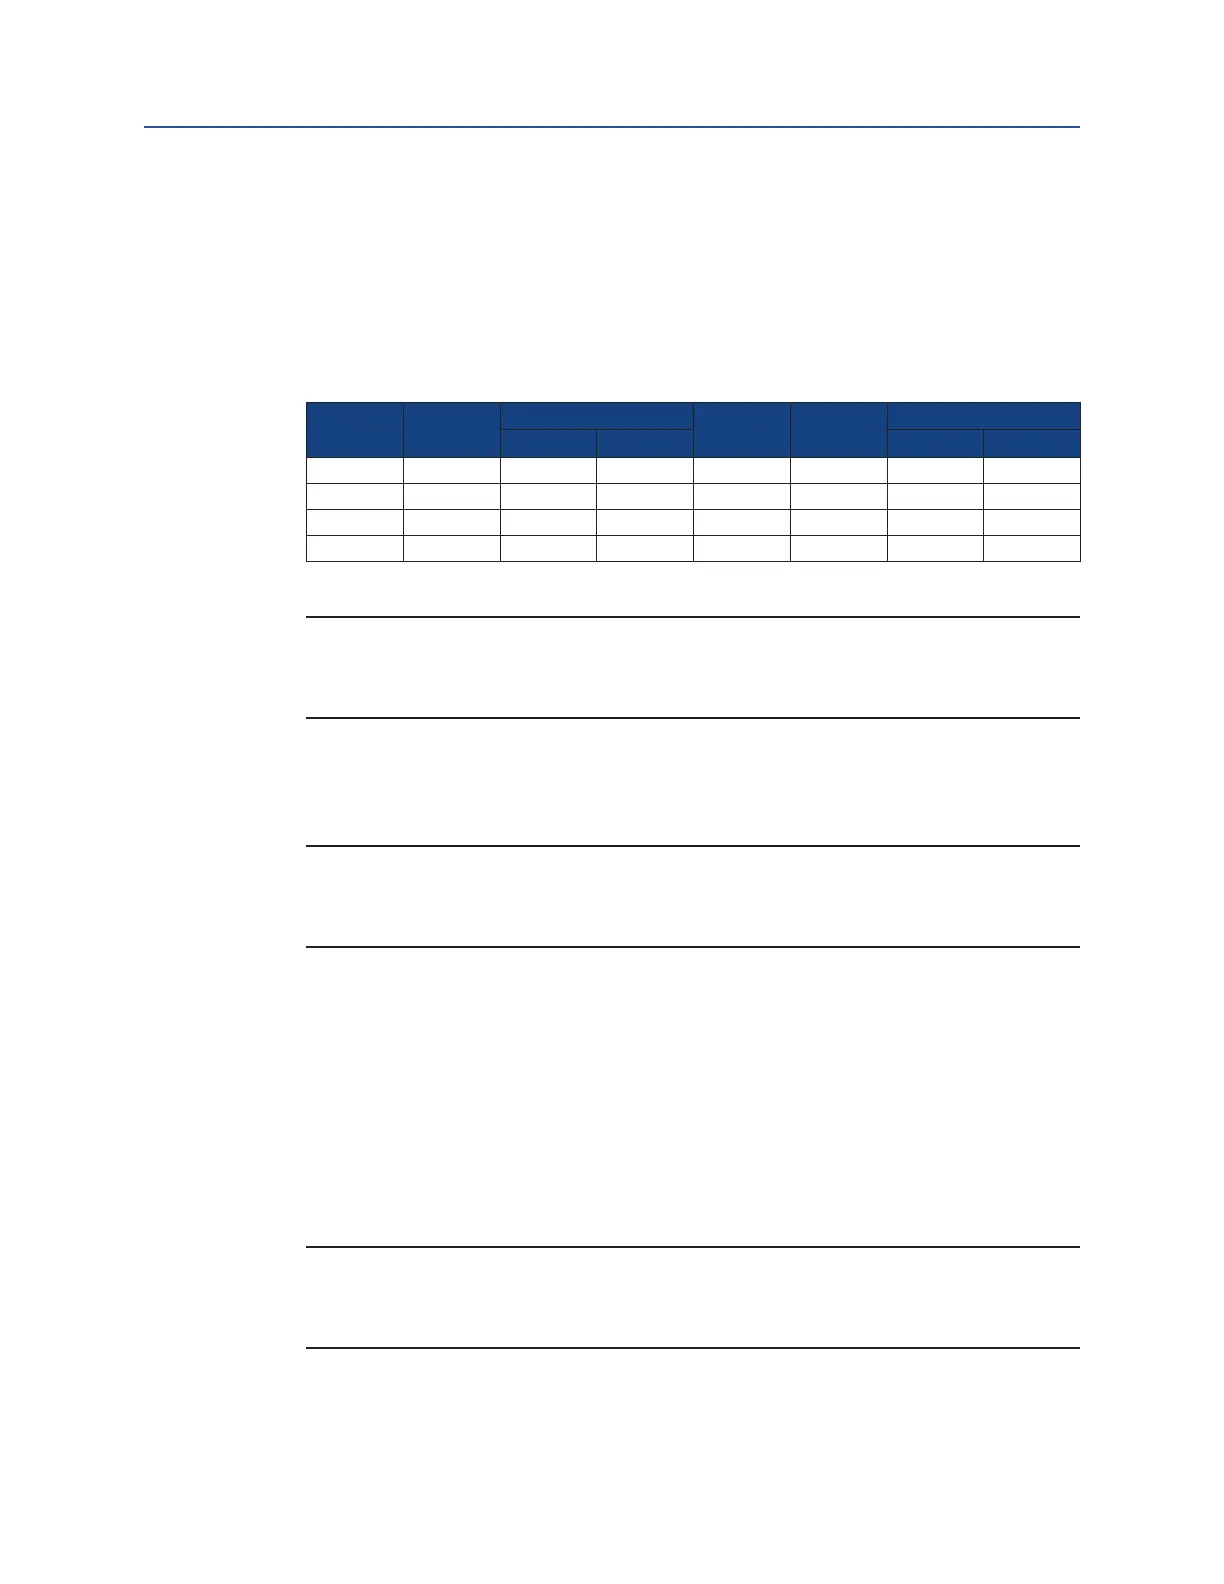
3.2.31 Torque tighten hex cap screws (1 - 110) until a nal lubricated torque, as listed in
the following Table, has been achieved.
Table 2. Housing Cover Screw Quantity and Torque
Model Qty.
Torque (±5%)
Model Qty.
Torque (±5%)
lb-ft Nm lb-ft Nm
G01 4 40 54 G5 8 100 136
G2 6 40 54 G7 8 100 136
G3 8 40 54 G8 12 100 136
G4 8 40 54 G10 16 100 136
NOTE:
Complete step 3.2.32 on G5 through G10 model actuators. For G01 through G4 model
actuators, skip step 3.2.32 and proceed to step 3.2.33.
3.2.32 On G5 through G10 models;
3.2.32.1 Place lock washers (1 - 115) onto hex cap screws (1 - 120).
NOTE:
Hex cap screws (1 - 120) are only used as "hole" llers and to protect threads from
environment.
3.2.32.2 Install and tighten hex cap screws (1 - 120) with lock washers (1 - 115).
3.2.33 Install thrust bearing (2 - 110) onto position indicator (1 - 140).
3.2.34 Install O-ring seal (2 - 100) onto position indicator (1 - 140).
3.2.35 Install upper bearing (2 - 120) into yoke cover (1 - 150).
3.2.36 Install rod wiper (2 - 80) into yoke cover (1 - 150).
3.2.37 Install O-ring seal (2 - 70) into yoke cover (1 - 150).
3.2.38 Install yoke cover (1 - 150) onto housing cover (1 - 20) and over position indicator
assembly (1 - 140).
NOTE:
During yoke cover installation be careful not to damage O-ring seal (2 - 70) and
rod wiper (2 - 80).
 Loading...


