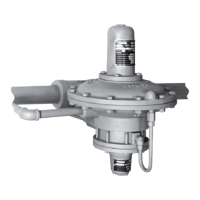
Type 667 Sizes 80 & 100
7
b. Replace packing and O-rings (keys 118, 119,
96, 107, and 120).
c. Unscrew the spring case adaptor cap screws
and nuts (keys 90 and 91), and remove the adaptor
(key 89) from the actuator.
12. Remove actuator spring and spring seat (keys 18
and 19).
13. Unscrew cap screws and nuts (keys 88 and 91),
and remove spring case (key 85). [Note: In figure 8,
the cap screws (key 88) on units with side-mounted
handwheels, do not use hex nuts (key 91)].
14. Remove spring adjustor (key 74) and attached
thrust bearing (key 86).
15. Remove cap screws (key 252), yoke bushing re-
tainer (key 251), 2 halves of split yoke bushing (key
249), and yoke bushing holder (key 250).
16. Refer to the size 80 actuator assembly proce-
dures. Carefully clean and inspect all parts, and obtain
any replacement parts required for reassembly.
Assembly
See figure 4, Size 80 Actuator Construction for loca-
tion of parts.
1. Coat the threads of the stem (key 144) with Lubri-
plate MAG-1 lubricant (key 237) or equivalent. Install
the spring adjustor (key 74) and thrust bearing. Pack
bearing (key 86) with Lubriplate MAG-1 lubricant or
equivalent.
2. Mount the spring case (key 85) to the yoke (key
73) using cap screws and hex nuts (keys 88 and 91).
Note that units with a side-mounted handwheel do not
use hex nuts (key 91).
3. Install spring adjustor, thrust bearing, and spring
seat (keys 74, 86 and 19) onto the actuator stem (key
144). Slide stem into spring case (key 85).
4. Align the spring seat (key 19) on the spring adjus-
tor (key 74), and slide the actuator spring (key 18)
squarely onto the spring seat.
5. Mount the spring case adaptor (key 89) to the
spring case (key 85) using cap screws and hex nuts
(keys 90 and 91).
6. For actuators with a snubber (see figure 8),
install cylinder (key 93) and attached parts with cap
screws (key 106). Slide stem and piston assembly
(key 23) into cylinder and thread onto actuator stem
(key 144). Attach travel stop (key 84), it one is used,
to stem and piston assembly.
7. For actuators without a snubber, install seal
bushing (key 7) into the spring case adaptor (key 89)
followed by the snap ring (key 72). Replace seal bush-
ing (O-rings (keys 8 and 9) as required.
8. Coat gasket (key 70) with lubricant (key 237) or
equivalent. Position the lower diaphragm casing (key
64) on the spring case adaptor, and secure with cap
screws (key 30).
9. Mount the lower diaphragm plate, diaphragm, up-
per diaphragm plate, and, if used, spacer (keys 71, 3,
4, and 2) on the actuator stem (key 144), and secure
using cap screw (key 12). (Note: Standard and top-
loaded constructions use the same key numbers for
parts. The parts look different, but they use the same
assembly and disassembly sequence (see figure 4,
Size 80 Actuator Construction.)
10. Position the upper diaphragm casing (key 1) on
the diaphragm (key 3), and align the holes.
Note
When you replace actuator diaphragms
in the field, take care to ensure the dia-
phragm casing bolts are tightened to
the proper load to prevent leakage, but
not crush the material. Perform the fol-
lowing tightening sequence with a
manual torque wrench for size 80 and
100 actuators.
Note
Do not use lubricant on these bolts and
nuts. Fasteners must be clean and dry.
CAUTION
Overtightening the diaphragm casing
cap screws and nuts can damage the
diaphragm. Do not exceed 50 lbfSft (68
NSm) torque.
11. Insert the cap screws (key 13) into the diaphragm
casing, and tighten the hex nuts (key 14) in the follow-
ing manner. The first four hex nuts tightened should
be diametrically opposed and 90 degrees apart. Tight-
en these four hex nuts to 25 lbfSft (34 NSm).
12. Tighten the remaining hex nuts in a clockwise,
criss-cross pattern to 25 lbfSft (34 NSm).
13. Repeat this procedure by tightening four hex nuts,
diametrically opposed and 90 degrees apart, to a
torque of 50 lbfSft (68 NSm).
14. Tighten the remaining hex nuts in a clockwise,
criss-cross pattern to 50 lbfSft (68 NSm).
15. After the last hex nut is tightened to 50 lbfSft (68
NSm), all of the hex nuts should be tightened again to
50 lbfSft (68 NSm) in a circular pattern around the bolt
circle.
 Loading...