April 2021
Installation, Operation and Maintenance Manual
VA-DC-000-1952 Rev. 0
9
Section 2: Installation
Installation
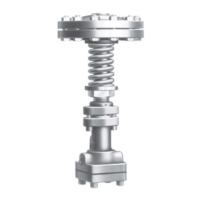
2.5 Installing the ECAT Actuator on the Valve
The actuator will be bolt-mounted directly to a bracket or adaptor that will be bolted securely to the
mounting ange top works of the valve.
2.5.1 Check to see that the dimensions of the bracket or adaptor are suitable for use with the
valve mounting ange and stem.
2.5.2 Check valve direction of rotation and the actuator direction of rotation to see they match
(for example: CW = close, CCW = open).
2.5.3 Check to see the actuator and valve are in the same relative position (see 2.3.3).
2.5.4 Check all mounting surfaces, they must be clean and free of debris to permit proper t up.
2.5.5 Prior to mounting, grease the coupling bore and the bore of the actuator.
NOTE:
Do not apply grease to the mounting ange surfaces on the valve or the adaptor.
2.5.6 Install the stem key and grease it (keys may be held in place with tape).
2.5.7 Install the coupling onto the stem and stem key.
2.5.8 Install the coupling key and grease it.
2.5.9 Carefully align the coupling and key to the bore and keyway in the actuator and slide the
actuator onto the coupling until the adapter (bracket) bottoms out on the valve bonnet.
2.5.10 Use the required fasteners to rmly attach the adapter to the valve bonnet. Tighten the
fasteners to their manufacturer’s recommended maximum torque (dry or lubricated).
2.6 Setting the Stroke Limit Stops
Refer to the installed actuator installation and operation manual for specic instructions on setting
the actuator stops.
 Loading...