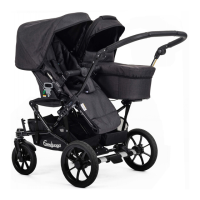
40 NXT TWIN V2.1
in locked position. Check that the rear wheel is
attached to the chassis properly by pulling the
wheel. Repeat on both sides.
WARNING Check that the wheel is rmly xed
and can not be pulled from the chassis.
WARNING Avoid driving over sharp objects or
surfaces eg. glass or the tyre can be punctured
WARNING To achieve optimum handling and
to avoid punctures, air pressure should be
correct. Please check the air pressure at regular
intervals (see marking on the tyre) (Air tires only)
3) ASSEMBLY OF THE FRONT WHEELS
3.1 Press in the button on the front section of
the pram and push in the front wheel. Release
the button and check that the front wheel is
attached to the chassis properly by pulling the
wheel. Repeat on both sides.
WARNING Make sure the wheels are correct
attached.
3.2 This is how the chassis should look when
fully assembled. (as illustrated in the picture).
4) FOLDING THE CHASSIS
4.1 Remove the bassinets or the seat units.
Turn the chassis so that the front wheels are
pointing forward (as illustrated in the picture).
Make sure that the shopping basket is empty
before folding the chassis.
WARNING There must not be a child in the
stroller when it is folded or unfolded.
WARNING Avoid having children near when
the pram is folded or unfolded.
WARNING Ensure that children are kept away
from all moving parts of the pram to avoid risk
of injury.
4.2 Press the grey center attachment button and
turn it down.
WARNING Ensure that children are kept away
from all moving parts of the pram to avoid risk
of injury.
4.3 Turn down the right side attachment by
pressing the grey buttons on the outside of the
attachment. Repeat this procedure on the left
side attachment.
4.4 (1) Fold the top of the handle to the front.
(2) Place your foot on the center of the prole.
WARNING Do not place your foot on the brake
pedal while folding the handle to the front.
(3) Then pull the 2 handle sliders simultaneously
upwards as far as possible and THEREAFTER
fold the handle to the front (4).
4.5 To make the chassis more compact, remove
the wheels. This can be done both before or
after the chassis has been folded.
CHASSI
1) ASSEMBLY OF THE CHASSIS
1.1 Unfold the chassis by lifting the handlebar
upwards.
PLEASE NOTE!
While unfolding the chassis make sure that you
can hear a distinct ”CLICK” sound. That means
that you have correctly opened the chassis.
WARNING
Don´t carry the folded chassi by the handlebar.
Always carry it underneath.
* Lift here to carry the chassis
WARNING There must not be a child in the
pram when it is folded or unfolded
WARNING Avoid having children near when the
pram is folded or unfolded.
WARNING Ensure that children are kept away
from all moving parts of the pram to avoid risk
of injury.
1.2 Turn the right side attachment until you
hear a ”click” and the attachment is locked in
place. Repeat this procedure on the left side
attachment.
WARNING Ensure that all attachments are
locked in place.
1.3 Turn the center attachment, and at the same
time press the grey button. Turn the attachment
until it stops and release the button to lock into
position.
WARNING Ensure that the attachment is
locked in place.
1.4 Adjust the handle by pressing the upper
grey buttons on the outside of the handlebar.
Make sure that they ”click” into position
WARNING Only the upper handle lock can bee
adjusted when the seats or bassinets has been
mounted.
WARNING Ensure that the handle is locked in
place.
WARNING! Ensure that children are kept away
from all moving parts if you adjust the pram to
avoid risk of injury
2) ASSEMBLY OF THE REAR WHEELS
2.1 Wipe dirt from the axles before you put on
the wheels. Press the button on the rear wheel.
Insert the axle shaft in the rear wheel.
Ensure that the axle shaft clicks into the wheel
WARNING Check that the wheels are rmly
xed and cannot be pulled off the axle shaft.
2.2 Push the axle shaft into the chassis.
2.3 Lock the axle shaft with the grey lock that
sits on the brake bar. The axle shaft shall click



 To Next Page