41NXT TWIN V2.1
SE
EN
BG
CZ
DE
DK
EE
ES
FI
FR
GR
HR
HU
IS
IT
LT
LV
NL
NO
PL
RO
SVK
ML
PT
RS
RU
SL
TR
5) REMOVING THE REAR WHEELS
5.1 Release the axle shafts and wheel by, (1)
press down the grey button and at the same
time (2) open the grey clip. Loosen the axle
shaft by pressing the button on the rear wheel
and pull out the axle shaft.
5.2 You can safely store the axle shafts in the
elastic holders in the shopping basket
6) REMOVING THE FRONT WHEELS
6.1 Press the grey button on the front part of the
chassis and pull the front wheel off.
7) LOCKING THE BRAKE
7.1 Stop the pram by pressing the brake pedal
until it ”click”.
WARNING Never leave the child unattended in
the pram without engaging the brake
WARNING The brake should always be applied
when you lift your child in or out of the pram.
WARNING Never park the pram on a slope.
WARNING Always check that the pram is
properly parked.
8) RELEASE THE BRAKE
8.1 Release the brake by lifting the brake pedal
upwards.
8.2 If the pram is equipped with a safety leash:
Insert your hand into the leash for safety when
using the pram.
WARNING This product is not suitable for
jogging, skating or rollerblading.
9) ADJUST THE ANGLE OF THE
HANDLEBAR
9.1 Adjust the angle of the handlebar by
pressing the grey buttons on the outside of the
handle. Keep the
buttons pressed and adjust to the desired
position. Make sure they click into position.
WARNING Ensure that children are kept away
from all moving parts of the pram to avoid risk
of injury.
10) THE FRONT WHEELS CAN BE FIXED OR
ROTATED 360 DEGREES.
10.1 The wheels can be locked by pressing the
locking ring when the wheels are in the ”forward
facing” position. The wheels can rotate freely
through 360 degrees when the locking wheel is
released.
WARNING Ensure that children are kept away
from all moving parts of the pram to avoid risk
of injury.
10.2 WARNING Never pull the pram when
the swivel wheels are unlocked. The pram may
wobble which can lead to a safety risk if you are
not cautious and careful.
10.3 The front wheels can be locked in the
forward position
WARNING Only use this position when the
pram is parked. Never push the pram with the
front wheels locked in this position.
10.4 WARNING Never park the pram on a
slope.
11) ASSEMBLY OF THE BASKET
1.1 Fasten the 3 buttons on the back around the
tube
1.2 - 1.3 Pull the knobs through the holes.
CARRYCOT
1) ASSEMBLY OF THE CARRYCOT
1:1 To erect the carrycot pull the bar using
the easy pull handle along the bottom of the
carrycot towards the plastic stops. Repeat both
in the foot end and the head end.
WARNING Before using the carrycot ensure
that the four press studs are fastened to the
bottom of the carrycot and the carrycot frame is
held rmly in place (only on certain models).
1.2 Remove the mattress from the plastic bag
(discard safely) The bottom of the carrycot is
made of wood. Insert the mattress.
WARNING Do not use additional mattresses in
the carrycot. Use only the Emmaljunga original
mattress that comes with the pram.
WARNING Risk of suffocation. Do not let
children play with plastic bags.
1.3 Press both buttons on the inside of the hood
and pull it up.Attach the apron using the velcro
straps on each side of the carrycot.
The hood can be folded up and down in the
desired position by pressing both buttons on
the inside of the hood.
1.4 The hood is attached to the carrycot with
velcro strips.
1.5 For ventilation, open up the Velcro strap on
the hood. You can fasten the hood in place by
folding under and securing it with the press stud
on the inside of the hood.
The ventilation and UV/Insect net on the back of
the hood is now visible. (only on certain models)
2) ATTACH THE CARRYCOT
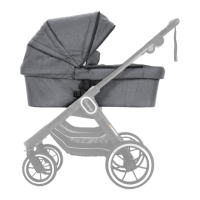
2:1 Put on the brake. Lift the carrycot with the
handle and place it onto the frame. Press down
so that the carrycot locks into place you will hear
a “click” on both sides.


 To Next Page