Do you have a question about the Emotiva XPA-100 and is the answer not in the manual?
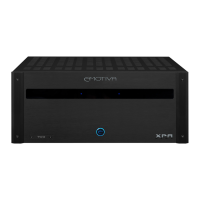
Describes the status LEDs on the front panel and their meaning.
Explains the front panel button for switching the amplifier between On and Standby.
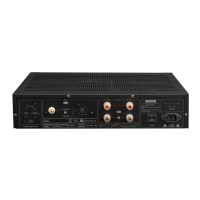
Details the trigger connections for remote power control and signal output.
Explains the switch to disable or dim front panel status LEDs.
Describes the line-level unbalanced RCA input jack.
Details the switch for selecting between RCA and XLR audio inputs.
Describes the line-level balanced XLR input connector.
Describes the full-sized five-way binding posts for speaker connections.
Explains the rear panel switch that controls main AC power to the unit.
Indicates the detected AC line voltage (115V or 230V).
Describes the connector for the removable AC power cable.
Guides on connecting speakers using the five-way binding posts and bi-wiring.
Explains how to connect balanced (XLR) or unbalanced (RCA) input sources.
Details the trigger connections for remote power control and signal output.
Explains how the XPA-100 automatically detects and configures to line voltage.
Describes the function of the rear panel AC power switch.
Explains how to use the front panel button to turn the amplifier On/Standby.
Details the switch for selecting between balanced and unbalanced audio inputs.
Describes the switch to disable front panel status LEDs.
Explains how to use trigger signals for remote power control.
States that the XPA-100 requires no periodic maintenance or calibration.
Provides instructions on how to safely clean the amplifier unit.
Addresses the issue of no power or output and potential causes.
Troubleshoots why the front panel status LEDs are not illuminated.
Helps diagnose no sound or distorted audio when indicators are normal.
Solves the issue of no sound when the status LED indicates a fault condition.
Addresses problems where the trigger signal does not activate the unit.
Explains what defects in materials and workmanship are covered by the warranty.
Details the length of coverage and if the warranty can be transferred.
Outlines Emotiva's options for repairing, replacing, or refunding the product.
Lists damages and conditions that void the warranty coverage.
Step-by-step instructions on how to make a warranty claim and get service.
Explains how state law affects your specific legal rights under the warranty.
Discusses the importance of quality cables and where to find Emotiva's offerings.
| THD+N | < 0.1% |
|---|---|
| S/N Ratio | > 100 dB |
| Total Harmonic Distortion (THD) | < 0.1% |
| Signal to Noise Ratio (SNR) | > 100 dB |
| Damping Factor | > 500 |
| Input Sensitivity | 1.2 V |
| Channels | 1 |
| Frequency Response | 20 Hz - 20 kHz |
| Input Impedance | 33 kOhms |